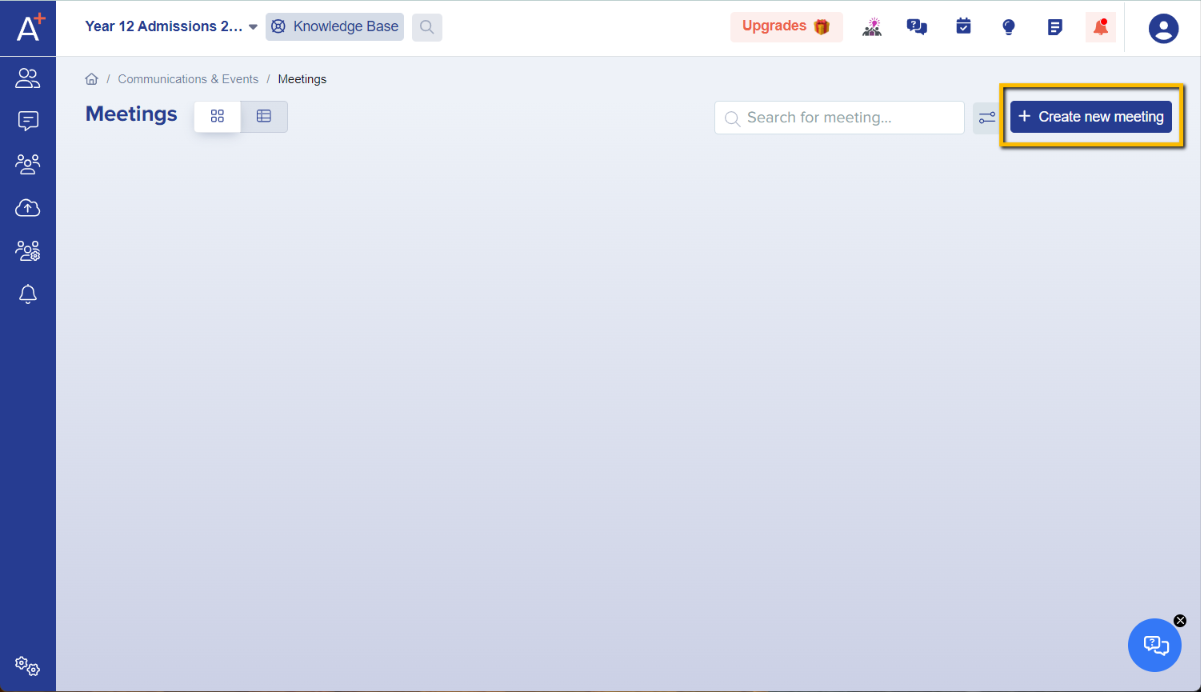
From the dashboard, click on Communications & Events and select Meetings.

In the Meetings area, click on the + Create new meeting button on the upper right hand corner.
First step is Set Up. This is where you can specify the details of the meeting.
.
Note: Fields with red asterisk are mandatory.
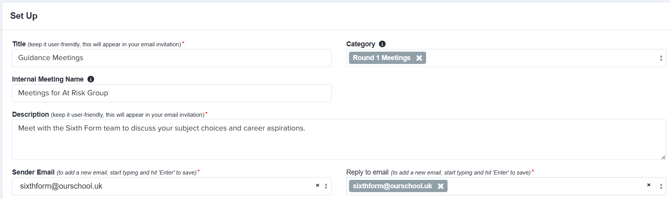
Title - name your meeting; this is the title that students will see when they receive the meeting invitation.
Category (optional) - this will help you label the type of meeting; if the type is not on the list, simply type it in and press the Enter key on your keyboard.
Internal Meeting Name - visible to staff only; this is a helpful additional identifier if you have lots of very similar meetings set up and need a way to distinguish amongst them.
Description - add a brief description of the meeting; this will help invitees know what the meeting is for.
Sender Email - indicate the email address you would like to appear as the sender of the meeting invitation.
Reply to email - indicate the email address that should get the responses to the meeting invitation if an invitee chooses to reply.
How will the meeting be scheduled? - you have the option to allocate invitees their time slot, or allow them to choose their preferred time slot from a range set by you later on in the setup process.
Select "Applicants will be invited to choose their own meeting slots" if you would like to allow them to select their preferred time slot, or "Staff will assign meeting slots before sending out invitations" if you want to allocate students their time slots.
Attendee Actions - here you can choose whether invitees will have the option to cancel a scheduled appointment, and if you choose the configuration "Applicants will be invited to choose their own meeting slots", you will also have the option to allow them to reschedule their appointments, and to apply a cut-off time for new bookings.

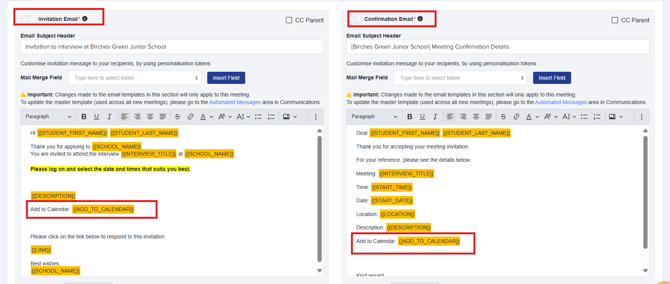
Once you have selected your preferred settings, you will see the relevant Invitation Email & Confirmation Email templates settings which you may customise to your liking.
Note: Both email templates are mandatory and cannot be disabled, however when you click to send your invitations, you will have the option to choose to invite students without sending the accompanying email if you wish. In that case they will just see the date on their homepage.
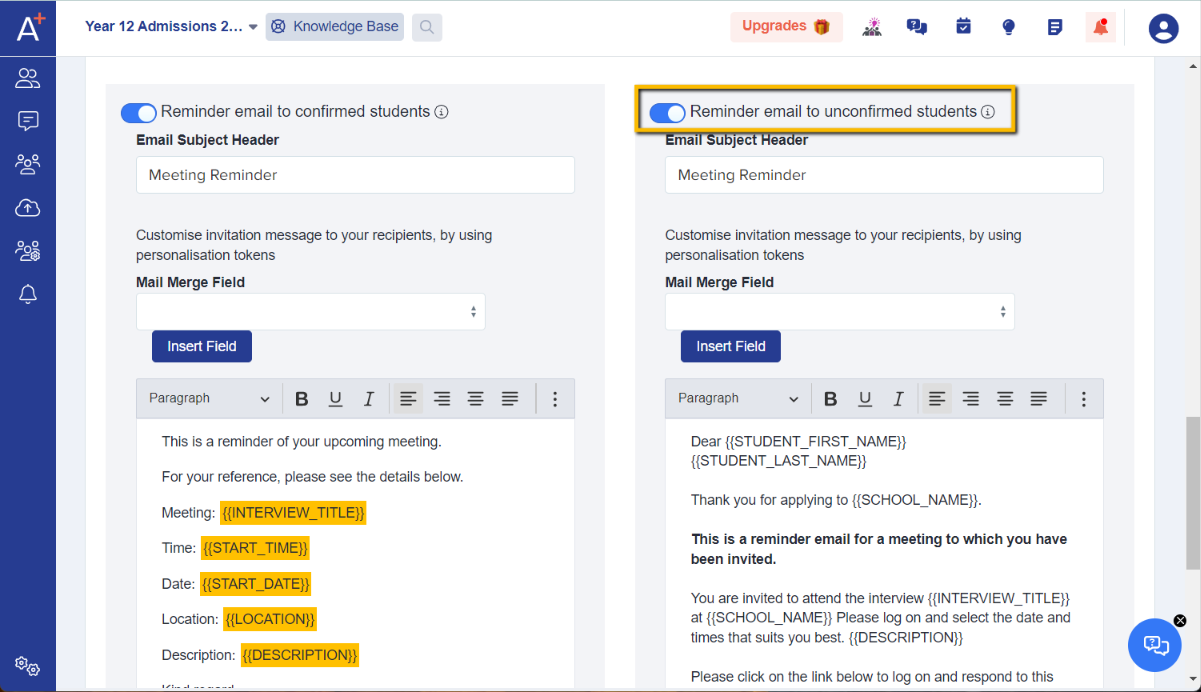
In addition to these emails, you may automate a reminder email to be sent out to students who have confirmed their attendance, notifying them of the upcoming meeting. To do this, simply toggle the Reminder email to confirmed students button, and you can opt to cc parents as well if you wish.
If the meeting is being set up in a parent-facing form (such as Year 7 Admissions), the recipient of the invitation will automatically be the parent instead of the student.
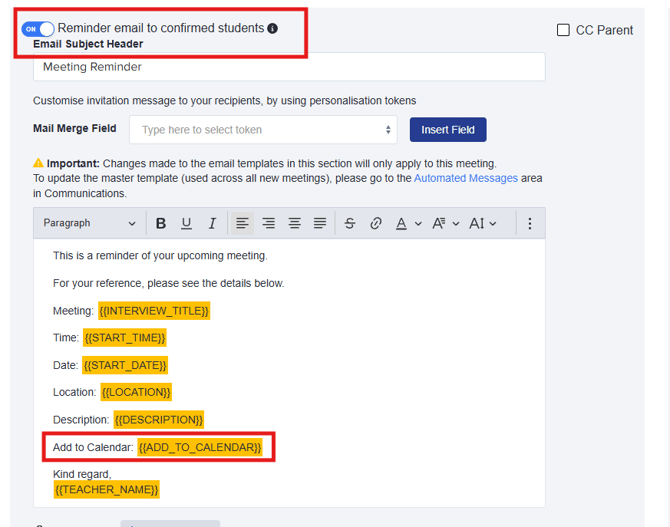
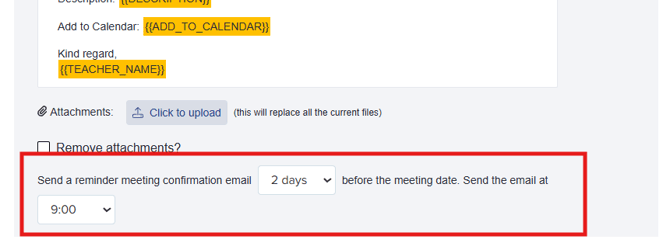
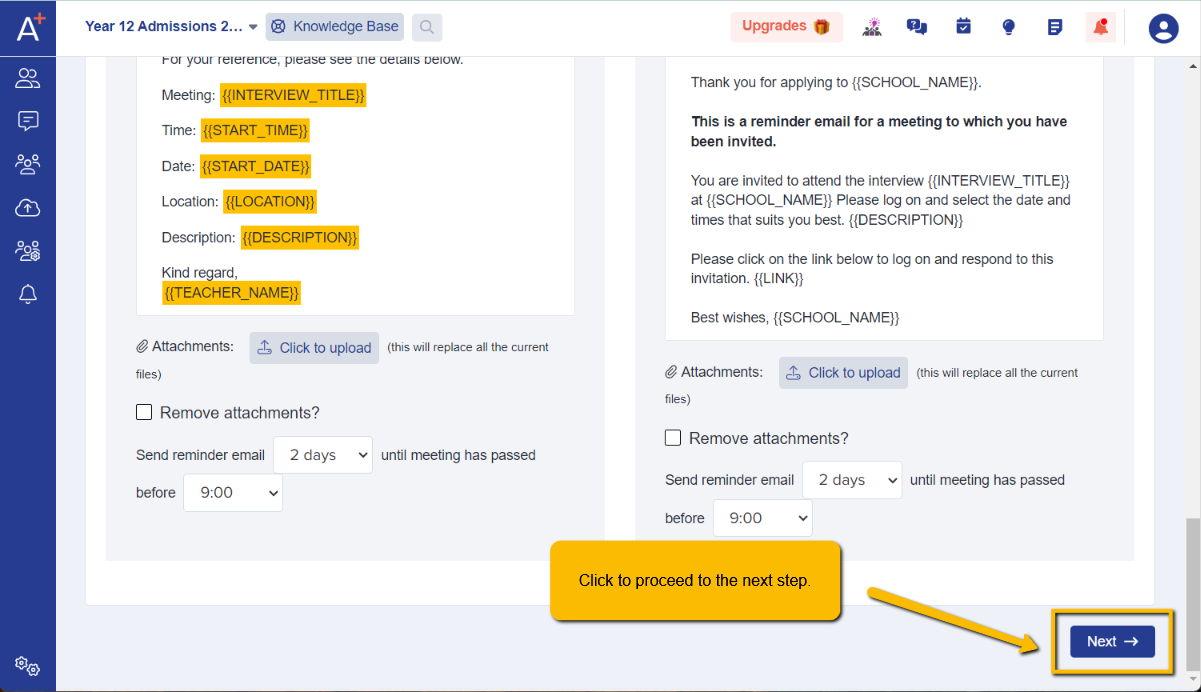
You may then configure when the reminder email will be sent.
Likewise, you may also automate a reminder email to students who have yet to confirm their attendance to the meeting. To do this, simply toggle the Reminder email to unconfirmed students button on.
Once done, click on the Next button on the lower right hand corner of the page.
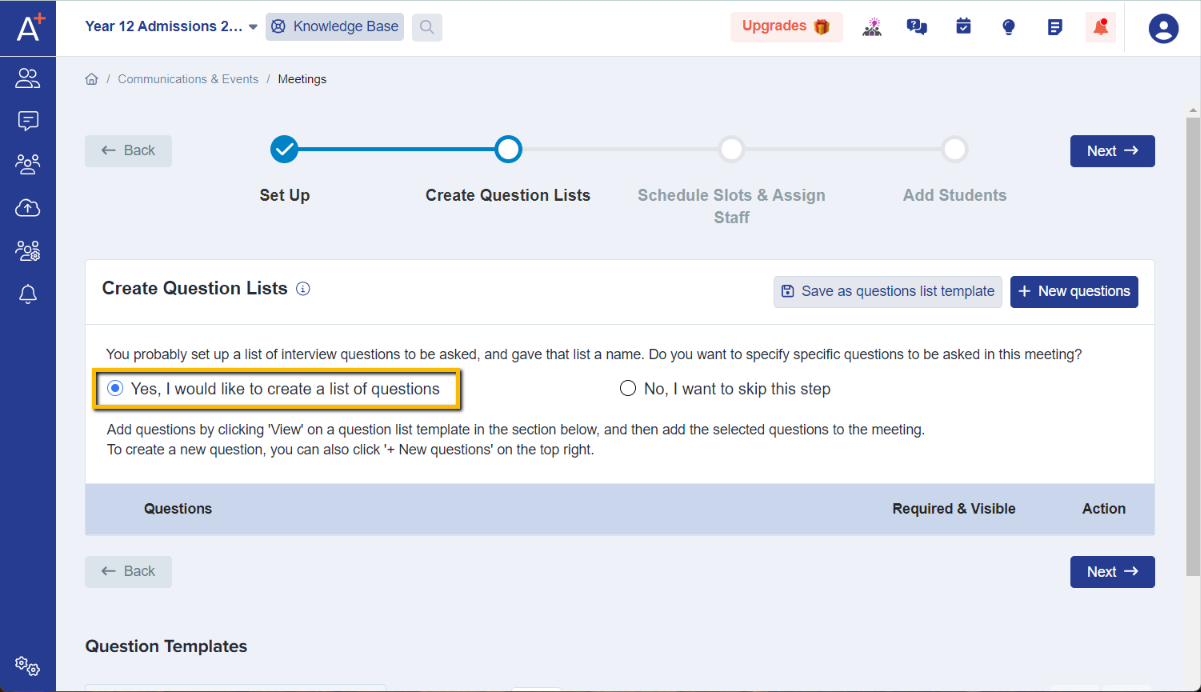
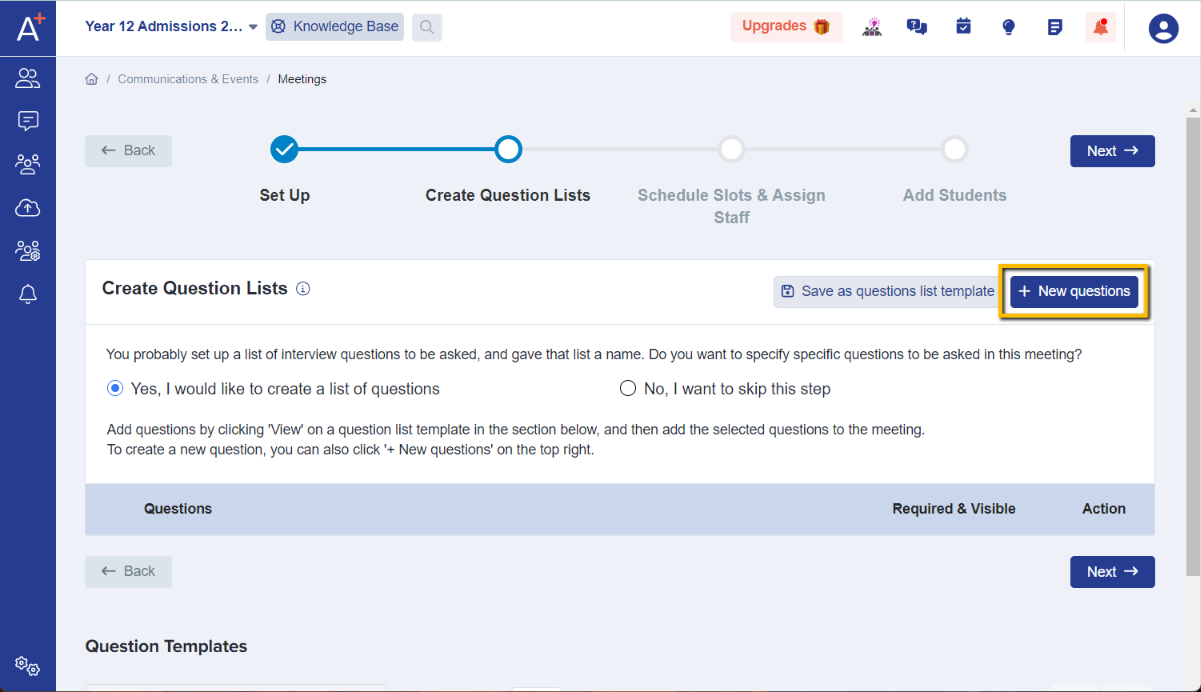
In the Create Question Lists step, you have the option to create a list of questions that will be asked during the meeting by selecting Yes, I would like to create a list of questions.
To add new questions, click on the + New questions button on the upper right hand corner.
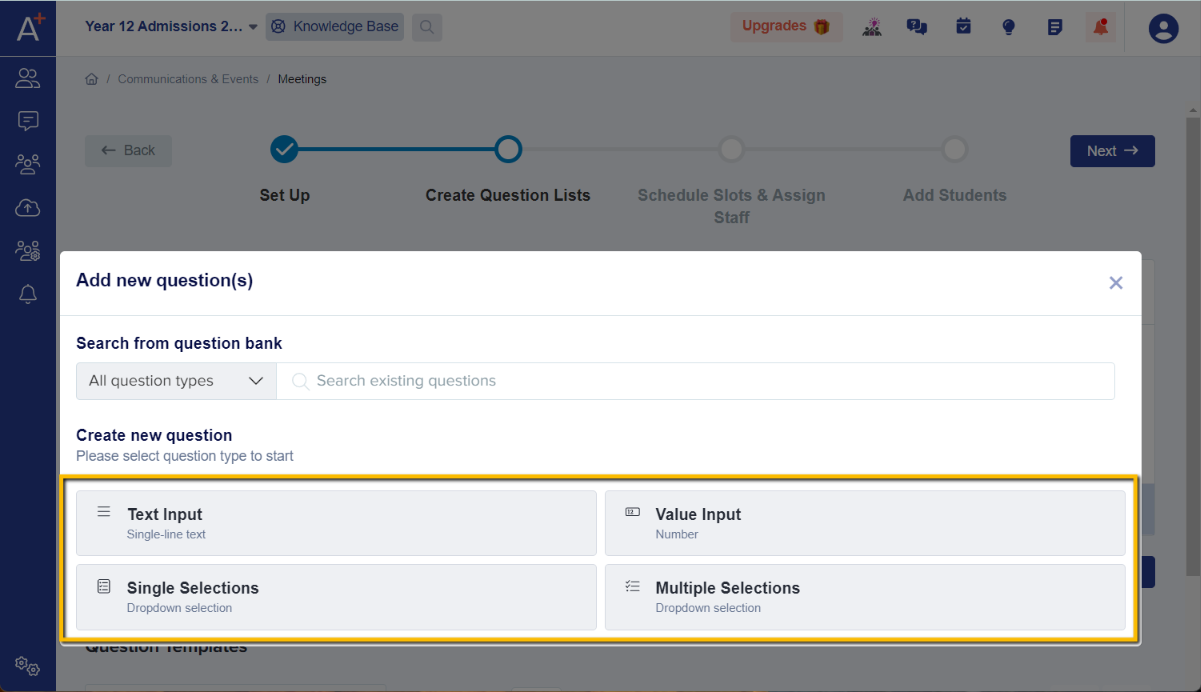
Select the question type, and add the details of your question. Click on + Add question to confirm.
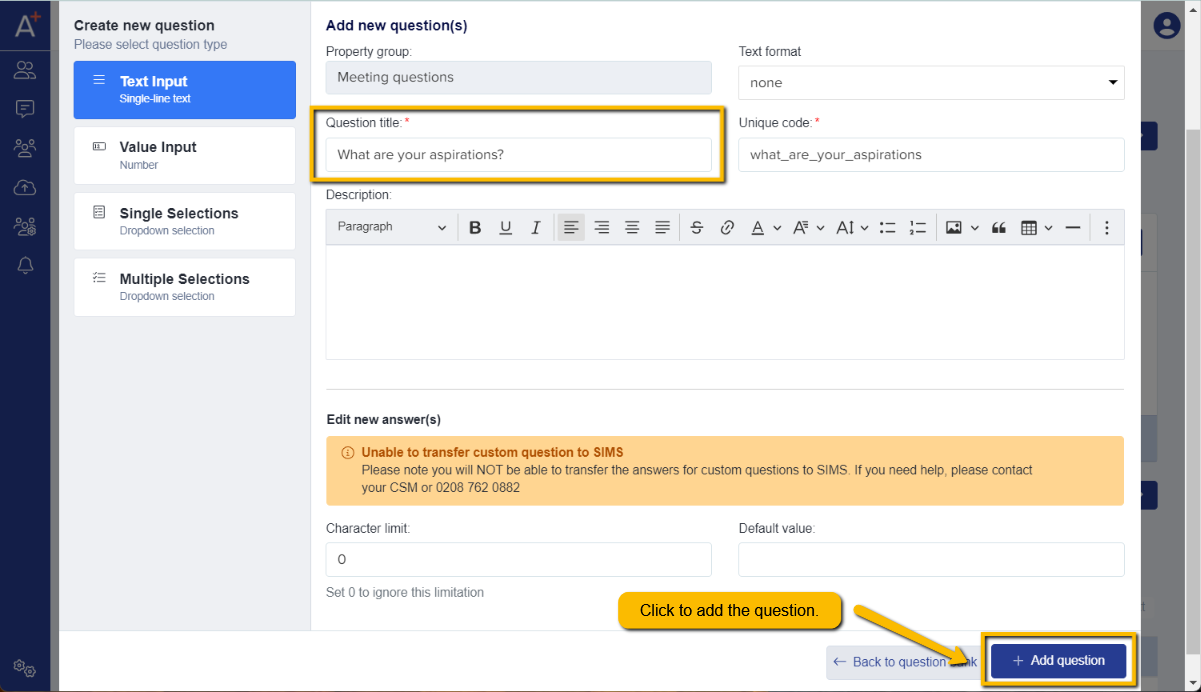
Question title - the question itself.
Unique code - automatically generated as you type in your question.
Description (optional) - in case you would like to add a brief note about your question.
The question will be added and you may add more following the same steps above.
You may set the question mandatory by ticking the checkbox beside the toggle button. Likewise, you may toggle the button off if you decide to not add it anyway.
Note: questions are not visible to the attendee at any time; they are only visible to the staff member conducting the meeting, and the staff member will be the one to input the answers.

You can also view question templates you have previously made (from last year, for example, or from prior meetings) and assign those questions to any new meetings you are creating to save having to recreate them each time.

Otherwise, select No, I want to skip this step if you don't wish to set any questions and click on Next.

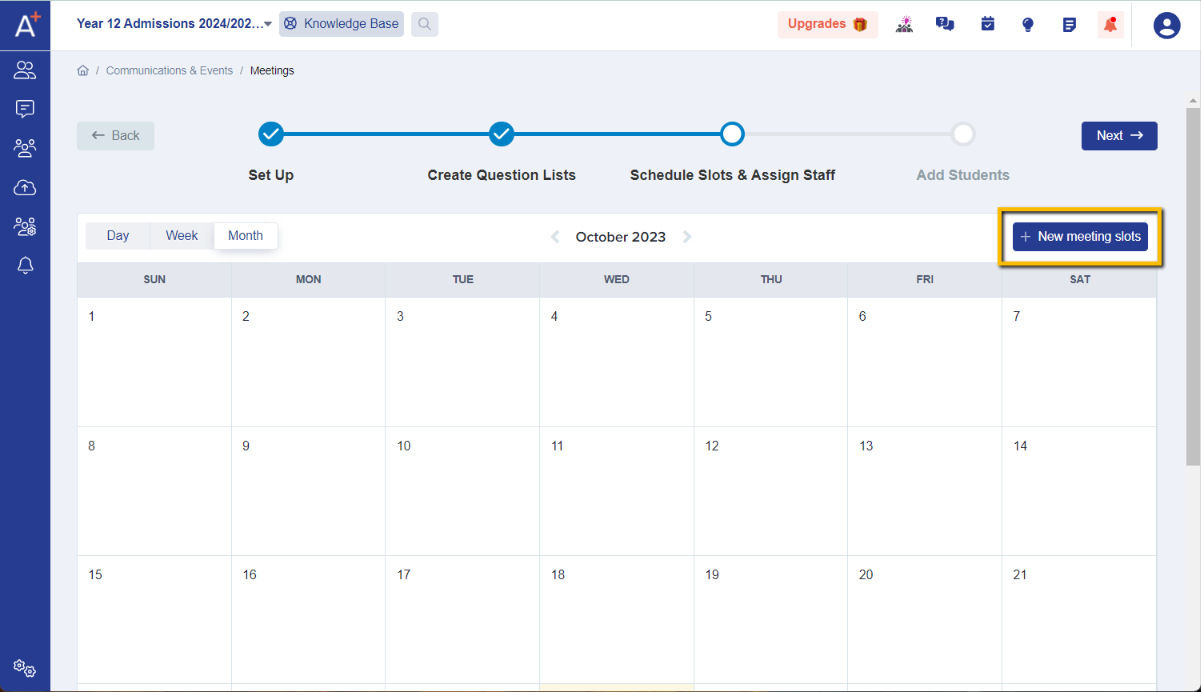
In the Schedule Slots & Assign Staff step, add meeting session and time slots, and assign staff who will oversee the meeting by clicking on the + New meeting slots button.

Start date - the date of the meeting.
Start time - the time the series of meetings will begin.
End time - the time the series of meetings will conclude.
Note: This will be the duration of the meeting e.g. 12:00pm to 4:00pm.
Set up as repeating slots - this allows you to set the meeting to recur in subsequent weeks if applicable.
Note: this is set to "no" by default, but if you change the answer to "yes" you are then prompted to say which day(s) the meeting will recur on and until when:

Length of each slot - duration of each individual appointment/meeting slot.
Gap between slots - if you would like to set a break in between meetings.
Close bookings before slot time - allows you to apply a cut-off time for bookings, so no last-minute appointments get made. This option is only available if your meeting is configured to allow attendees to choose their own appointment times.
Number of attendees per slot - set a maximum number of attendees per slot e.g 1 if it's a one to one meeting; 2 or more if it's a group meeting.
Assign Staff - select the staff who will be conducting the meeting (they need to have a staff user account on your A+ system in order to be selected - see how to add staff here.
Location - indicate where the meeting will be conducted.
Note: if your meetings will be online, you can insert your online meeting link into the "location" field to share with the applicants.
If your meeting link is long, you can condense it by visiting https://tinyurl.com/
Below is an example of the difference this can make:

Click on + Add new slots to generate time slots.

You will then see the time slots available within the duration of the meeting you have set previously and will have the option to amend the details per slot.
You can delete individual slots on this screen, for example if you need to build in a lunch break.
Once you're okay with the time slots, click on Confirm.
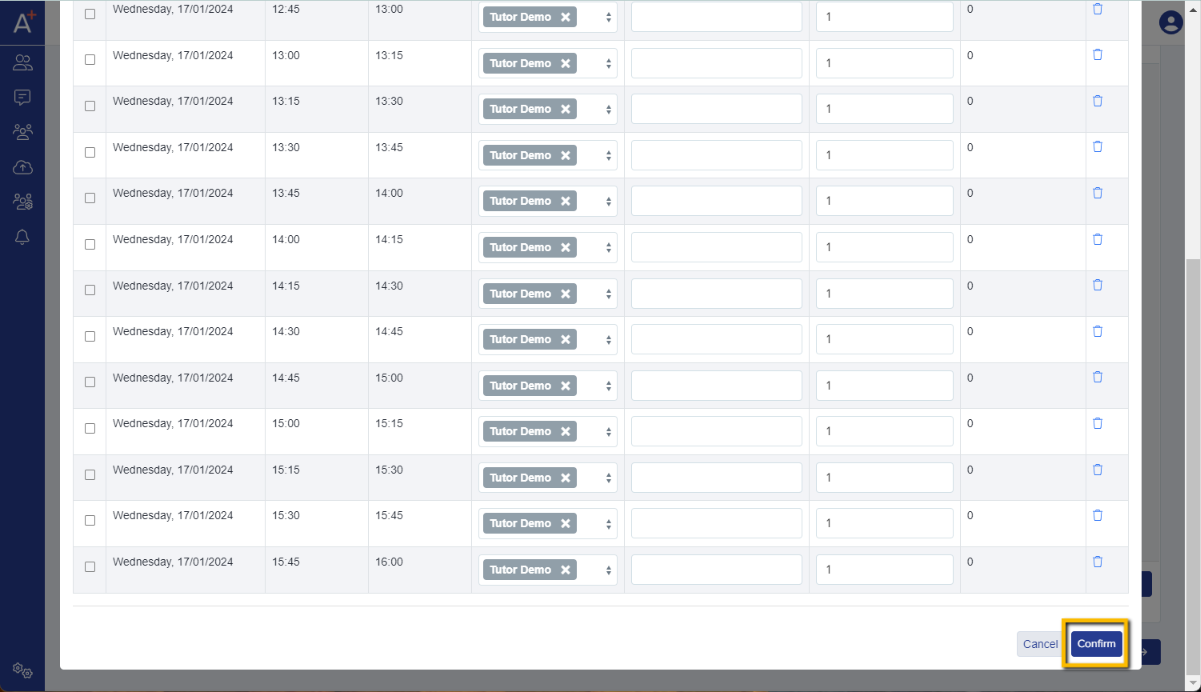
Note: You may also add additional time slots manually by clicking on Add Slot Manually.

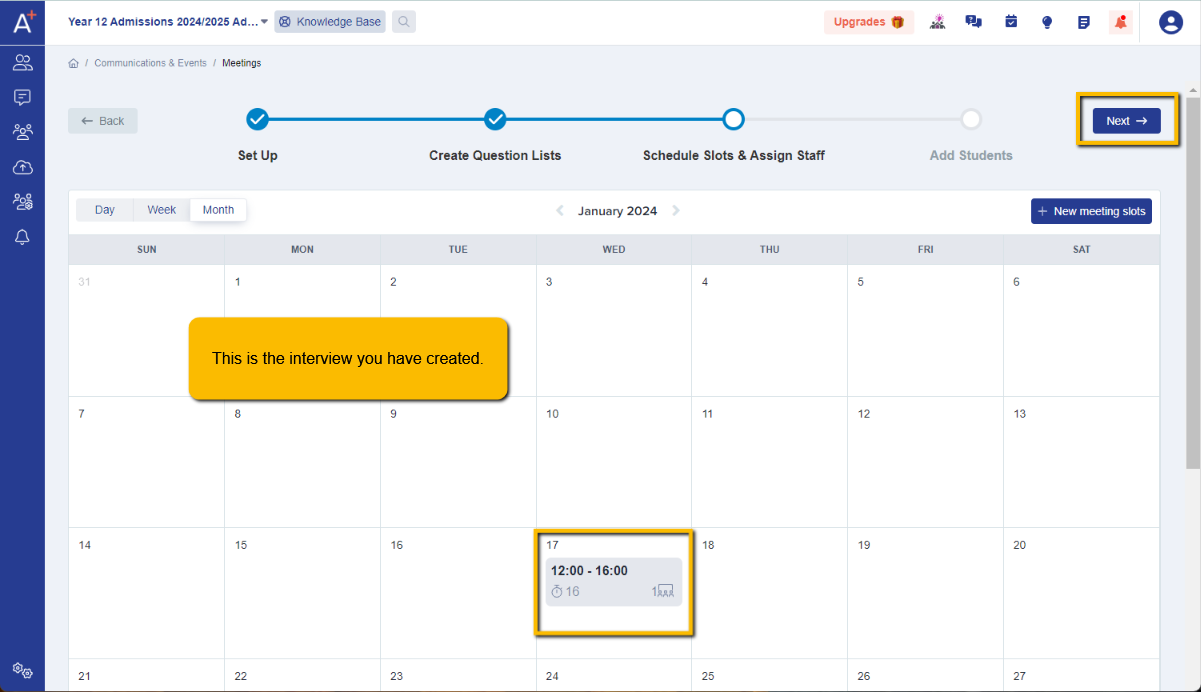
You will return to the calendar and if you go to the month that the meeting is happening, you should see it added.
Repeat the process as needed to add in more days and times for your meetings, and once complete, click on Next.
Finally, you will then see a list of available appointments and will be able to add the applicants to the meeting, using the Add Students function.
You can read how to add and invite people to meetings following these links.