How to add students to a meeting
How to add students to a meeting session.
This guide assumes you have already set up/ created your meetings.
You can add students to meetings from the meeting area, from your main dashboard or by adding them to an application group first.
From your dashboard
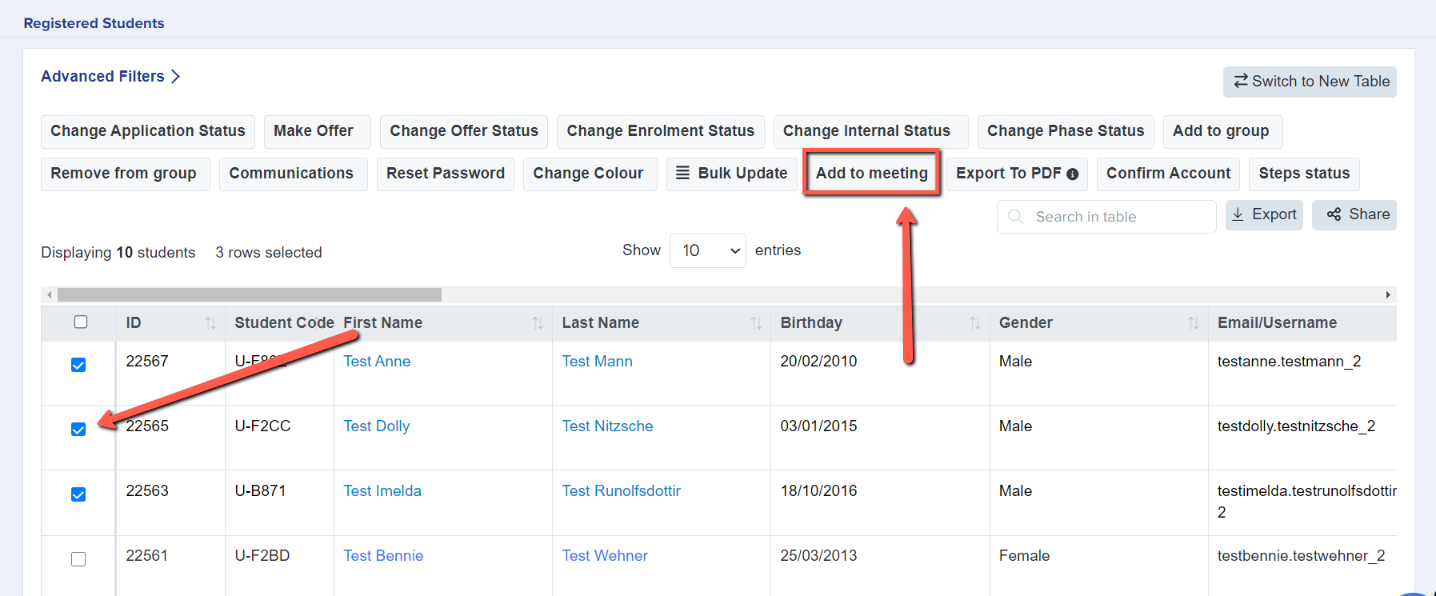
Select a tile or a category, to load a list of students.
Select the students you want to add to a meeting and choose “add to meeting” and from the dropdown list you should select the meeting you've made.

Then the page will refresh and you can choose any other students if you'd like.
Add students to an application group
To create an application group, click the “application groups” tab on your main dashboard and then click the settings cog on the top right of the table.
Then click “+ New Application Group”, give it a name and press “create group”.
Go back to your main dashboard and click to view a list of students. Select those who you wish to add to the group using the checkboxes on the left of the table (or select them all) and then use the “add to group” button to add them to the group you created.
You'll be able to add a group to a meeting directly from your meetings area, covered below.
Adding students to a meeting from the meetings area
Go to your Communications and Events > Meetings and click to open your meeting configuration.
Using the "add students" option, you can then add students one by one, or by group (as created above), or by using your advanced filters to generate the right list of candidates (for example those who have completed their applications).

In your meetings area, you will see the students you have added and can do some double checks. 
You can then fill up the slots that were empty by clicking 'allocate available slots' thereby populating the times you've set with the students you've added.
