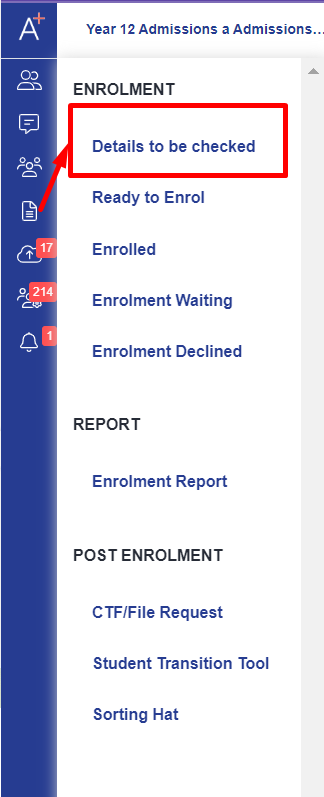
This guide assumes you have already done the step enrolment > details to be checked.
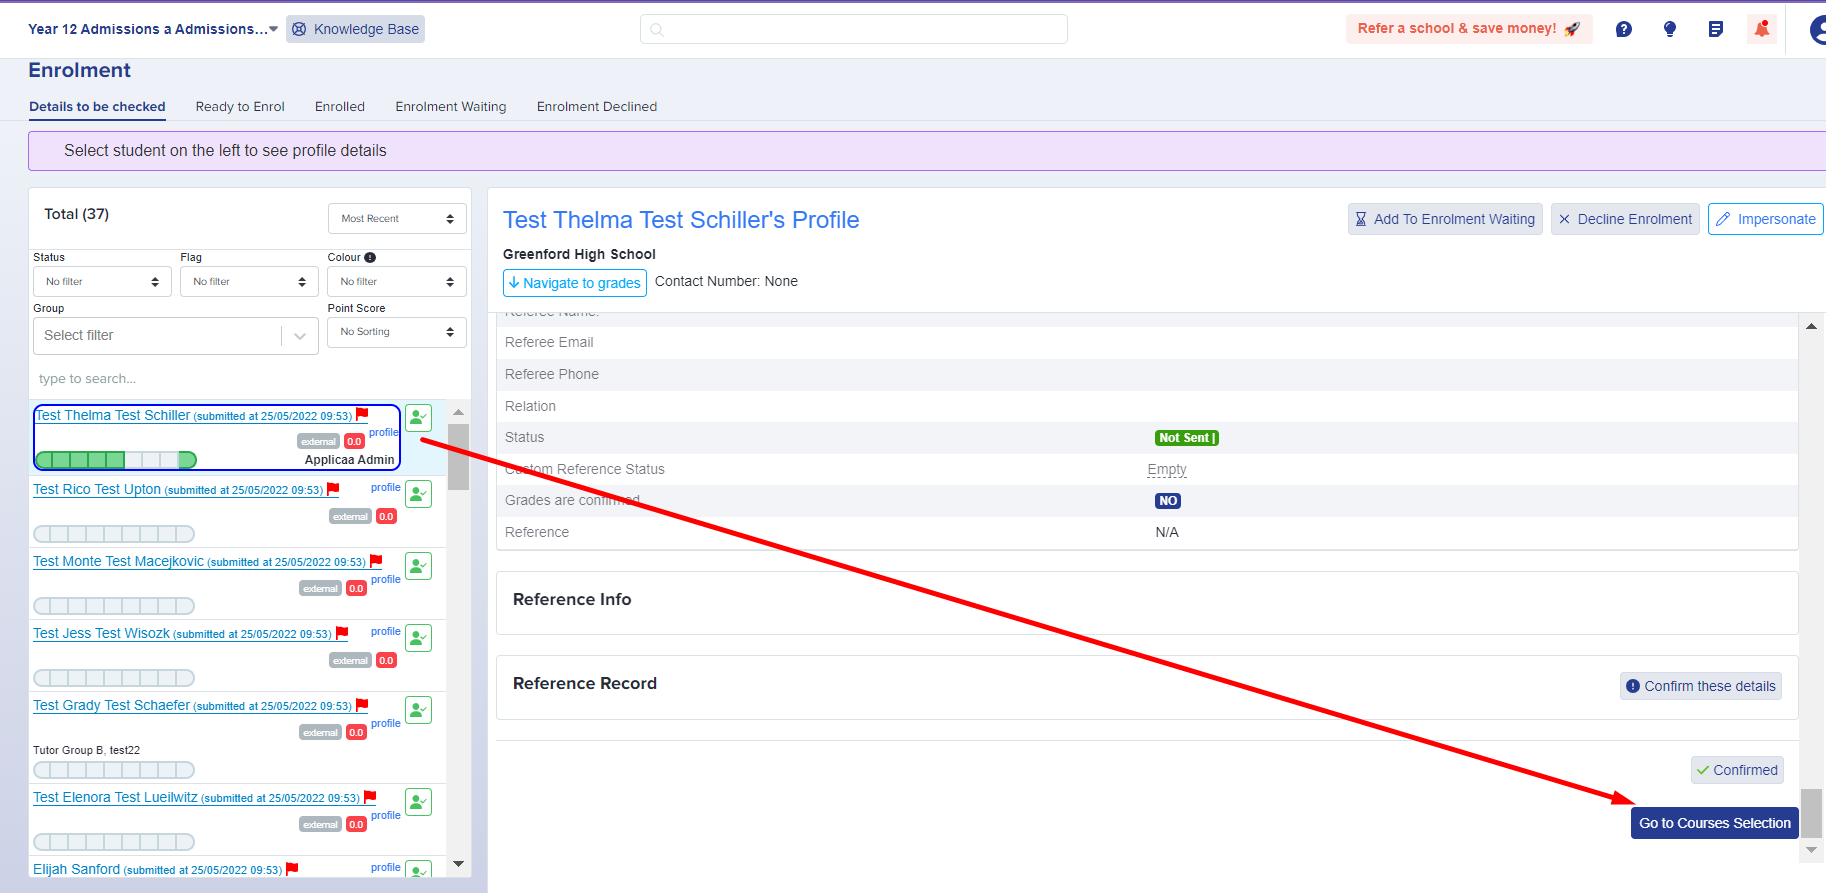
The final action on details to be checked is to scroll to the bottom and click "go to courses selection" which will push the applicant into the Ready to Enrol bucket
For staff going straight to this area, you may click on the enrolment icon from the main dashboard then select 'Ready to enrol'

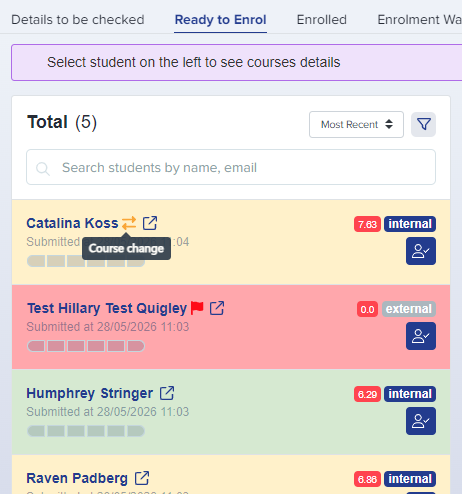
You may see that applicants are colour-coded, depending on the settings you applied within your Enrolment Navigator (restricting staff by entry requirements). You will also see a course change indicator in any instances where an applicant has changed the subject choices in relation to the courses they applied for/were offered.
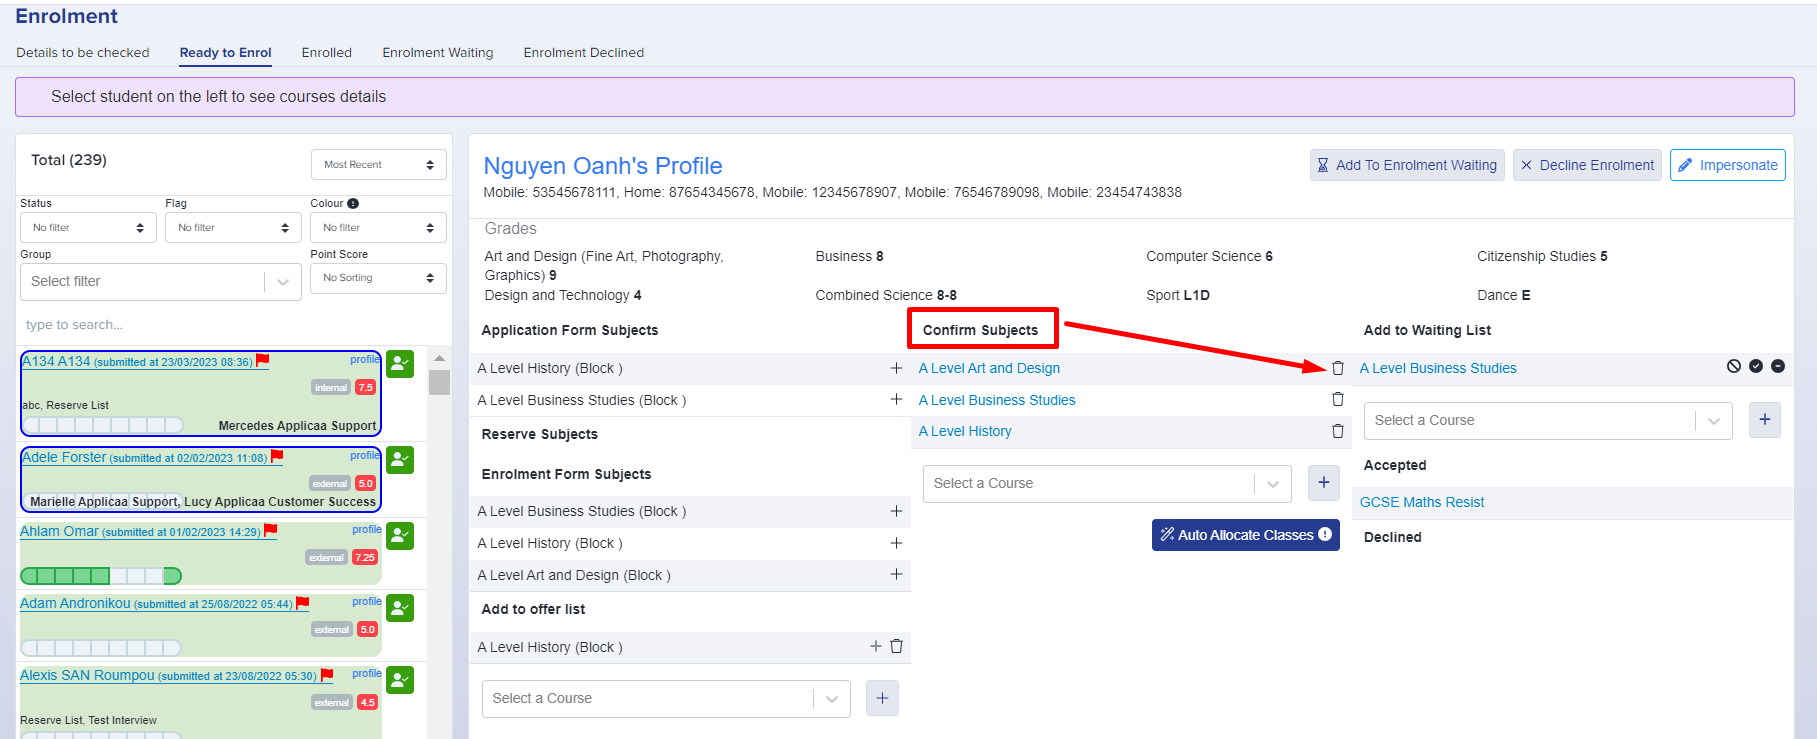
Click within the student's card (blank space surrounding their details) to load their course information.
Click the plus icon next to each subject you wish to confirm them onto - this can be from the "applied", "offered" or "enrolment" sections on the first column.
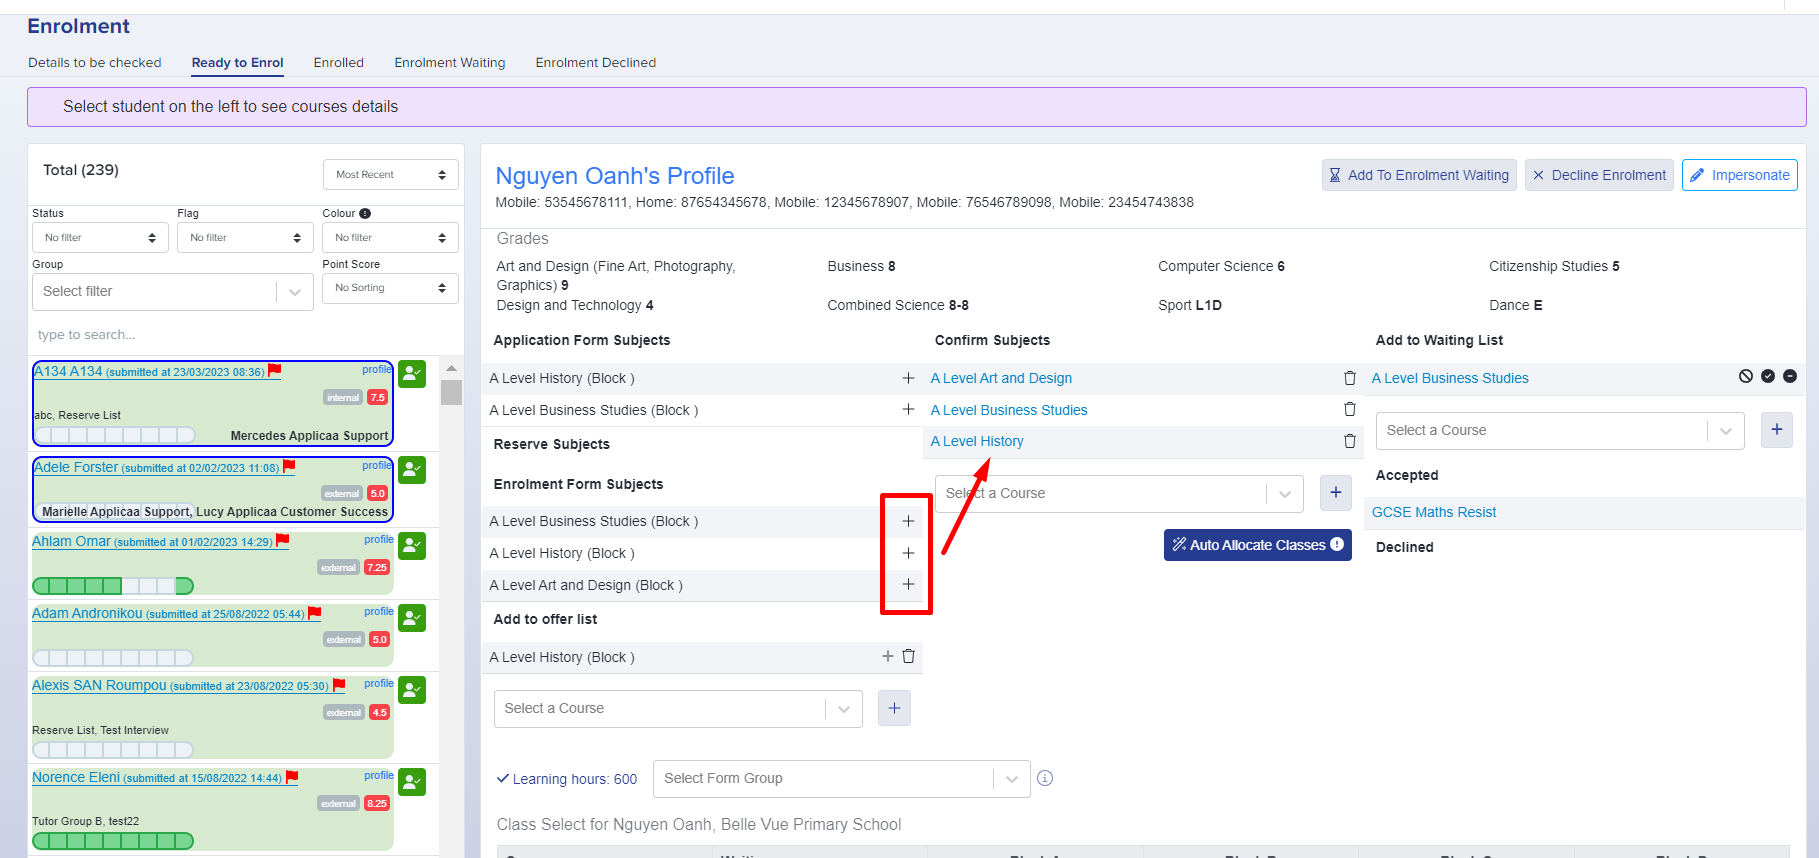
Note: Only subjects for which the student has qualified will have a plus next to them. If they have not met the entry criteria for a subject, you will see "not qualified" next to the name of the course and will need to add that course via the waiting list if you still wish to allow them to enrol onto that subject. There is a separate guide on using the waiting list, which you can access here
Clicking the plus icon will add the subject into the "confirm subjects" column
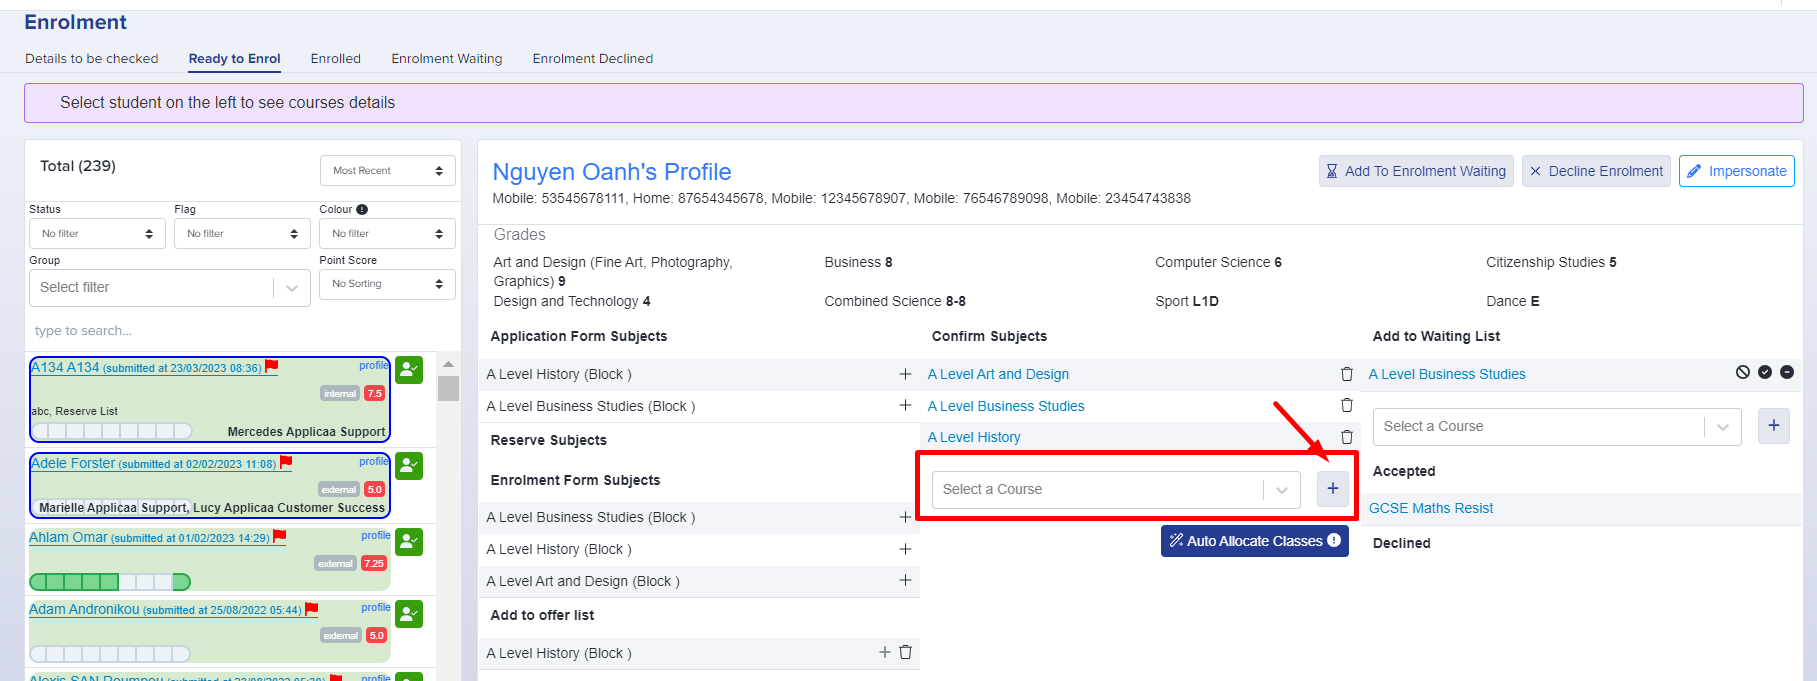
If you move something over in error, there is a bin icon next to each subject (click to remove the subject from the list)
You can also choose something completely new from the "select a course" dropdown menu if you are enrolling them into a course they hadn't previously chosen or been offered
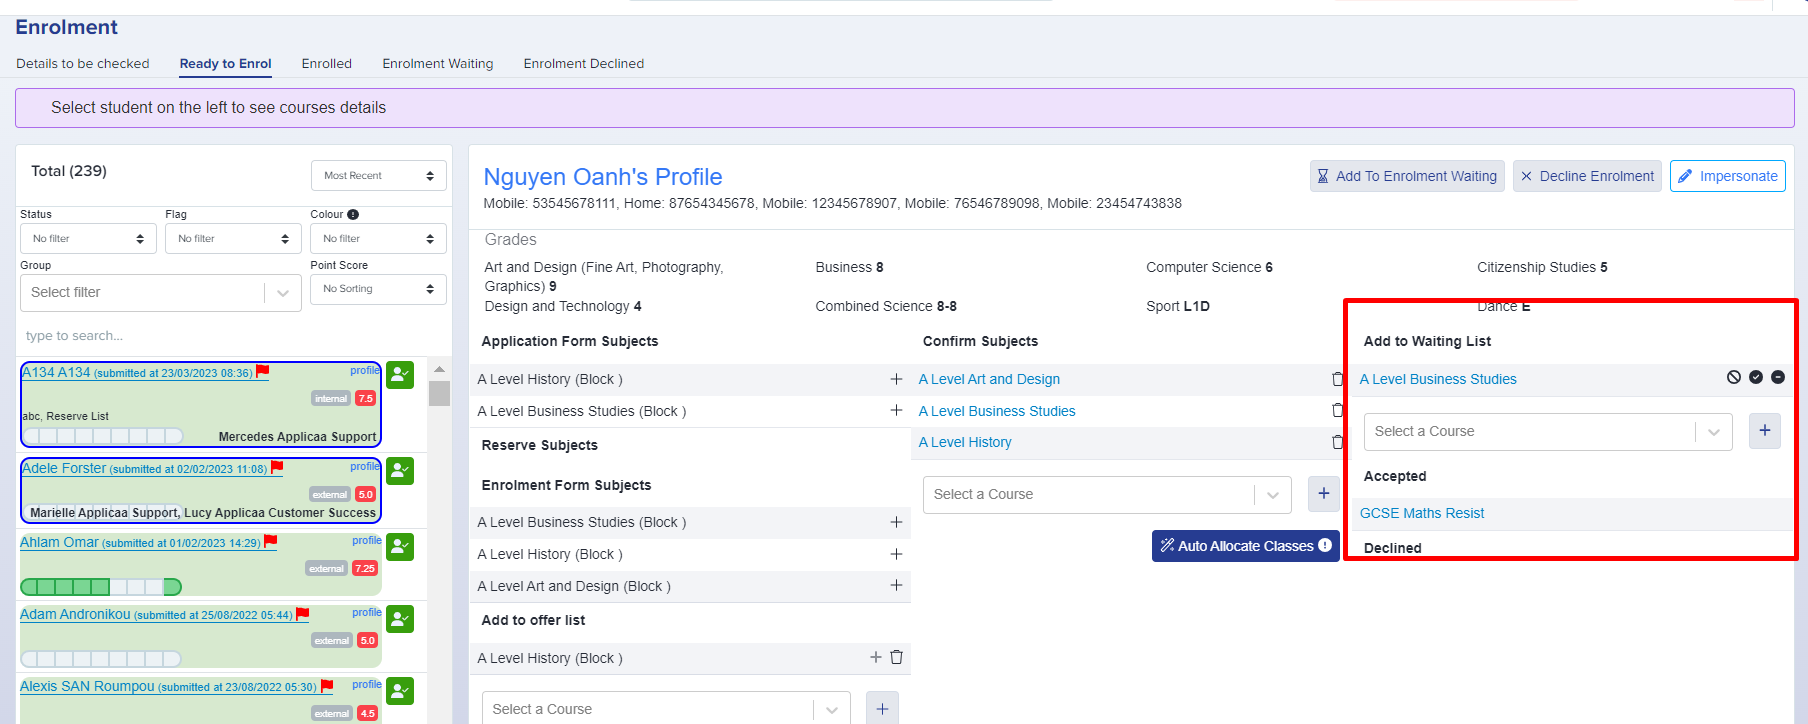
As mentioned above, you will also see the waiting list function on this screen. You can use this if:
- you want the student to have a backup subject (perhaps they or you are still making a final decision about which courses they will study)
- you are going to enrol the student onto a course which they have not met the entry requirements for. In this instance, a student has to be added via the waiting list first, and then approved by a member of staff. Once approved, that course will then become available to choose in the dropdown menu on the "confirm subjects" column

Once you are happy with the courses listed in the "confirm subjects" column, you can either press "auto-allocate classes" or scroll down to manually select which classes to add the applicant into on the timetable.
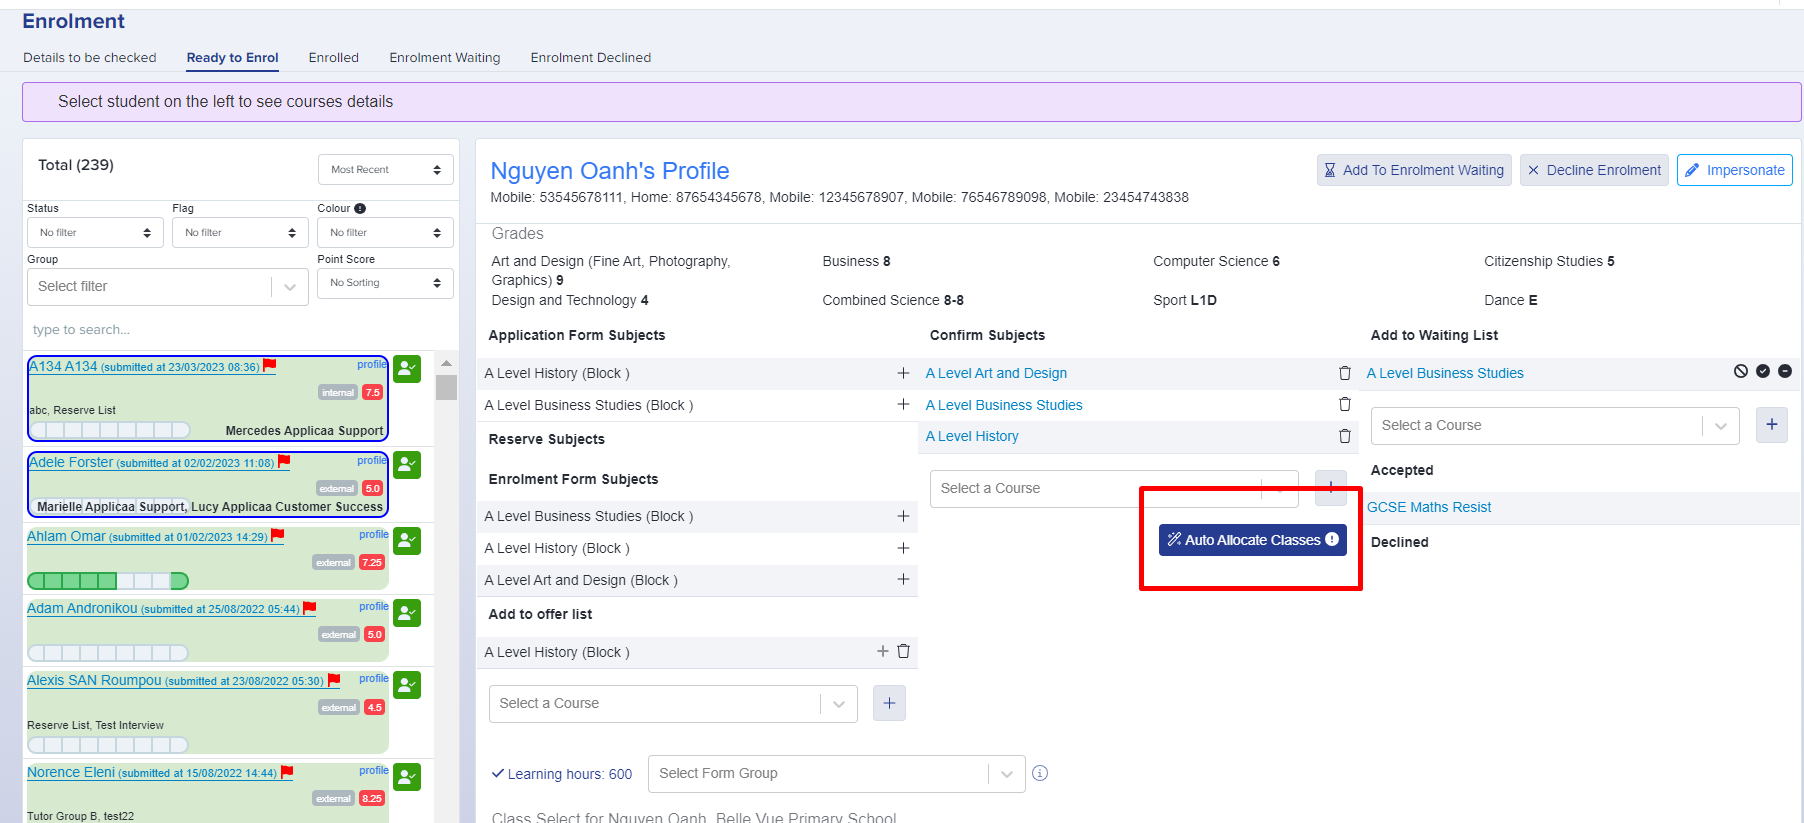
You will see a number on each class - this tells you how many other people have already been enrolled into each of those classes so you can keep track of group sizes
Press "submit" and this will show a summary and confirm the student is now enrolled. The student will now appear in the "enrolled" bucket and you can move onto the next student in your Ready to Enrol list.
