How to import internal students' grades
You can import predicted and/or achieved grades on behalf of your internal applicants to ensure accuracy of information.
Click to see a video demonstration of the grade import process.
Recording of Grade Import Walkthrough session 20/08/2025.
Prior to importing grades for your internal students, you will need to ensure that the file containing their grades is tagged with a unique identifier for each student already in Applicaa. Otherwise, the system will not know which student to import the grades for.
The available unique identifiers you can use on your grade file are:
- ULN
- UPN
- MIS ID (eg SIMS Admission Number, Arbor ID, Bromcom Student ID, iSAMS School ID)
- Email Address
We recommend using their MIS ID or UPN to ensure the correct grades are assigned to the correct student.
We recommend that you complete the following actions prior to your grade import:
1. Resolve all student duplicate matches - this will ensure you are not importing grades into a profile that a student is not using as their active one. Please see here for instructions.
2. Decide which unique identifier you will add to your grade import file.
If you imported your internal students from your MIS at the beginning of the cycle, we recommend using their ULN, UPN or MIS ID, as your exams officer will be able to add this to the file easily, and they are not values which are editable by the students, so they remain consistent and reliable.
If you use email address as their unique identifier, note that this could be updated by the student, and they may have applied to you using a different email address than the one you hold for them in your MIS.
If you are not sure whether your internal students on Applicaa have a unique ID, please click here to learn how you can double-check.
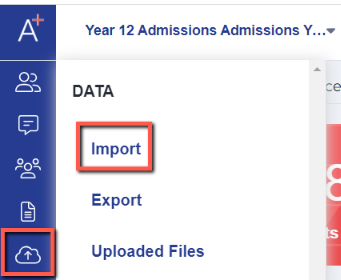
To import internal students' grades into the system, you will need to navigate to Data > Import, then click "start an import".

Name your import and then scroll to the bottom of the page, where you will see the option to import students' predicted or achieved grades.

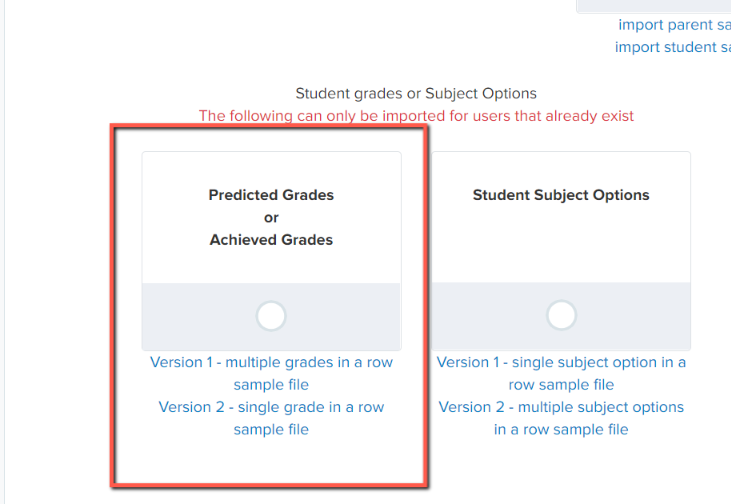
There are two sample files for you to download; you can use whichever makes most sense for you and your data. Version 1 has all the grades for one student on one row, whereas version 2 has one subject and grade per row.
There are important formatting rules for the grades you are importing, particularly for combined science and for BTECs. Please refer to this file, which will show you the formatting that must be used. This is critical because CSV files cannot read certain symbols, such as hyphens.
Once you have prepared your CSV file and saved it, click "next" on the import screen, where it will then ask you to select "CSV" as the file type.

Click "next" and then select which version of our sample files you will be using for your import:

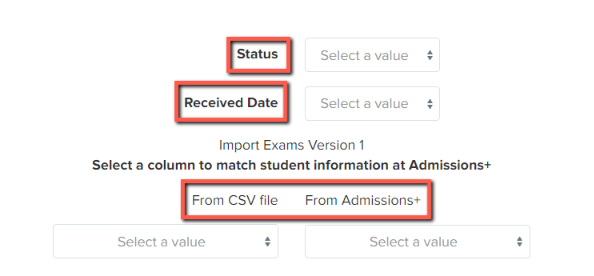
Click "next" and then complete the mapping step as follows:
Status: are these predicted or achieved grades that you are importing?
Received Date: if these are their achieved results, set the date for July/August.
Select a column to match student information at Admissions+: we would recommend using their MIS Admission Number or UPN to ensure total accuracy of the correct grades being assigned to the correct student.
You will then need to map your data to Admissions+. Match the CSV exam title to the relevant Admissions+ Qualification Title and set your qualification types:

Click "next" to produce a summary of the data you are about to import and then click "next" to start the import.
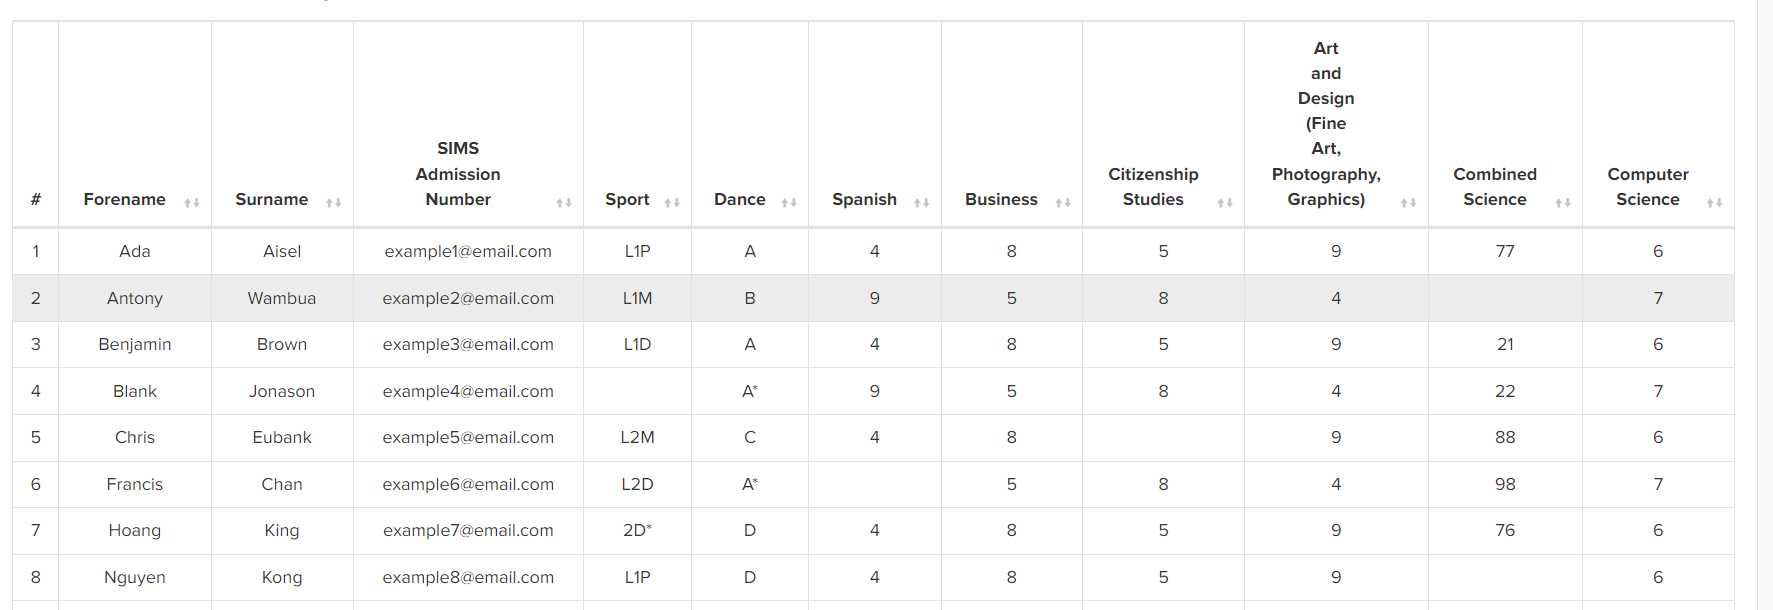
The system will then look for all of those students whose unique identifier (Admission Number, UPN etc) can be found and it will import the grades against each of those students.
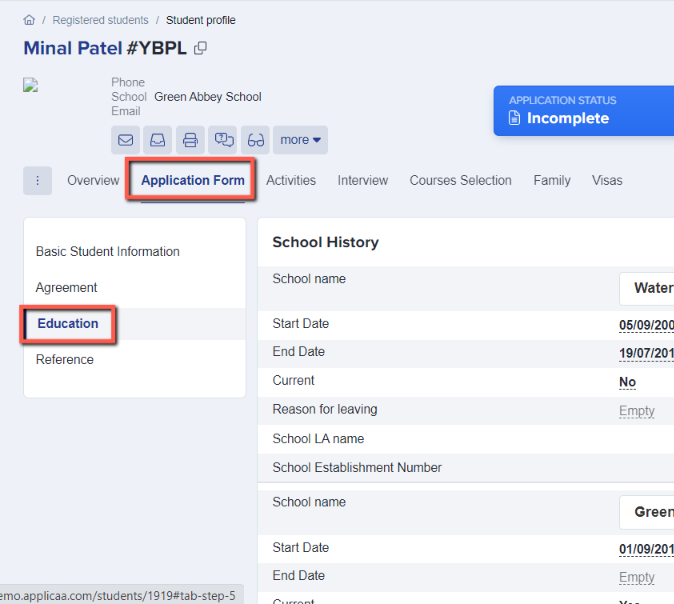
Once imported, you will then be able to go onto a student's profile and view the grades you have imported, by clicking on their education step within the application form tab and scrolling to see their listed qualifications.

For internal applicants, you can prevent them from making changes to these grades once you have imported them, so that they are not able to amend them or add any additional qualifications.
To lock these grades, navigate to settings > enrolment settings and turn on the toggle switch as shown here:
