Creating an Enrolment Day Email Template
You can design an email message that will go out to students, instructing them what they are expected to do on Enrolment Day.
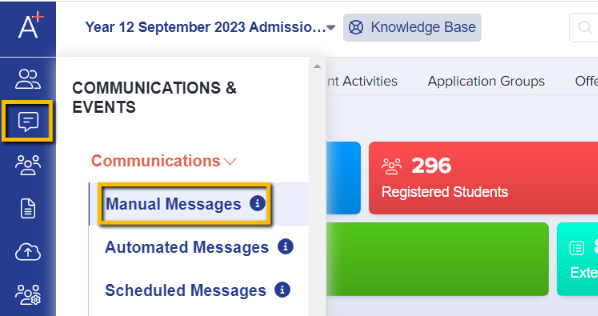
First, you'll go to Communications & events > communications > manual messages.

Then click on 'Add new message' to create an enrolment email template from scratch.

In the set up page, you can choose 'Email' as the Communication type; Template Name - you can put your own template name to easily differentiate the template you have created once you saved it; Subject header - the title of the email template which will be shown when you send out the enrolment emails; Target Audience - choose students so that the recipient will be the students within the system; Sender & reply to email address - set the email address that will serve as your from address and the email address that the students can reply to.
Optional: Template Description - you can add a brief description for this template to help you remember what the purpose of this email template is.
Once done, hit the next button.

And on the Advanced settings, you will be able to select how you would like to send the message. As shown below, kindly select 'Manually' & hit next button.

You will now be able to go ahead and add your enrolment day template in the description box. This can include information on what time they need to come into school, what the Enrolment Day will look like and what they need to bring.
You can also use the mail merge fields so that the system will pick the data of the tokens you have selected once you've sent out the email template (for example, students' names).

Please see below sample email description that you can use.
Key information to include:
- the dates and times of your embargo (students won't be able to log in when the embargo is in place)
- the procedure for your day - do you need to see students in person? At what time and where? Do they need to bring anything with them?
- what they need to complete on their Admissions+ profile. Do you need them to upload a copy of their results? Will they need to answer any additional questions?
- what to do post-enrolment. When is their first day in school and what do they need to have with them?
Once you are happy with the template that you created, you can then click the 'Save' button on the bottom right side of the page.
Now, to send it to your students, you might have to open the list of students that you will be asking to complete their enrolment form from your main dashboard. So usually these are your students with application status as completed, or perhaps those you have made an offer to.
Alternatively if you have a particular application group that you've created for enrolment, then you can use that instead.
Click on the "communications" button at the top of the table and click "send email".
There, you can search for the template you created and click "add template".
You will have the option to send to just students, or to students and parents - useful if you have some applicants who aren't great at checking their emails.
Check it through and press send!
Once you're on the list you may use this guide on how to send a quick email to a group for your reference.