CONTENTS
- Navigation and Overview
-
New and Old View Options in the Application Form Configuration
-
Old View Customisation
-
New View Customisation
- Configuring Sections and Questions within the Steps
You may access your application form by clicking on Settings (gear button) > Application Form
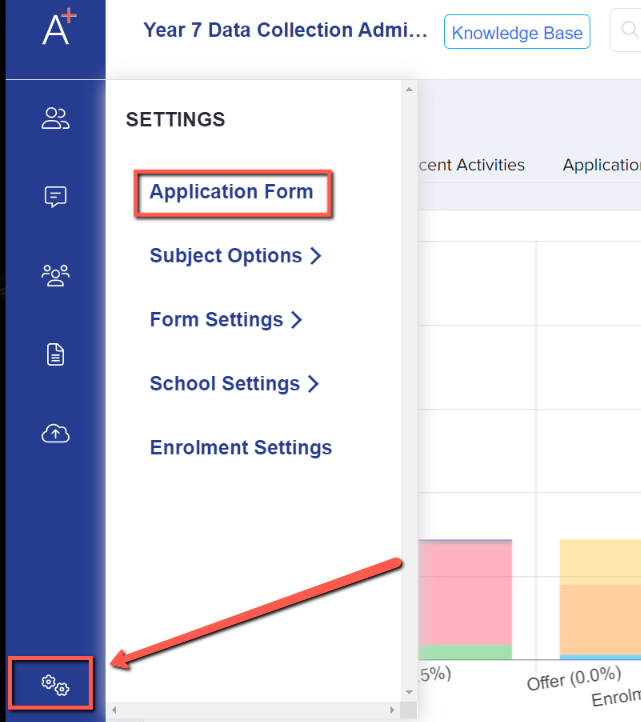
The application form area is broken down into phases, steps, sections and questions. Depending on your intake, you may use only one phase (application form)—generally Year 7, Reception, and In Year or multiple phases (account creation, application form, offers, enrolment form)—generally Year 12, and sometimes Nursery.
New and Old View Options in the Application Form Configuration
The Application Form configuration within the Customise Application Journey now features two distinct views for managing your forms:
- Old View: This is the classic interface you may already be familiar with.
- New View: This updated interface offers an improved experience, with enhanced usability and navigation features designed to streamline your workflow.
You can switch between the Old and New Views at any time with just one click, so you’re always able to work in the interface that suits you best. The New View is now the default across all platforms, but you have the flexibility to move between views as needed, ensuring a smooth transition and letting you adapt at your own pace. This update is designed to make the application setup experience even more intuitive and efficient for your admissions team.


Old View Customisation:
PHASE VIEW: this is where you can see the overview of phases and enable/ disable them.

Each phase has a toggle that you can switch on or off to decide whether applicants are shown these phases on their student or parent homepage. Disabling a phase hide all steps and all questions within the steps from the applicants.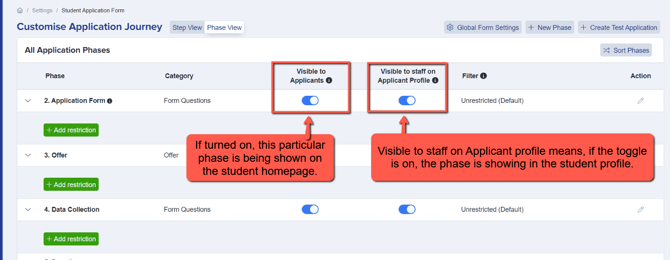
You can also add new phases and sort them in order: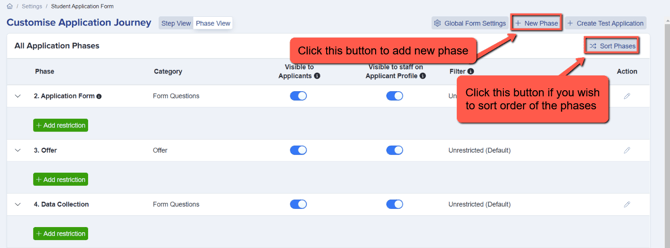
Under the Actions column you may configure the phase setting and rename the phase if you wish by clicking on the pencil. You may also control who can access a certain phase by applying a filter.
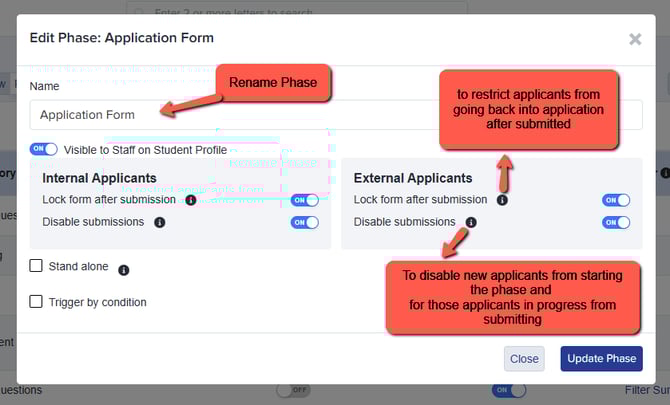
Phase Settings
- Lock form after submission: this means disabling applicants that have already submitted their form, from going back into their application and making changes.
- Disable submissions: Disable new applicants from starting the phase and those in progress (Only completed some steps in the phases) from submitting.
- Stand alone: This makes this phase appear as a separate standalone phase that can be completed at any time regardless of where the user has reached on their journey.
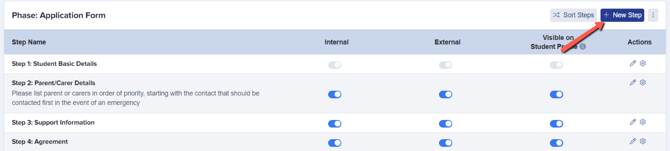
STEP VIEW: The step view is where you can see the detail of phases and amend step sections and fields. 
You can add your own steps as needed, via the + New Step button.
You can easily rearrange the order of your steps within the form to match your preferred workflow. Simply click on the "Sort Steps" button—this will open a drag-and-drop interface where you can adjust the sequence of your steps, ensuring the journey flows logically for applicants and aligns with your school’s admissions process. This flexibility allows you to tailor the application experience, whether you want to front-load essential information or group related sections together for clarity.
Note - the following steps have to remain in this set order and cannot be re-ordered: Education, Pathways, Courses.
You may also rename the steps if you wish by clicking on the pencil button in the "Actions" column to the right.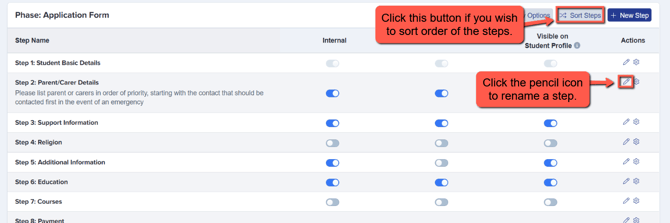
For each step, you’ll find toggle switches that let you control whether students see the questions in that step on your form. When the toggle is blue, the step is enabled; when it’s grey, it’s turned off.

Please note that the Step 1 for Basic Details will always be turned on and greyed out by default, meaning it cannot be turned off.
To view the questions within a step, simply click on the step’s name or select the settings cog icon found under the ‘Actions’ column.

To jump directly to editing sections and questions within a step, click the link: Configuring Sections and Questions within the Steps.
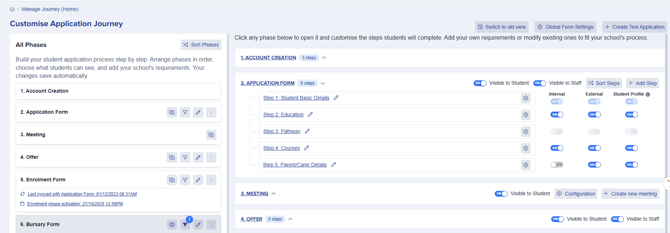
New View Customisation:
The main improvement in the New View over the Old View is that you can now access and adjust all configuration options for both steps and phases on a single page. This streamlined layout gives admissions teams a comprehensive overview of the form structure, making it easier to navigate, update, and manage every aspect of the application process without having to switch between multiple screens or menus. By consolidating all settings in one place, the New View enhances visibility, speeds up configuration, and supports a more intuitive workflow, reducing the time needed to tailor your application journey to your school’s unique requirements.
Phase Configuration
To rearrange your phases, click the "Sort Phases" button to open a drag-and-drop interface. This allows you to quickly adjust the phase order to reflect your admissions journey, from Applications through Meetings and Offers, and finally to Admissions or Enrolment, ensuring the process aligns with your school's requirements.

Phase Control Buttons
Each phase includes dedicated action buttons for managing visibility, setting applicant filters, editing details, and configuring settings like submission locks or form availability.
- Eyeball - lets you control phase visibility, determining whether applicants are able to view or access the steps and questions included within that phase.
- Filter - lets you set filters to control which applicants can access each phase. For example, you can restrict phases to internal or external applicants, specific year groups, or applicants who meet custom criteria. This ensures every applicant only sees phases relevant to their circumstances. Please see relevant guide: Filtering Applicants
- Pencil - enables you to rename and adjust phase settings, such as locking a form after submission to prevent further edits, or disabling submissions once the phase deadline has passed.
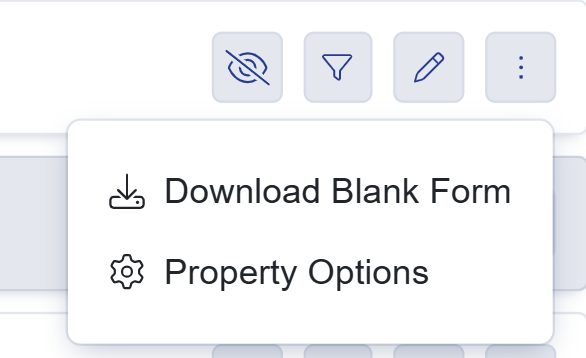
- Kebab/Three-dot Menu - clicking on this button will show you a dropdown for Downloading the blank form and opening the Property Options.
Step Configuration
In the New View, you can easily add, rename, reorder, and configure steps within a phase using the panel on the right. Enable or disable steps, set access permissions between internal and external students, and customise each step to fit your application or admissions process.

You can add your own steps as needed, via the + New Step button. 
You can quickly reorder steps in your form to suit your workflow. Click the "Sort Steps" button to open a drag-and-drop interface, allowing you to adjust the sequence so the journey is logical for applicants and aligns with your admissions process. This lets you tailor the application experience, grouping key information or related sections as needed.
Toggle switches allow you to easily control visibility by turning options on or off, managing access and visibility as needed.

The steps can be renamed by clicking on the pencil button.
To view the questions within a step, simply click on the step’s name or select the settings cog icon.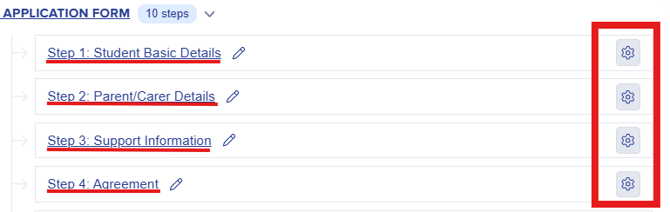
Configuring Sections and Questions within the Steps
Step Sections Configuration
Customise Sections - This is the option you use if you’d like to add another section to the step you are working on. Once a section has been created, individual questions can then be added to it. This is where you can also sort your sections accordingly.

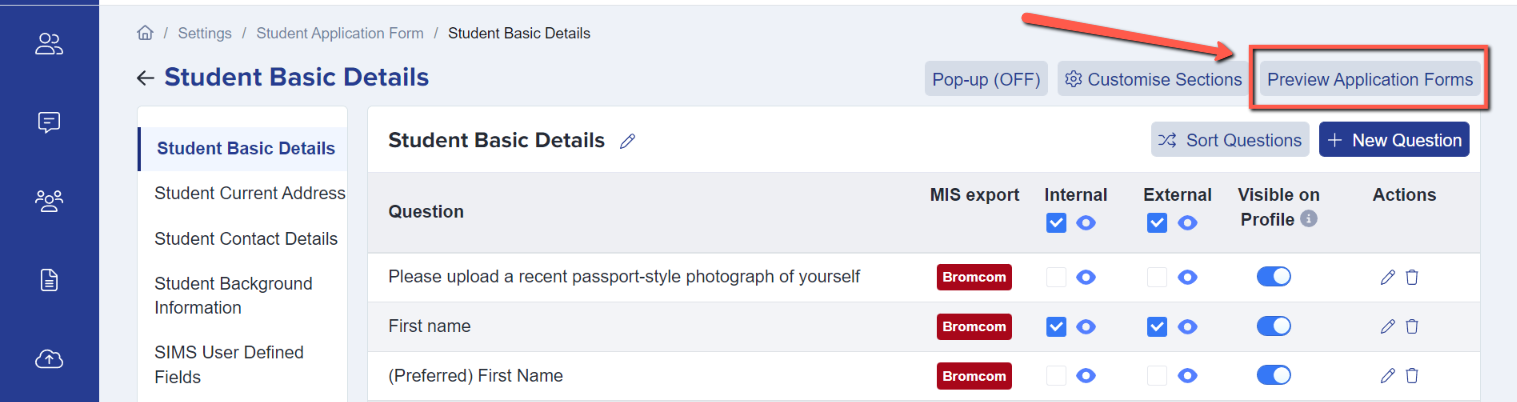
Within each section, you can configure a set of questions to suit your needs. Questions can be enabled or disabled individually using the toggle switches—simply switch off any questions that aren’t required, rather than deleting them. A blue tick indicates a question is compulsory; applicants and parents will be unable to proceed with the form until they have answered that specific question.

The MIS Logo next to questions means that property is transferable to your MIS upon exporting your applications at the end of your admissions cycle. Any question data that is not compatible to be exported into an MIS can still be exported into a CSV spreadsheet or PDF.
‘Visible on Student Profile’ means that answer will be visible to you on admin view of the student profile.
You have an option whether the questions will be visible for internal and/or external students.
Internals are students already in your MIS, externals are students joining you for the first time.
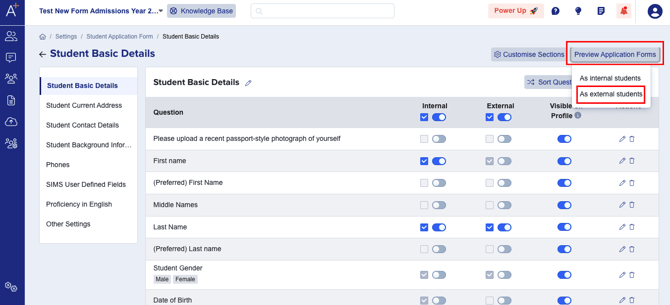
For example, if we turn off one question for external students here, and refresh the page...
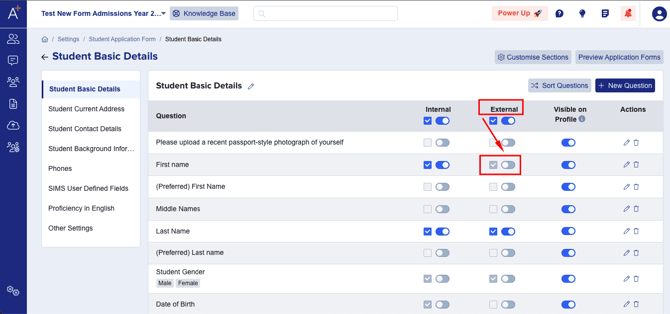
You'll see that this question is now gone for external students once you click the preview application form as external students.
The "First name" text field is not visible for external students.
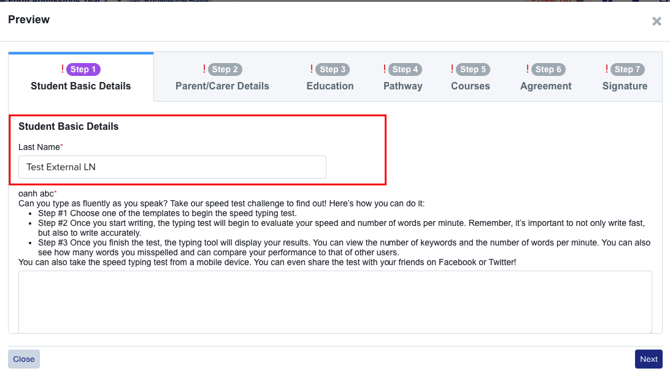
Questions within the application form that are required to be answered will be denoted by a red asterisk.

Adding New Questions
Every section within your form has its own + New Question button, so you can add extra questions to a pre-existing section, or build a new section from scratch.

You can add questions to your form in a number of ways, depending on the required formatting.

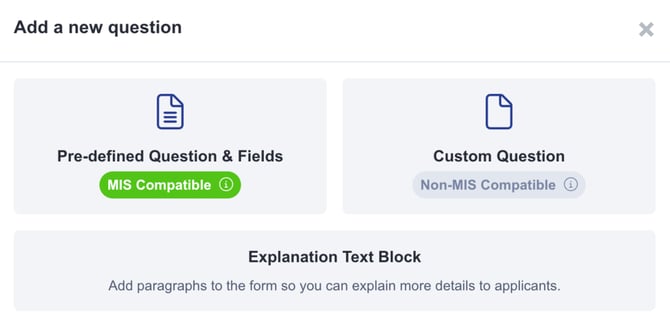
You'll be prompted to choose what you would like to add - do you want to add a field which writes back to your MIS, or not, or simply a text block to provide information?
If you opt to add an MIS Compatible field, you will see a list of those available and can search by name, or from the dropdown list.
Fields which already exist in your form will have their checkbox greyed out, and if you try to click on it, a message will appear to tell you where that field already resides.
For fields which are available to add, you can select more than one at once, and then use the Add Selected Questions button to add them into your form.
If an MIS Compatible question does not exist, you can switch to adding a custom question (not MIS Compatible) instead.

If you select to add a Custom Question you will be reminded that this will not be able to write back to your MIS. You can search to see if the question already exists, or choose a question type to design and add something new. If you need to switch and add an MIS Compatible question instead, there is a button to allow you to move to that screen instead.
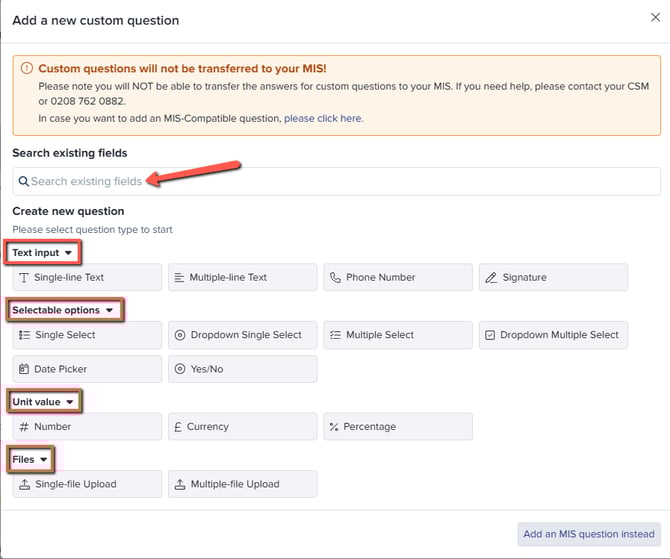
Text input - Use this if you would like to add free text response questions.
Single line text is for short answers while Multiple line text is for paragraphs or answers that require further elaboration. You can also add a question for Phone Number and Signature if you require one.

Selectable options - All of these options are applicable to "choice" questions that you would like to add on the form.
Choose Single Select/ Dropdown Single Select if the question only requires one choice then Multiple Select/ Dropdown Multiple Select if the question requires two or more answers. Additionally, you can add a Date Picker or a question with a Yes/No answer.

Unit Value - Use this property if you are planning to add questions that ask relevant numbers about a student/parent. (i.e a parent’s monthly income, the student’s punctuality and attendance).

Files - You may use this property if you would like to ask for supporting documents (i.e Proof of Address or Birth Certificate, for example).

Text Block - You may use this property if you would like to add further instructions or descriptions on the form.
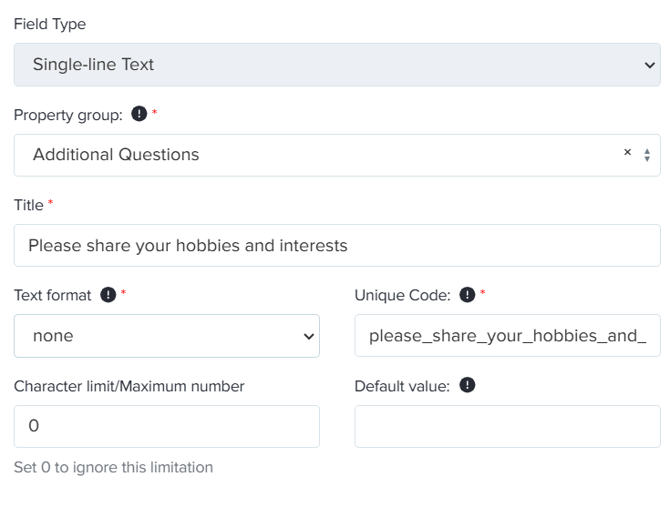
Once you have selected your question type, you can then format your question. You will be asked to select the property group and should try to choose the section title which most closely matches the area of the form you are working in. For example, if you are adding a question in your "Basic Details" step, select the property group "Basic Details".
You should then type your question in the "title" box, and set your other parameters as applicable before clicking to "save".
Here are some examples:
Example 1: Text Input
Example 2: Single or Multiple Select
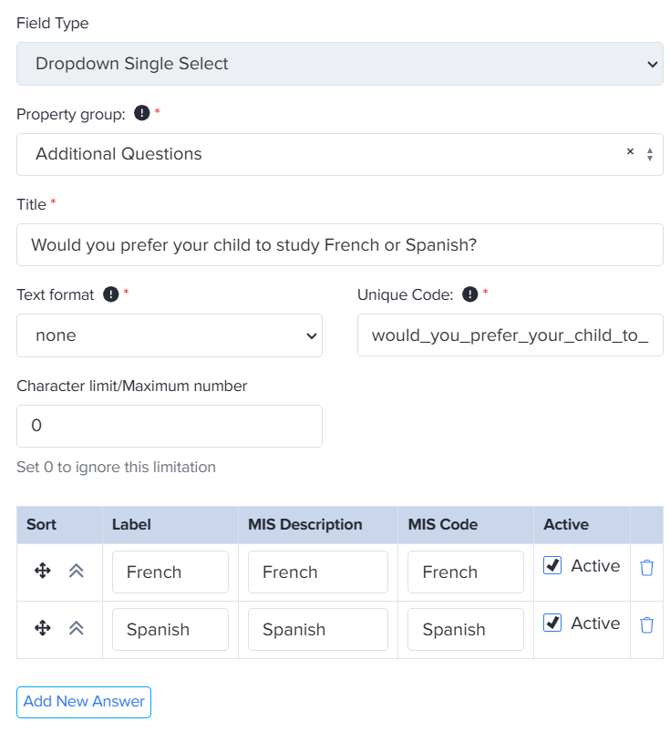
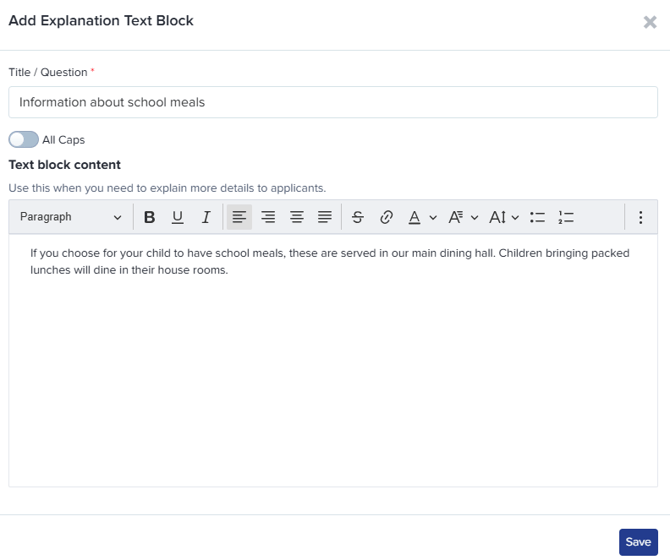
If you select to add an Explanation Text Block you can add information for the applicant, without the need for them to answer a question - it can be useful in cases where you need to provide additional background information or explanations in your form.
Sorting and Editing Questions
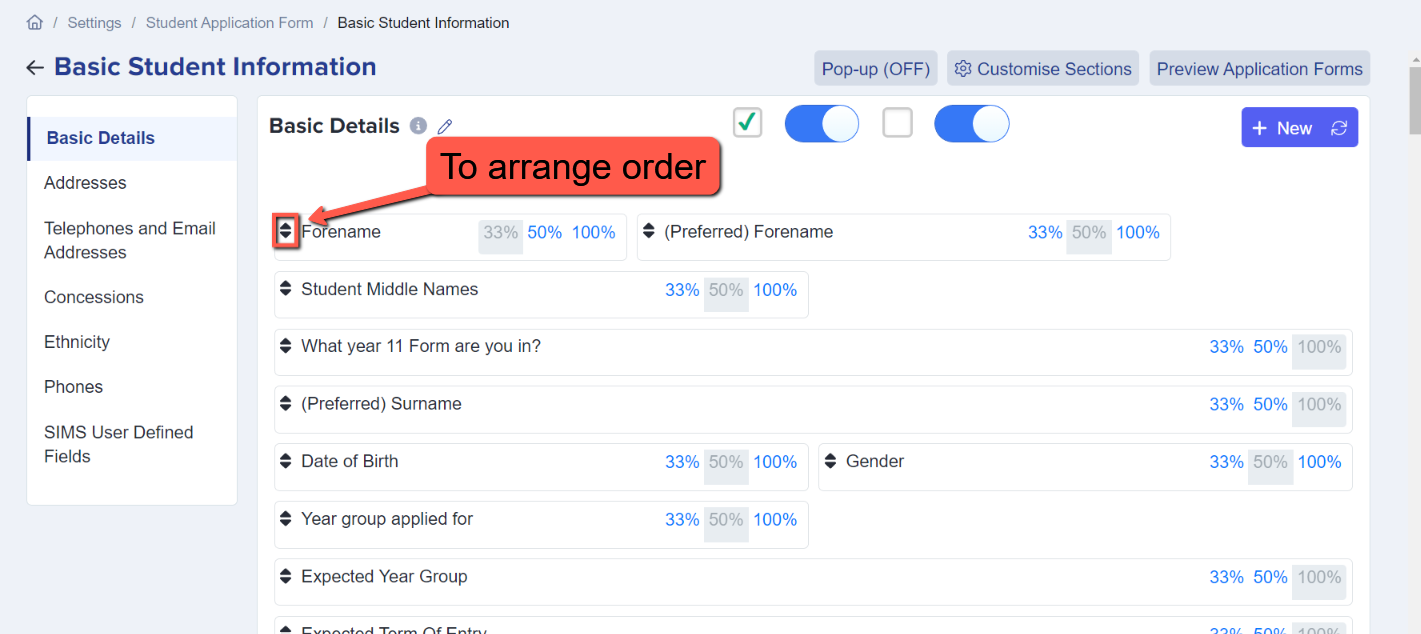
You can easily move and rearrange questions within a section as needed. Any new question you add will appear at the bottom of the relevant section. To change the order, click the "Sort Questions" button, then drag and drop the questions into your preferred sequence.

When sorting your questions, you can also customise their layout to control how they appear on the form. Setting the layout to 33% displays three questions per row; 50% arranges two questions per row; and 100% places one question per row. Questions are presented from left to right, so, for example below, applicants would answer Date of Birth, Gender, and Year Group Applied For in that order.
You can edit a question and add detailed descriptions or extra guidance to any question within your application form, helping applicants understand exactly what is being requested. To do this, simply click the pencil icon next to a question—this will reveal the option to add a description.

Adding User Defined Fields (UDFs) [Access Full Guide Here]
User Defined Fields (UDFs) - It is very straightforward to add UDF questions that exist in your MIS. Simply click + New Question as you do for other questions, then locate the User Defined Fields section within the MIS Compatible area - from there you can add the question into your form and rearrange as needed.

Please note that if your MIS is SIMS these UDFs will be synced into the system automatically once you have downloaded the Admissions+ SIMS App.
If SIMS is not your MIS then this is how you could download your UDFs from your MIS.
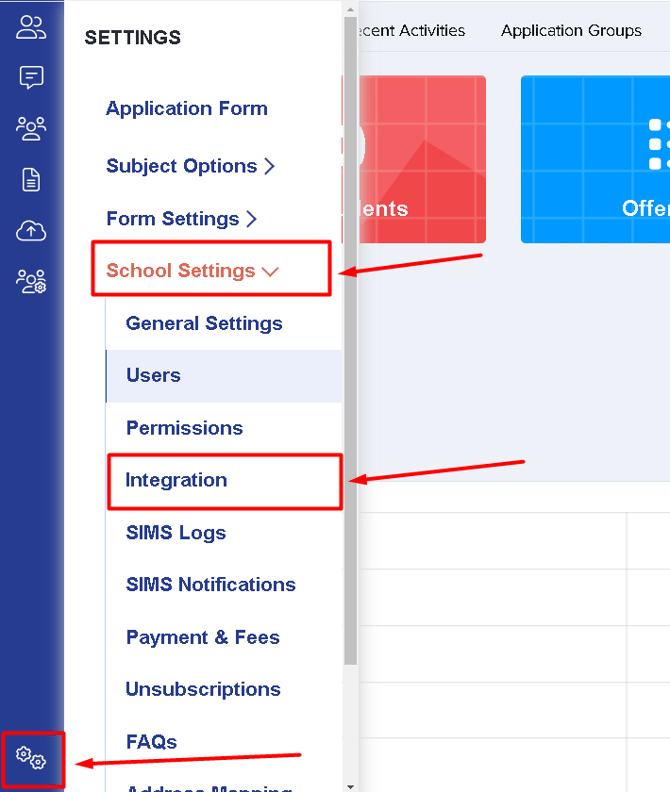
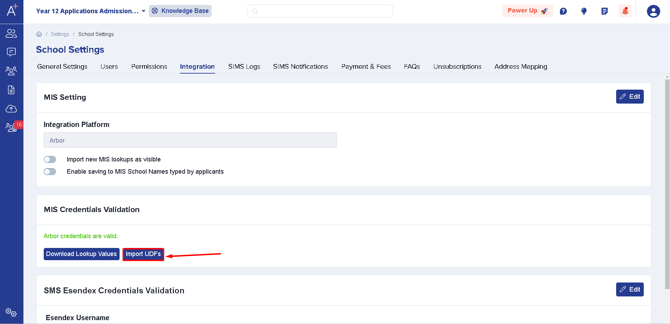
Please go to Settings > School Settings > Integration.
You'll then be directed to the Integration area, please click "Import UDFs".
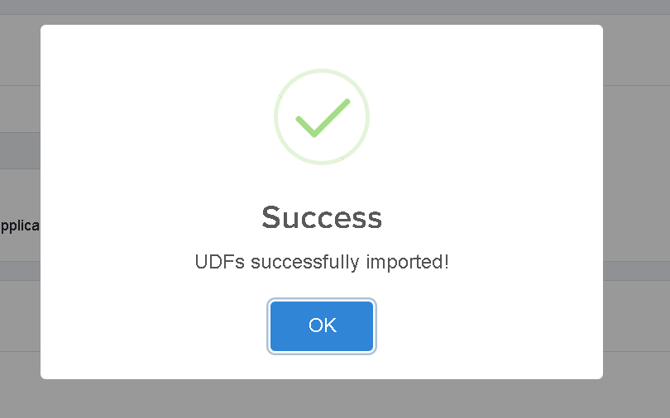
Once you've done this, a message should pop up saying that the UDFs have been successfully imported.
Adding Conditional/Toggleable Questions
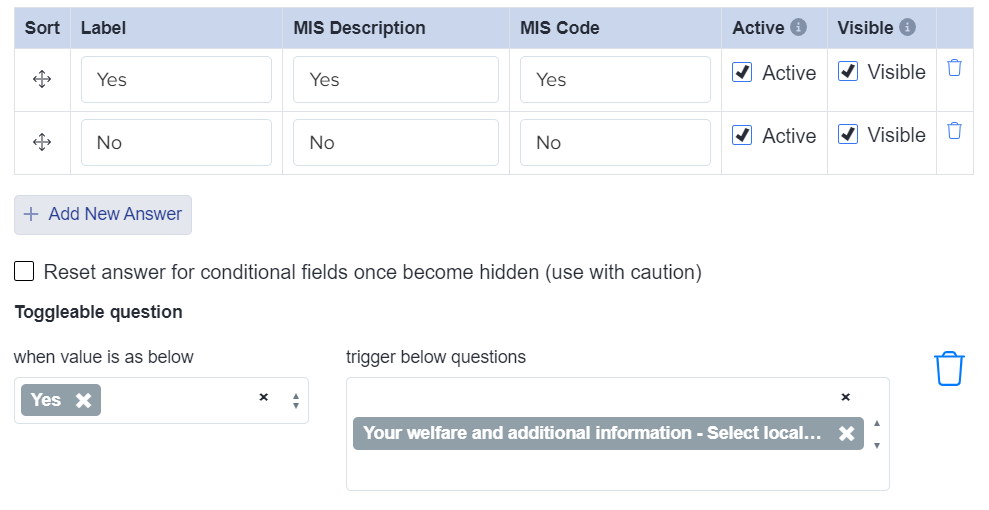
Toggleable Questions - setting a follow-up question to be conditional on a prior answer
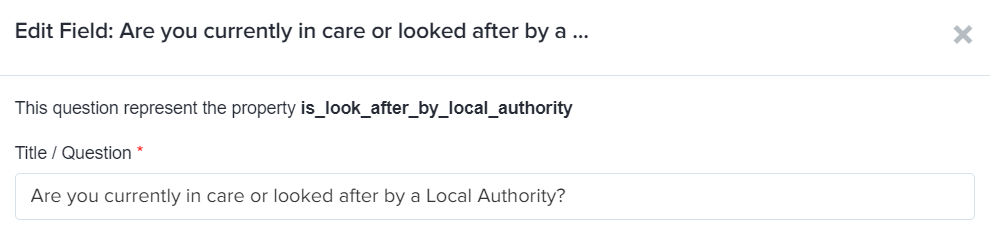
You can link questions, sections and steps together in your form, so that they only appear given a particular response to an initial question. You will find some of these are already set up in your Welfare and Additional Information step but you can create these yourself in any section of your form.
In this example, when an applicant answers "yes" to this question, a follow-up question is triggered, asking them which Local Authority they are in the care of.

Please see this guide for more information on Toggleable/Conditional Questions.
Preview Application Form - Once you’ve made changes in the form, you may preview it by clicking this button. The option given which is to view it as Internal/External student will vary depending on your intake(s).