This step is called "Blocks", this is where you'd be adding the number of blocks available and where the bands will be available on each block, this is helpful in allowing students to be put on bands that were set. (most schools would put 1 band available for all blocks which are for exceptional students while the other bands would have less availability on the blocks as it caters to students that can only choose specific subjects.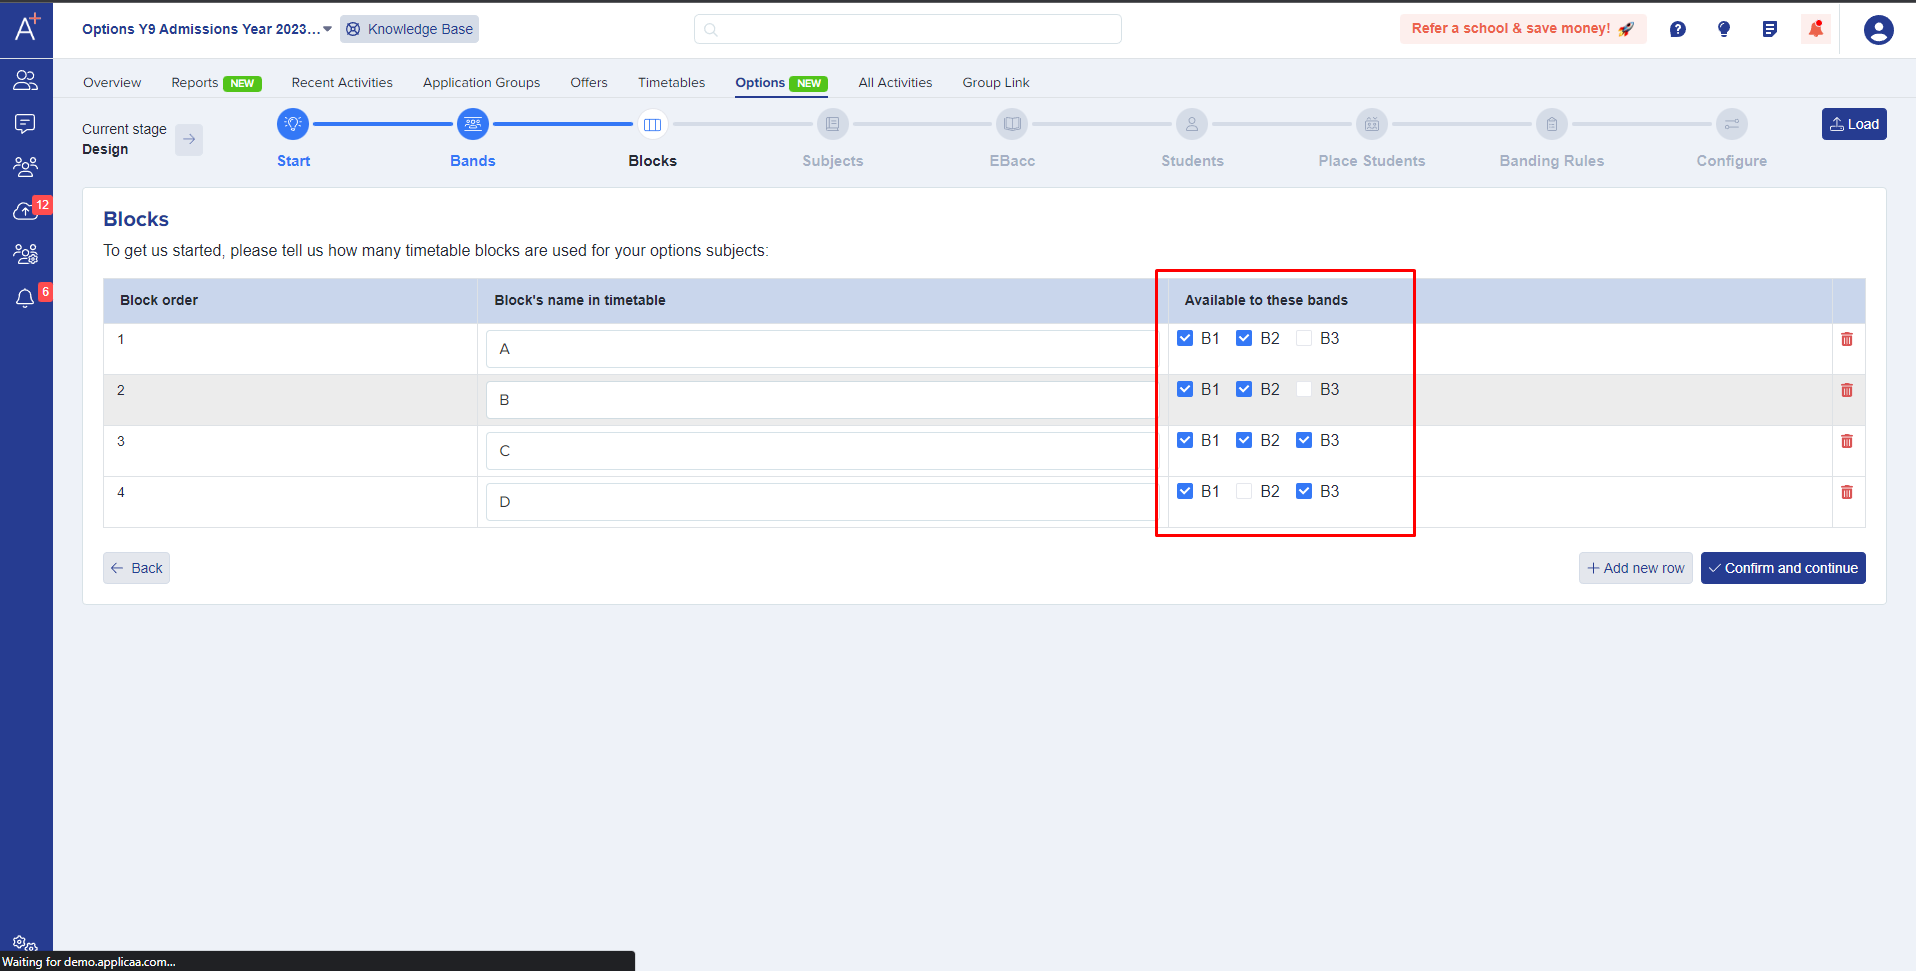
After the blocks have been set another set of rules you can set up will be the Banding rules:
In the banding rules area, you'd be able to set the requirements for each band and which subjects they may be able to select
You will be selecting the band you need to set first, then enter the number of classes they will be allocated to, you will also be selecting how many choices they can select(and will serve as their reserved choices)
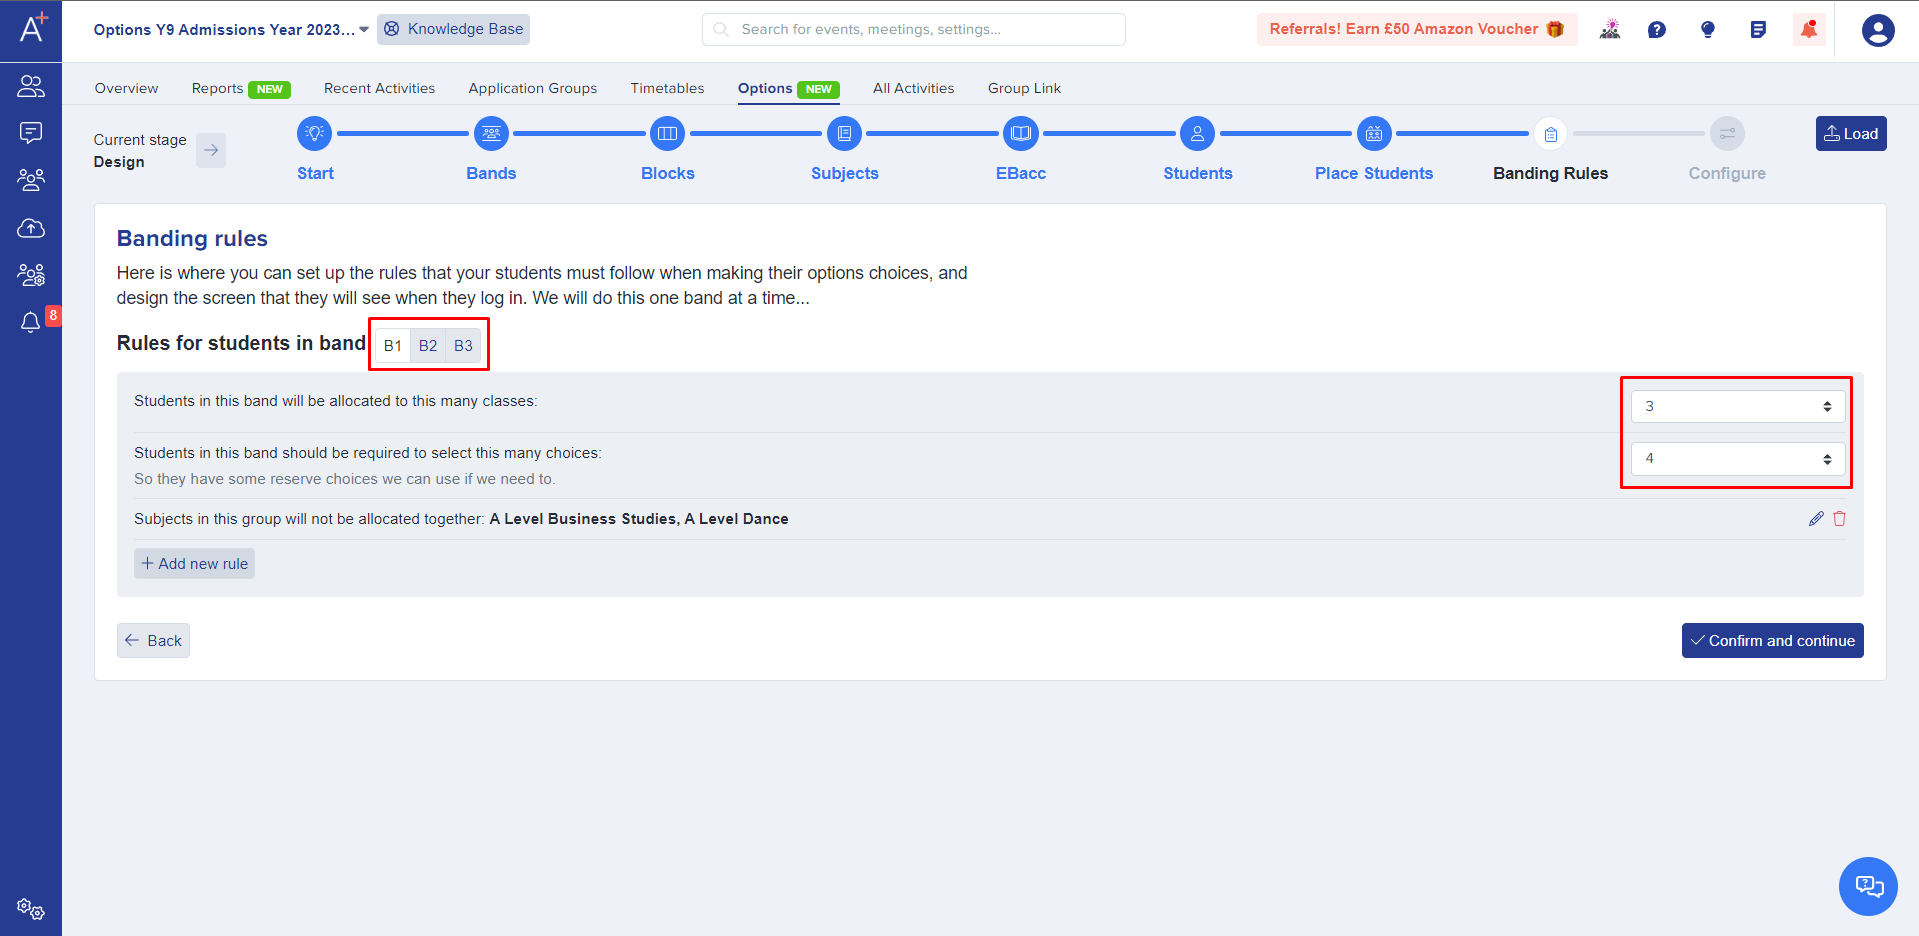
After you've set those you can choose from the options we have to set as a rule on each band as well, and you may select as many as needed from the list:
(Subjects that must be taken together, Subjects that cannot be allocated together, and students must choose at least one subject from a list)
Once you've set up the rules and blocks on the options the last step before allowing them to choose the option would be Configure which will allow you to tick if you'd want parents to agree on the choices the students have selected - it sends out an email to the parent of the choices the student made for the parents to confirm.
To view the webinar we've conducted for the Options feature you may access this link.
Year12