Reports: Dashboard
How to add, edit and delete a new dashboard
Adding a New Dashboard:
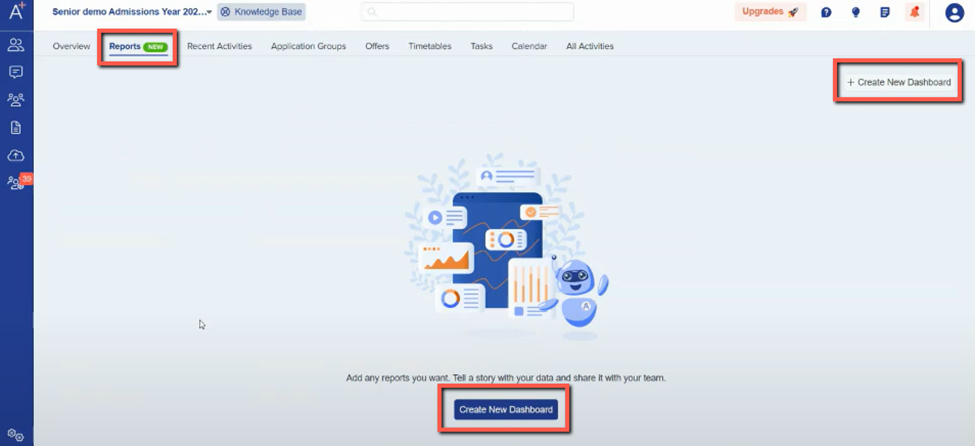
In the landing page you’ll see the reports Area. If no one from your school Admin / Staff created a dashboard, this is what it looks like. 
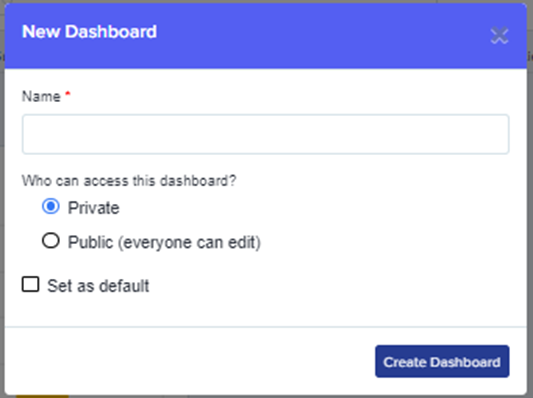
You can create a new dashboard in this page by simply clicking the “Create New Dashboard” tab at the center bottom part or click the +Create New Dashboard on the right-hand corner of the screen. Once you click that, a new window will pop-up. It will ask you to give your dashboard a name.

You can create more than one dashboard and you can either share it as Public where anyone on your platform can view and edit, or just make it private.
There is also an option to make it a default so when you log in the next time, that will be the dashboard that you will see. Don’t forget to click “Create Dashboard” again to save it.

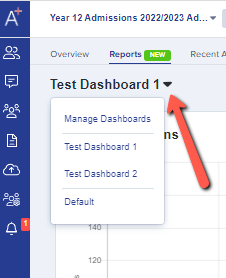
To view all the dashboards created in this form, you just have to click the arrow down right beside the name of the current dashboard you are viewing. If you want to manage your dashboards, click the "Manage Dashboards" in the menu.
You can edit, view and delete the dashboard in this window. It will also tell you which dashboard is your default and whether it is shared.
Now you have created a dashboard, you may go on to create charts within that dashboard to show your data analysis.