From your Admissions+ dashboard, click on the Options tab at the top.

You have two options here: “Create New”, which allows you to build a completely new model from scratch, or “Load a Saved Model”, which lets you reopen a model you previously worked on within the same form.

Selecting “Load a Saved Model” will prompt you to choose from a list of models you’ve previously saved.

If you choose to create a new model, you’ll need to give it a name. When creating multiple versions, consider naming them based on their purpose. For example, if you want to explore what happens if the Art & Design class isn’t available, you could name it “Year 12 Options without Art & Design.”
Once named, proceed by adding the blocks your school uses, then click “Confirm & Continue.”

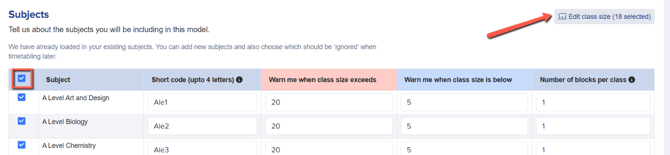
The system will automatically pull your subject information from the Subjects area, so all imported subjects will be displayed at this step. You’ll then need to add your class codes.
Note: Class codes are two or three-letter codes your timetabler uses when building timetables. Because schools don’t always use the same codes for their subjects we need you to tell us here which codes you use.
In this section, you will also need to set thresholds for the following: when to be alerted if a class size exceeds or falls below a certain number, and how many blocks each class occupies. You can apply the thresholds one by one, or in bulk by selecting multiple subjects and then using the "edit class size" function.
Once you’ve finished configuring these settings, click “Confirm & Continue.”

In this next step, you’ll specify which students you want the system to include when calculating the best-fit model. You can select all applicants or use the tick boxes below to choose specific students to include in the model. Alternatively, you can use the filter section to limit the model to a particular group — for example, a ‘shortlist’ of likely attendees you’ve already created.


Once you’ve confirmed that you have the correct list, click “Select All”, then select “Confirm & Continue.”

In the Choices Options step, you can select which subjects the system should consider when calculating the best-fit model, such as Interested and Reserve subjects, Interested subjects, or Offered subjects.

Allow Partial Allocation of Students’ Classes – Enable this option to allow the system to allocate students to some of their chosen subjects (for example, 2 out of 3), even if not all of their selections can be accommodated.

Note: This feature ensures students can still be partially accommodated when their full set of preferences cannot be fulfilled.
Depending on the number of students you’ve selected, the system will now allow you to set how many classes you plan to run for each subject. It will also provide an estimate of the average number of students per class based on the number of groups you’ve set.
This is where the thresholds you configured in Step 3 become visible — any classes with an average size exceeding the upper threshold will appear in red, while those falling below the lower threshold will appear in blue.

In this step, you can exclude certain subjects from the model by setting their Teaching Groups value to ‘0’. This allows you to remove subjects from the modelling process without deleting them from the system entirely. It’s particularly useful if you want to see the potential impact of not offering certain subjects.
If you set the Teaching Groups column for any subject to zero, the system will display a notice before you proceed to the next step. This notice will list all subjects that will be excluded from the modelling.

At the top right of the table, you can also set an Attrition Rate or Drop-out Rate for your intake. For example, if you know that only 90% of your applicants typically enroll in September, you can set this value to 90% instead of 100%, and the system will automatically adjust your projected numbers accordingly. You can also specify different enrolment follow-through rates for internal and external applicants.

The 'Download summary' button will allow you to quickly download a csv file of the subjects and how many students have chosen each subject.

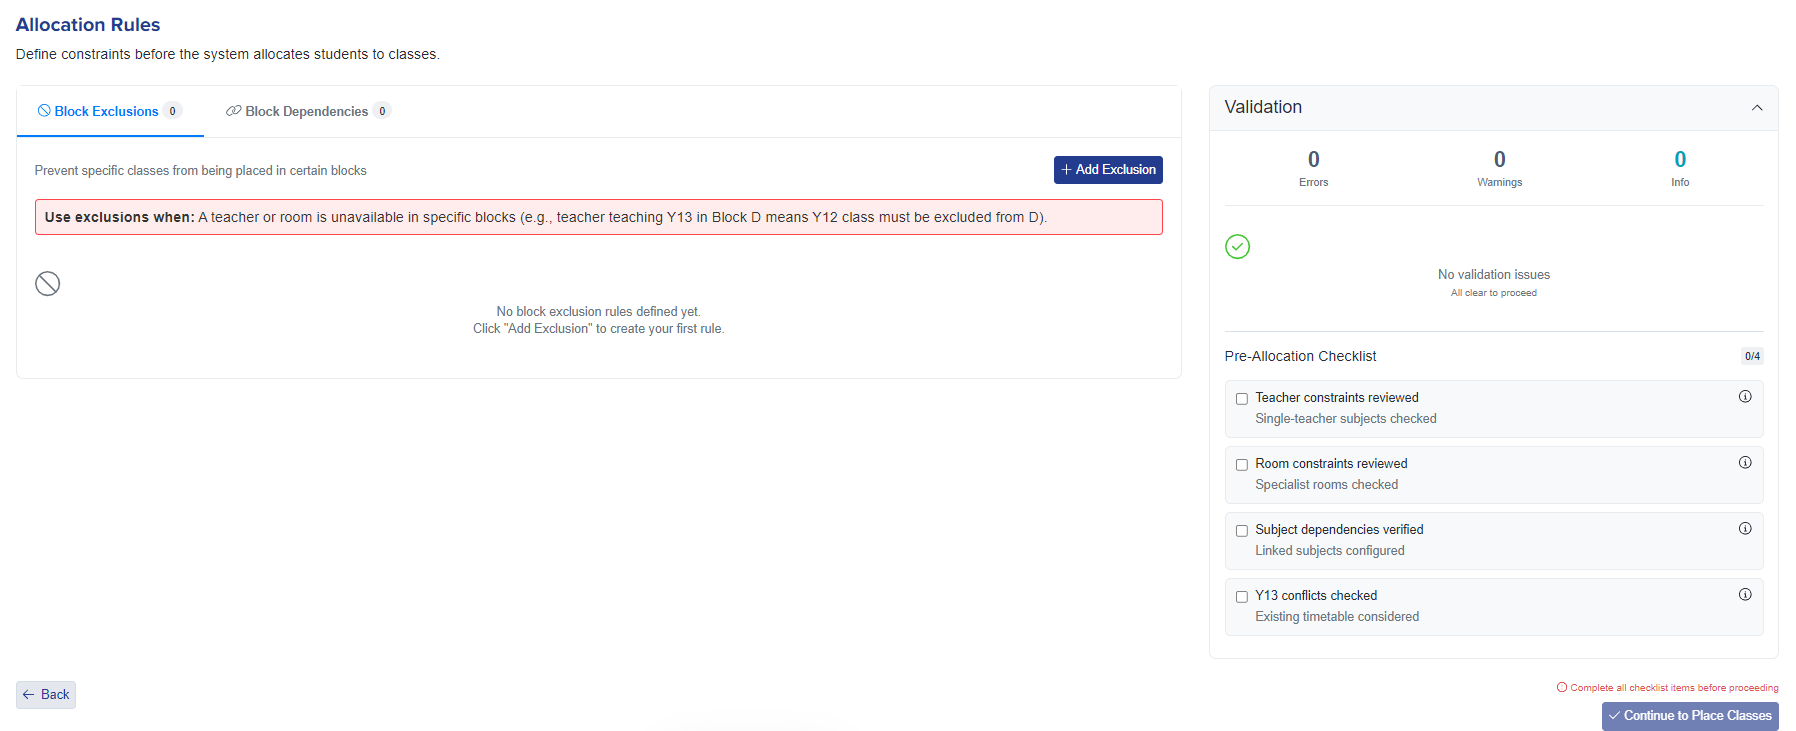
The Allocation Rules step enables you to apply constraints on blocking before proceeding to generate your model. For example, specifying that a subject must be excluded from a particular block, or that a specific subject combination is dependent on particular blocking.
In the Place Classes step, click “Allocate” to generate your model.
You’ll then see the best-fit model for your option blocks, based on your students’ subject choices. There’s a lot of information displayed on this screen, and we’ll walk you through how it all works.

Once your model has been generated, you’ll have several options available:
-
Freeze — Locks all classes and allocations so that no further changes can be made.
-
Unfreeze — Unlocks all classes and allocations, allowing further edits or recalculations.
- Allocate button — allows you to recalculate student class allocations using three options:

-
Recalculate class allocations for selected students only
-
Recalculate class allocations for all students, except those with frozen allocations
-
Recalculate class allocations for all students, including those manually assigned to classes
You can generate a model with some classes removed without the need to delete that subject out of the entire platform by clicking on the 'X' to the right of each class.

4. Duplicate - use this button to create alternative versions of your model. This is useful for testing “what-if” scenarios — for example, removing, moving, or adding a class.
Before trying different scenarios, click Duplicate, give your current version a name, and save it. You can later return to this version by clicking Load at the top right of the screen. You may then create another version to adjust and compare outcomes.

5. The + Add Students button lets you add additional students to your current options model as needed.

6. The Update Offers button allows you to automatically publish the subjects modelled by the options module directly into each student’s Offered Courses list.

Instead of manually transferring subjects for each student, you can use the Update Offers button to let the system automatically update the offered courses for your students.
When you click this button, a pop-up window will appear with the prompt “Select who you want to update offers”, giving you two options:
-
For All Allocated Students – Updates the offers for all students included in the allocation list.
-
Only Selected Students by Offer Status – Updates the offers for a specific group of students based on their current Offer Status.
This action pushes the subjects to each student’s offer list so they can be included in their offer email. Once you’re satisfied with your selection, type “YES” to confirm.
Note: This action will override any existing offered subjects.

7. The Allocation Report button exports a list of students’ allocations, showing which subjects and classes they’ve been assigned to within your model.

At the left of the screen, you will see a line of ‘emojis’, showing you a quick breakdown of how happy your students would be with this particular class arrangement.
- (Broad smile) indicates how many students were placed into all of their main choices without needing to use any reserve options. Ideally, all your students would fall into this category, but realistically, this may not always be achievable.
- (Slight smile) indicates the number of students who had to be assigned to their reserve choices to receive a full timetable. The emoji to its right shows how many students had to be assigned subjects that were not part of their original choices.
- Some students might not be placeable at all. This means that even if all their reserve choices are used, they have selected subjects that cannot be accommodated. To identify these students, simply click on the last emoji. A grid will appear, allowing you to assign them to other classes.

- Next to the emojis, you’ll find the Happiness Score, which provides a percentage of students who received all of their subject choices. A perfect score of 100% means every student has been fully satisfied with their allocations. You can use this score as a benchmark to measure whether any timetable changes improve or reduce overall satisfaction.

- Below the emojis, you’ll see a visual representation of your blocks, along with a list of classes that the system recommends for placement in each block. The system automatically generates tentative class names using the standard naming convention (for example, 12A/Bi for the Year 12 Biology class in Block A). Clicking on a class name displays the list of students the system has tentatively assigned to that class.
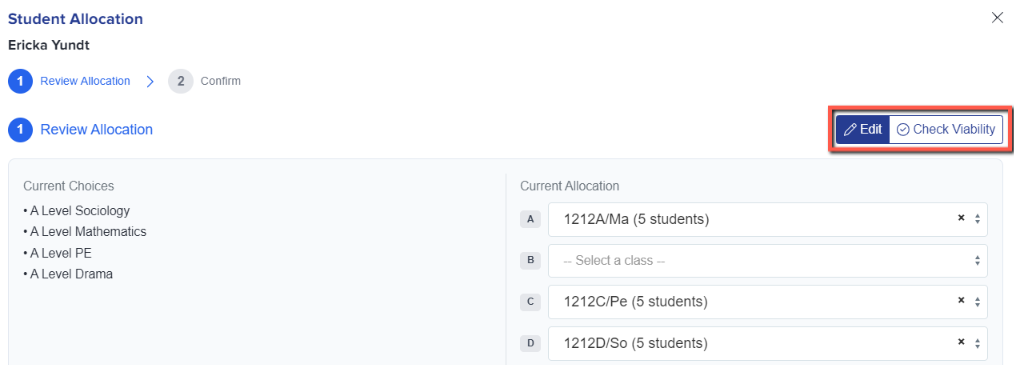
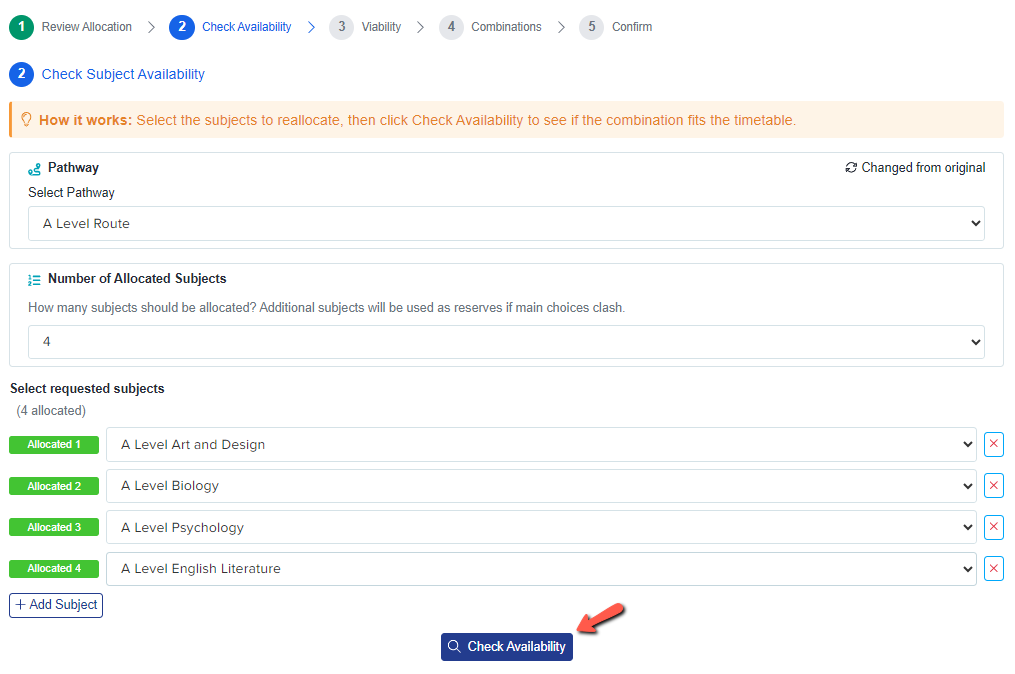
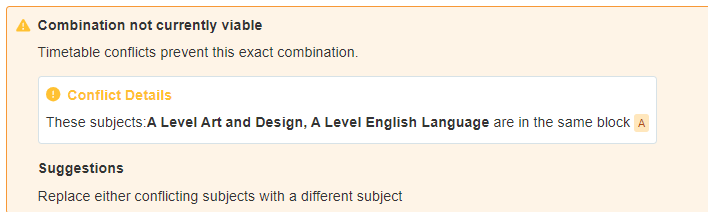
By clicking an emoji (particularly the unhappy students), you can edit their choices, to add them to other subjects if required, or use the check viability option to determine whether their subjects are viable, and review any clashes.

Note: If any students in the group have not selected the subject as one of their main choices, an appropriate emoji will appear next to their name. You can also click on a student to modify their subject choice if they decide to pursue a different option.

When you hover over a specific subject, all other classes for that same subject in different blocks will be highlighted. This feature helps you quickly identify where each subject’s classes are positioned across the various blocks.

When you hover over a class, you will also notice a few extra icons:
The "push-pin" icon allows you to lock a class in place. This serves as a reminder for yourself to ensure that you don’t move a class from its current location.

The copy icon (as shown below) allows you to duplicate a class. For example, if you have a class with 50 students and have found another teacher to take half of the students in their own separate class, clicking the duplicate button allows the system to make a copy of the class and divide the students evenly between the two classes.

The "magic wand" icon allows you to test if another block might better suit a particular class. While the system has already placed the class in the BEST location, there are times when you may need to move the class (often due to a staffing clash). Clicking this button will quickly calculate which other blocks would be most suitable and show you the result. You can then move the class to another block by specifying which one the system should transfer it to.

If you wish to delete a class from the model, click the "X" to the right of the class. The system will then remove the students from this class, and the number of unhappy students at the top will likely increase slightly.

At the top of each block’s column is the "Add new class" button, which you can press to add a new class to a block.

Note that you will likely spend several days working on this model. Before enrolment day, however, you will want to publish your finalised model to the timetables section of Admissions+ so that you are able to successfully enrol students into their confirmed classes.
Keep in mind that, until now, this has been a projection, but on Enrolment Day, it becomes reality.
8. When you are ready, click on the 'Publish' button (after making sure you have selected the correct model) to transfer the model to your Enrolment Day timetable in Admissions+.

Once published it will time-stamp the date and time you have finished it.