You may need to share information with parents or students in advance of them joining you, so they know which groups they belong to, what equipment to purchase etc.
Here is the process for importing extra information for the applicants, and how to use that information in email templates.
First: Export the students out of A+ into a CSV
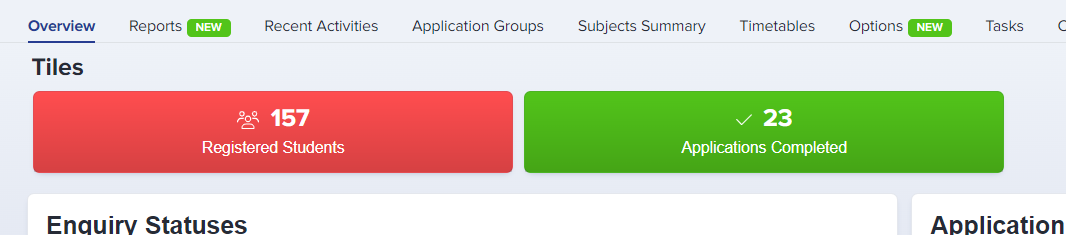
1. From the main dashboard, click on your "registered students" tile
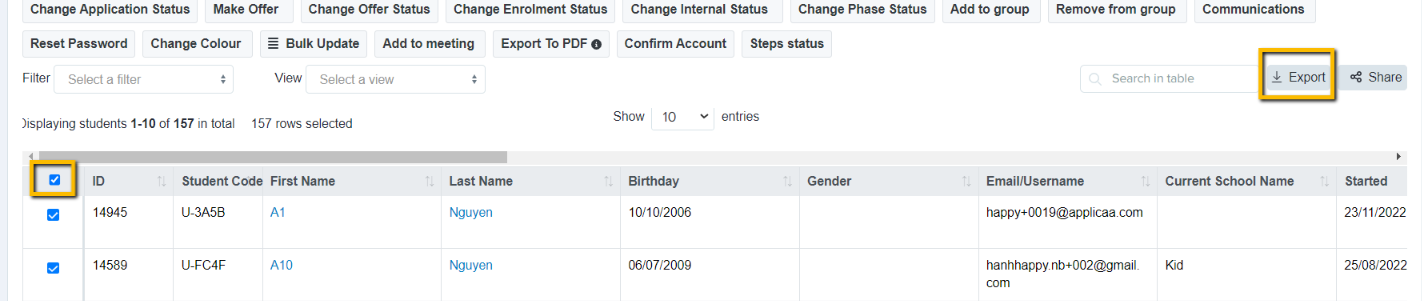
2. Select all students using the checkbox on the left of the table and click the "export" button on the right; export to CSV
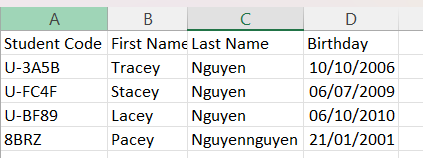
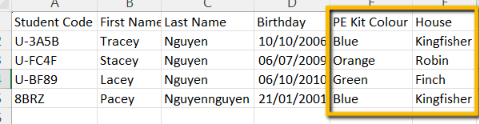
3. Open the CSV and delete most columns - keep student code, first name, last name, birthday - nothing else needed
4. Add new columns to the CSV for each of the new fields you want to import data in for (eg class, house, colour etc) and save the CSV
Next: Create the fields in your admission form to receive the data into
1. Go to settings > application form > step 6 (additional information)
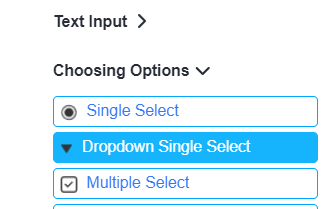
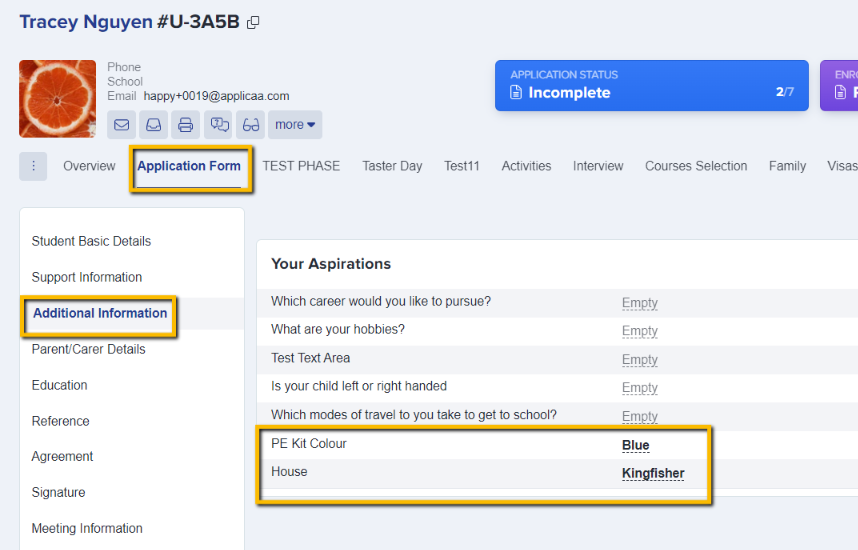
2. In step 6, click the + New Question button and select "dropdown single select"; set the property group as "additional questions" and the title can be " PE Kit Colour", as in the example above; click to add the answers

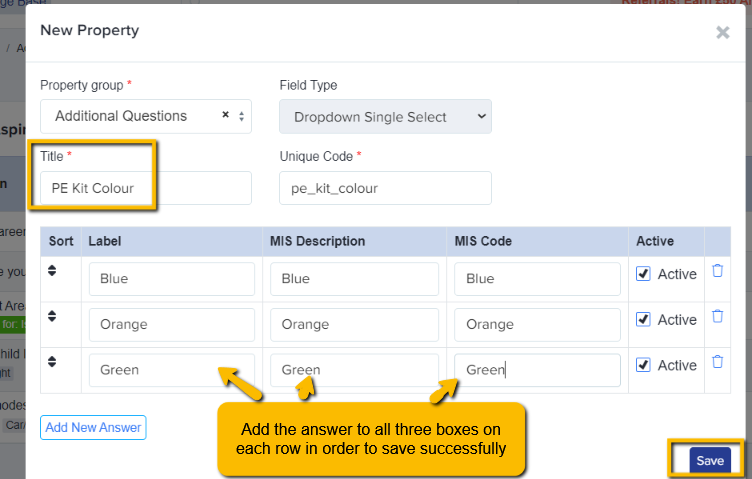
3. Turn off the internal and external switches, and leave visible on profile turned on (this makes it an "office use" field - you can see it, but applicants cannot)

Finally: Import that data in from the CSV:
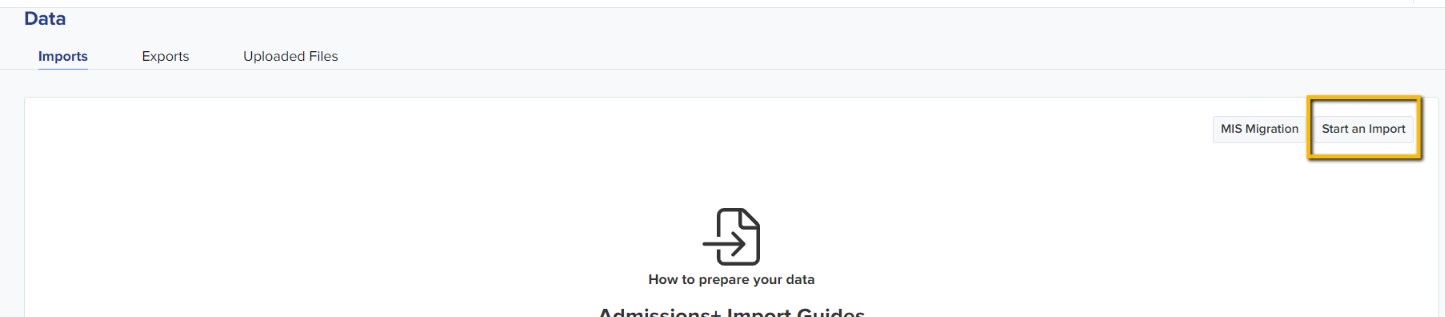
1. Go to Data > Import > Start an Import and give the import a name

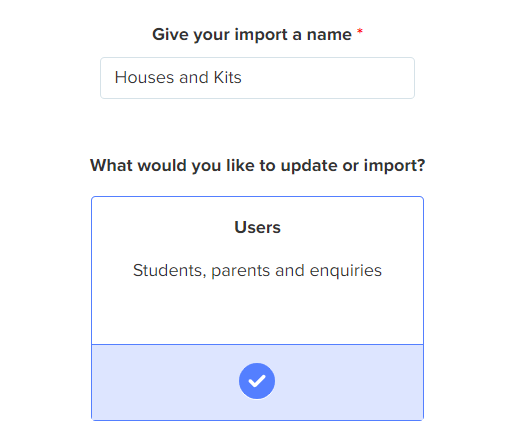
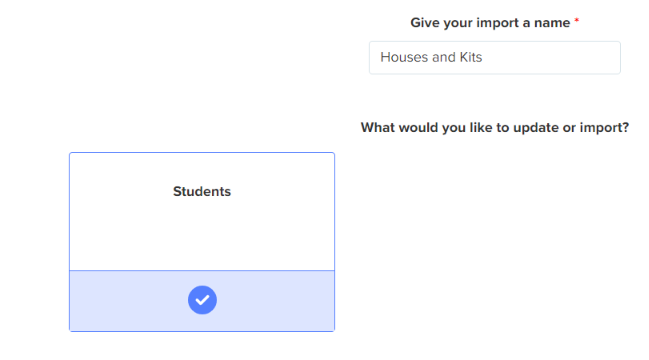
2. Choose "users", next, "existing users", next, "students" and then attach your CSV

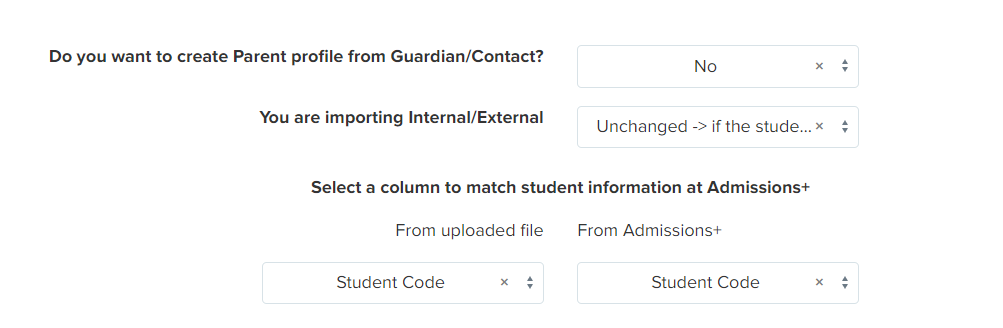
3. On the mapping step, you don't need to create parent profiles, and the type of student is "unchanged"
4. For the "select a column to match" fields, choose "student code" for both - this is the best way to ensure the data gets mapped to the correct child
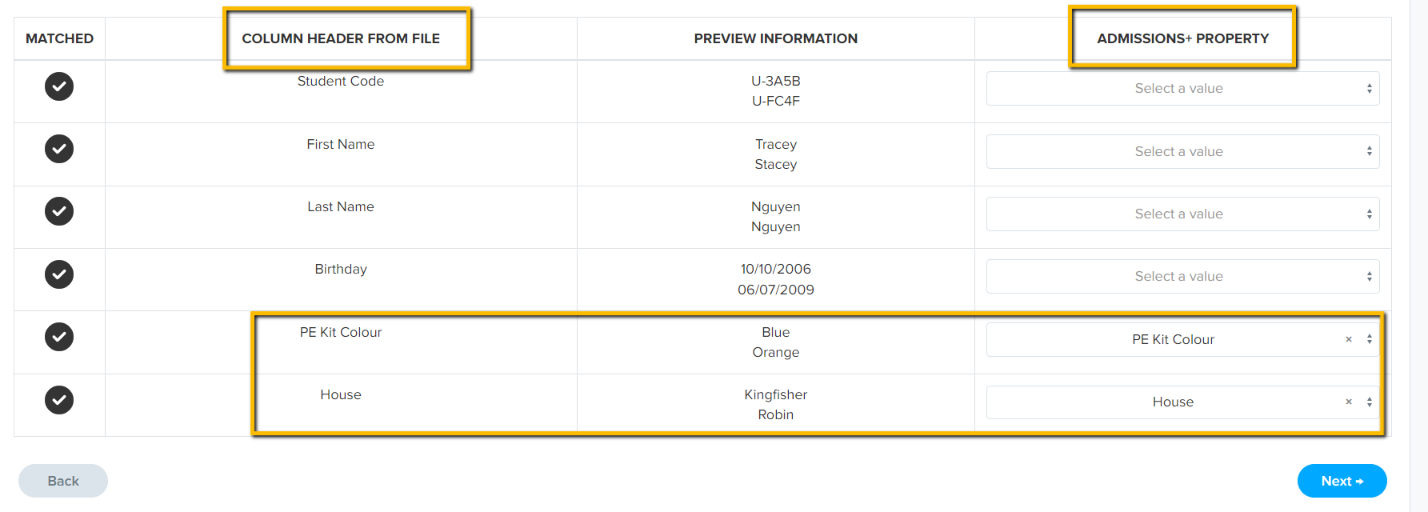
5. The only fields you need to map underneath are for the new data (their names and DOB are already in, so you don't need to reimport those) - map the columns on your CSV to the corresponding fields in A+ and click "next" to complete the import
Check the profiles of some children, to see that the data has been imported successfully:
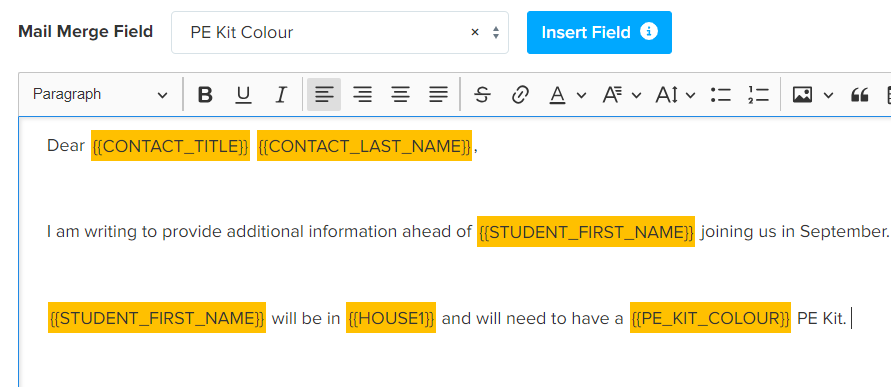
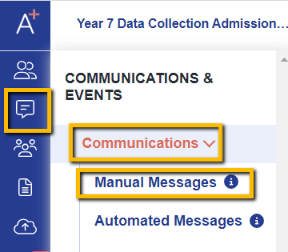
You can then build your email template by going to communications and events > communications > manual messages and creating a new template.

The fields in your form will be available for you to select as mail merge tokens, for each of the unique values you need to share with the parents.