How To Send Test Emails
This article will show you how to send a test email in the Communications Area
To send a test email go to Communications & Events > Communications > Manual Messages or Automated Messages.

Click on the kebab menu icon on the right hand-side and select Send Test.

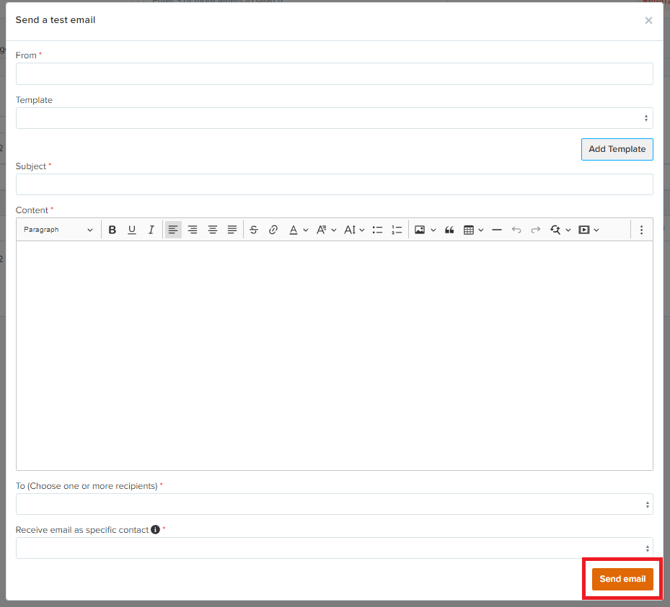
From the pop up, fill out the required fields for the following:
- From: This is the address where your message is delivered from.
- Template: This is a pre-customised email layout that you can be used to create an email. You will need to select the template you want to test and the click "Add Template". Once you add the template the Subject and Content fields will be pre-populated.
- Subject: This is the headline for the content of an email.
- Content: This is where you can build and edit content of your email
- To: This is the person you want to receive the test. This could be you and / or a colleague.
- Receive email as specific contact: This is to receive the email as a parent / student. We use this to ensure that the tokens are working correctly and pulling the correct information that the school wants. The person you select is not notified that their details have been used for any testing.

Once you have completed the fields above, click 'Send email'.
You will receive the email, populated with the mail merge tokens relating to the person you chose from the "receive email as specific contact" list.