Application form useful information
Note: The form that you are using has already been tailored for your specific entry point and has the collection of questions that are available for data transfer to your school MIS system.
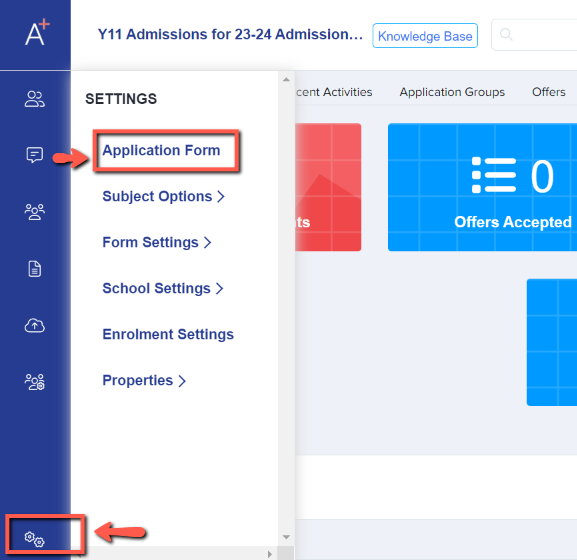
For you to start customising your form, go to the Settings area and then click Application Form.

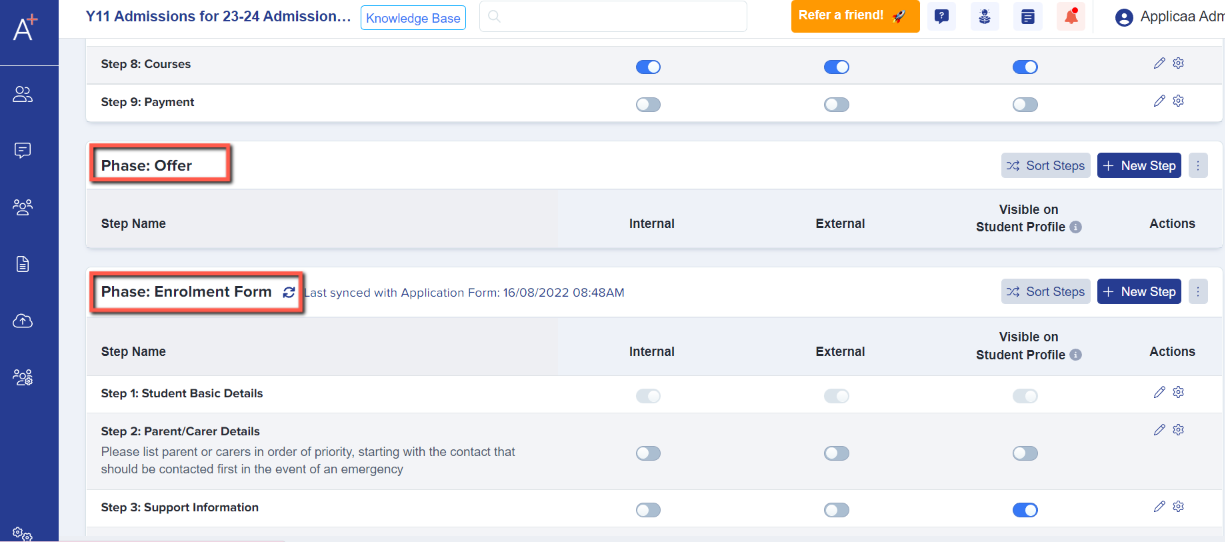
You'll notice that your application form is in phases. First is Account Creation which is how users can register. Users can also be imported into the system and a welcome email will be sent for them to access the form.

Next will be the main Application Form and then you have the other phases such as the Offer Phase and Enrolment Form.


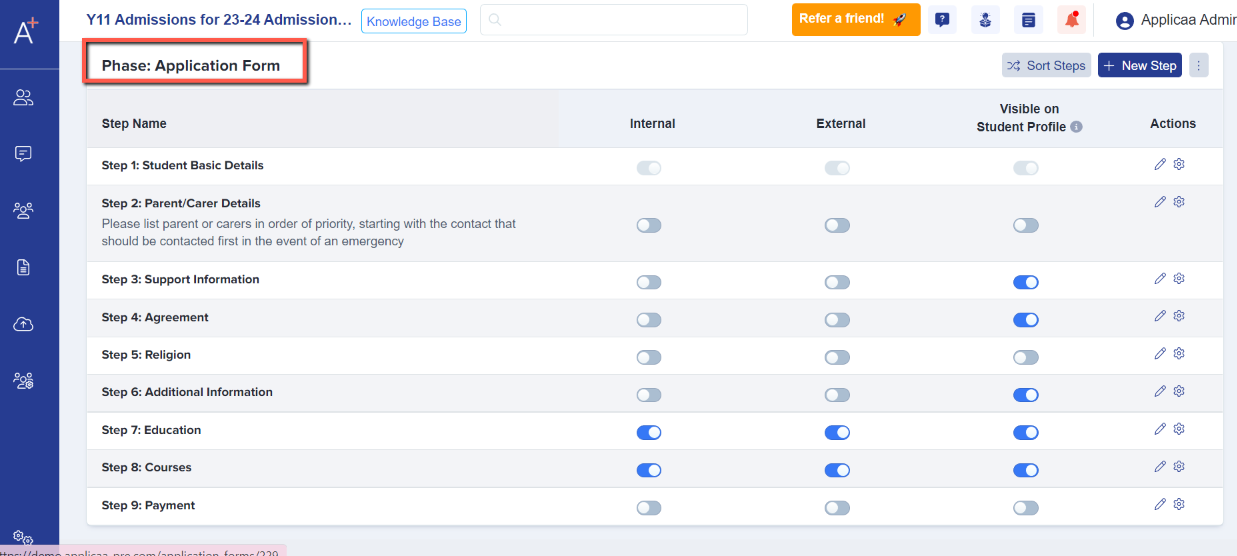
For most entry points, the main phase that you'll be using is the Application form. As mentioned, this has already been tailored for your specific entry point.
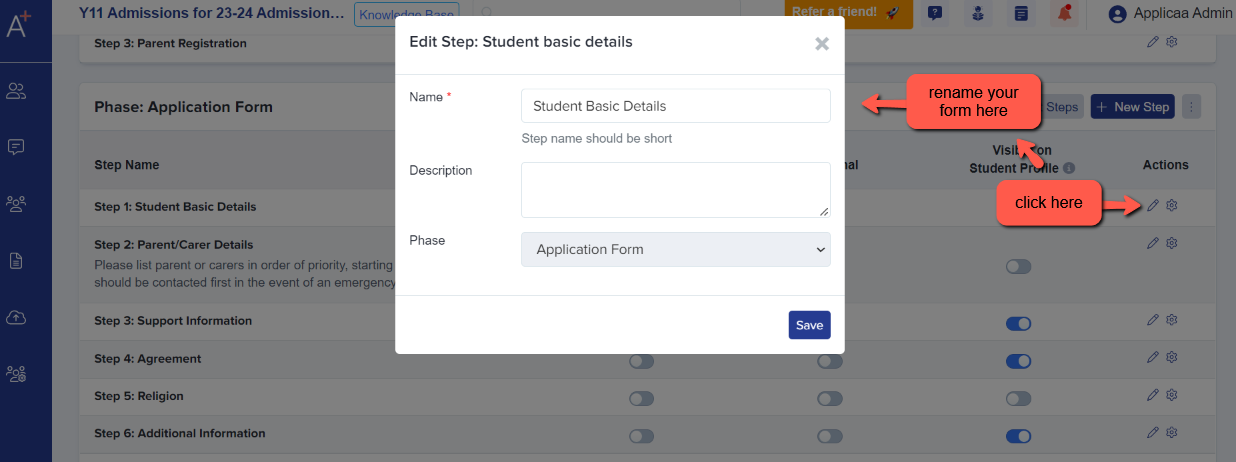
As you can see, you can edit the name of the steps by clicking the pen icon and a pop-up will show where you can rename the step.

You'll also be able to decide if that step is on or off for Internals and Externals. Except for Step 1 which is switched on by default. If you wanted to turn a step off for a particular cohort of students then simply click the toggle off.

For the Year 7 data collection process, most students will be tagged as external applicants.
Please see 'Application our form customisation guide' for more detailed instructions.