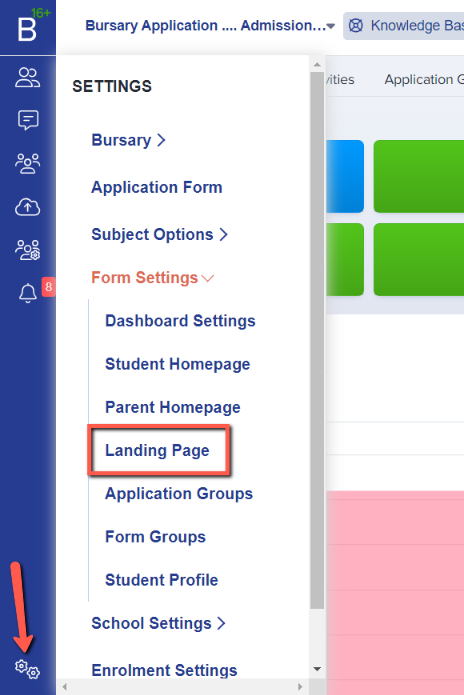
Click on Settings > Form Settings > Landing Page
The Configuration Mode section allows you to select how you accept applications - typically, bursary applications are made by the student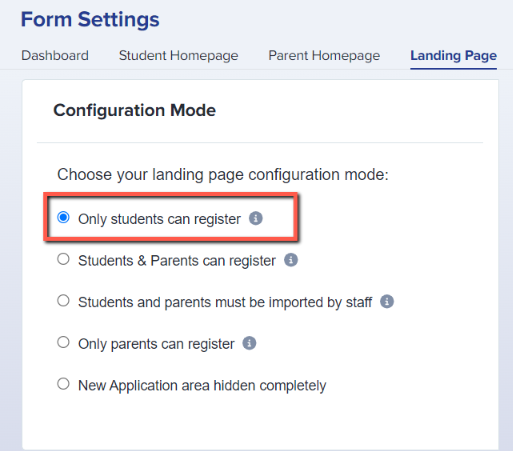
The Landing Page section has 3 sub-sections and you may customise them by clicking on the Edit button.
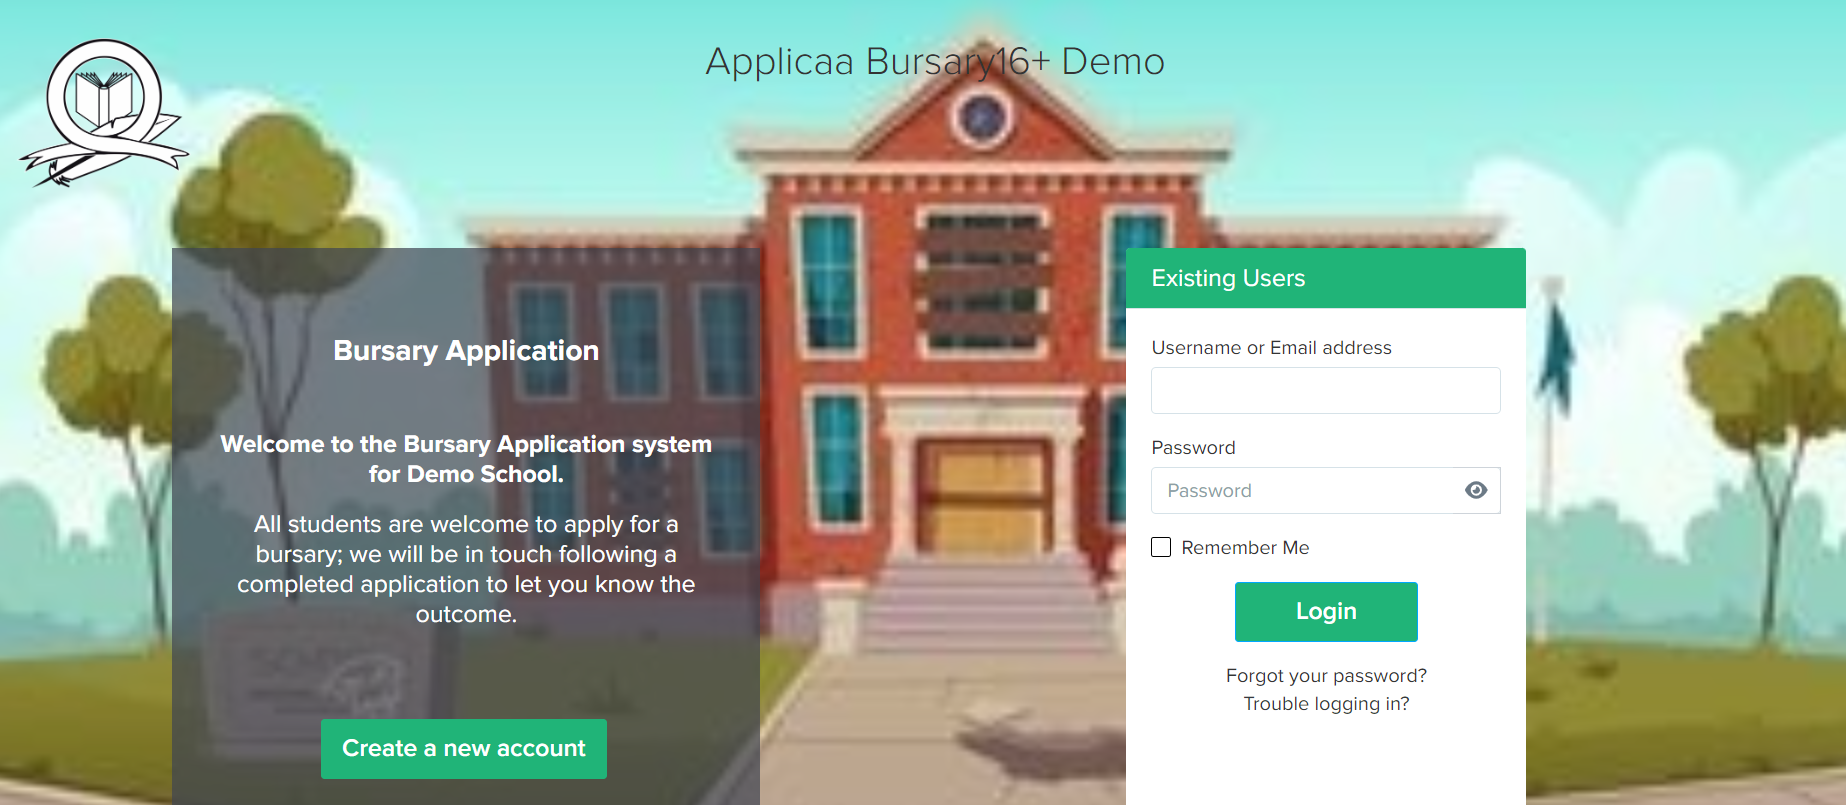
Note: Just beside this section, you see a preview of your landing page.
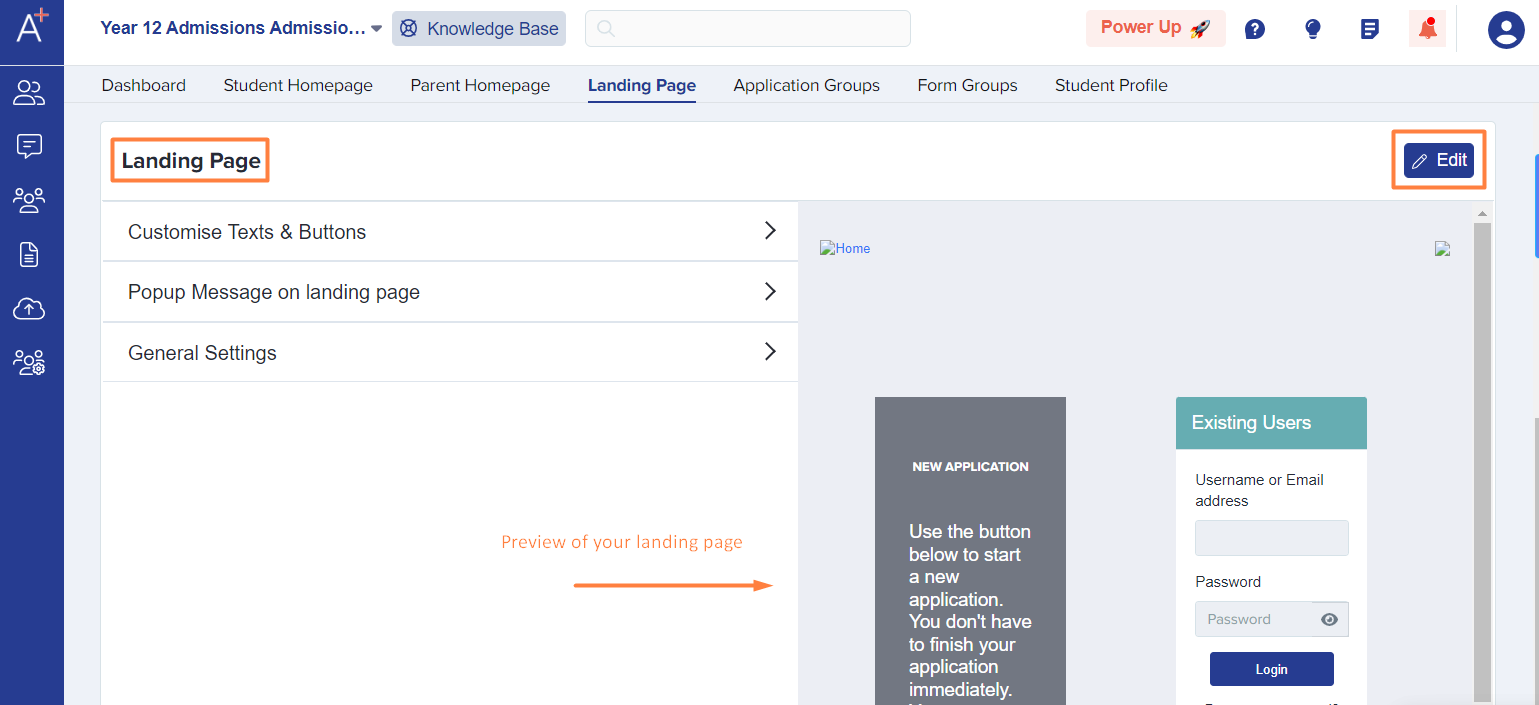
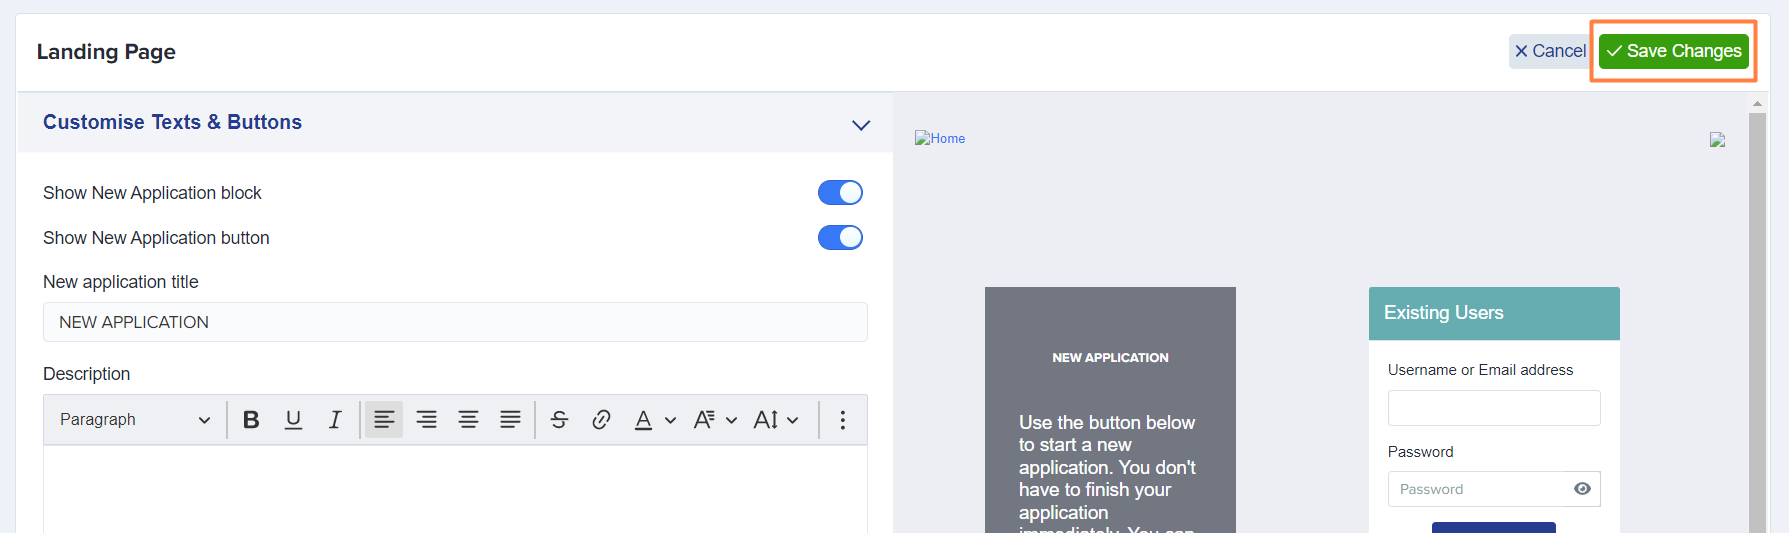
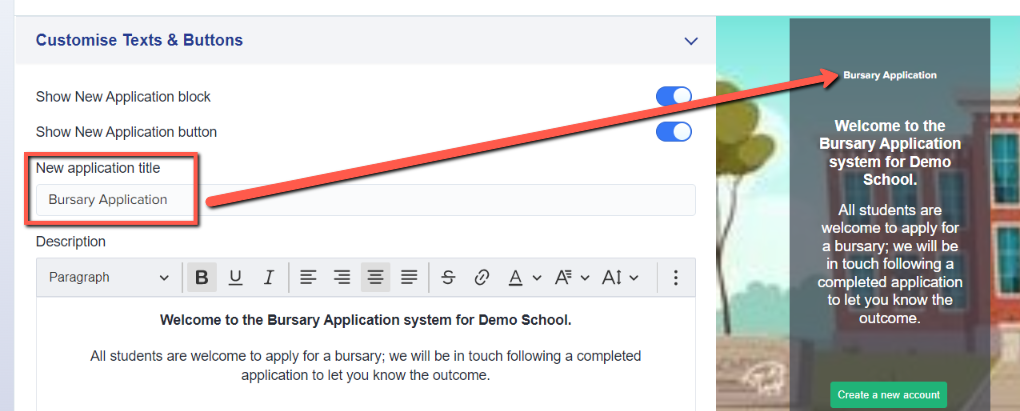
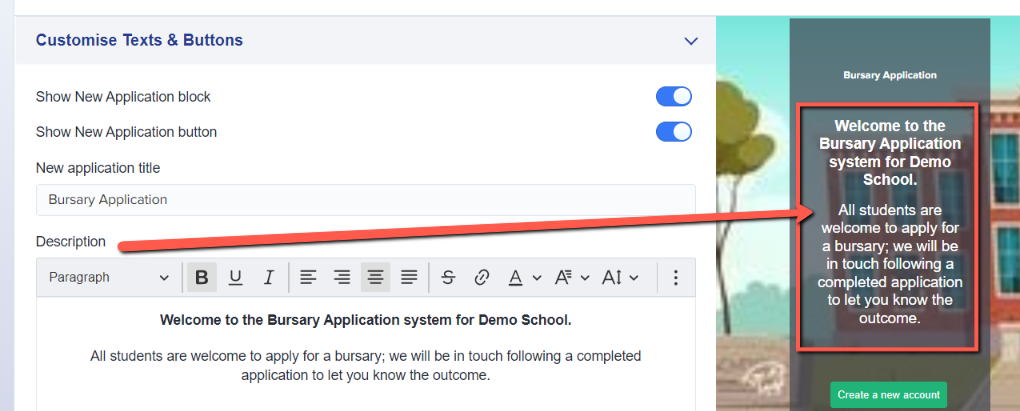
Customise Texts & Buttons
- Show New Application block - controls the visibility of the New Application block on the landing page
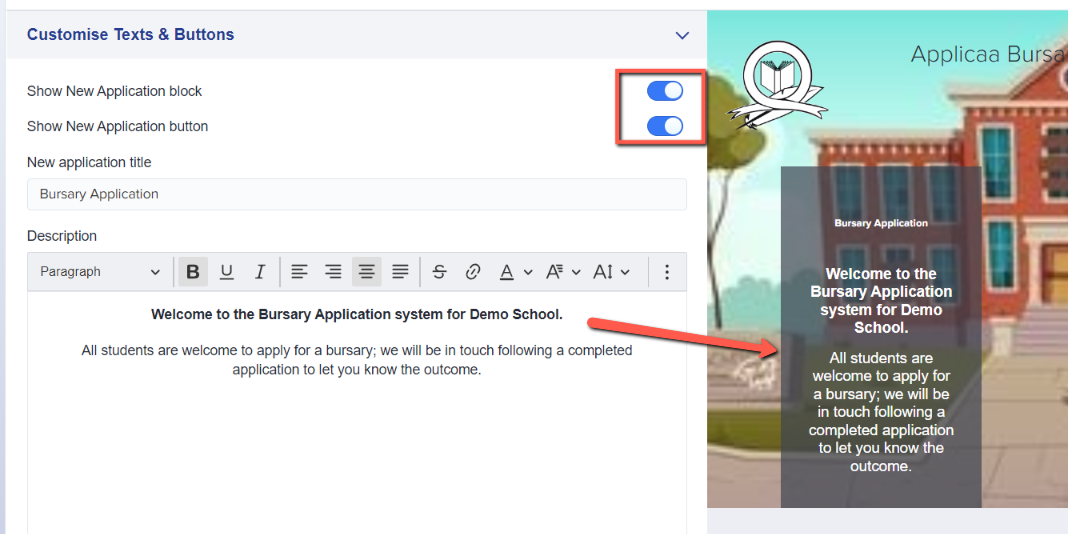
- Show New Application button - controls the visibility of the New Application button on the New Application block
Note: Schools usually disable this after the deadline for bursary applications, or if your Bursary 16+ system is linked to your Admissions+ system and all of your applicants already have an account - in which case, they would log in as Existing Users instead
- New application title - allows you to change the title on the Application Block
- Description - allows you to put a short message or instructions on the New Application block
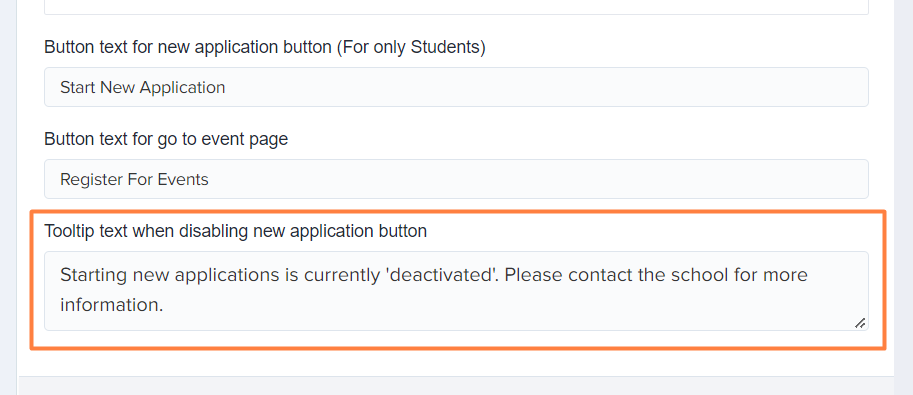
- Button text for new application button (For only Students) - this allows you to change the text on the New Application button (as indicated, it is only applicable when you set the form to accept applications from students only)

- Tooltip text when disabling new application button - when you decide to disable the New Application button (after the deadline for applications), the New Application button will be greyed out and students will see whatever message you put in this field
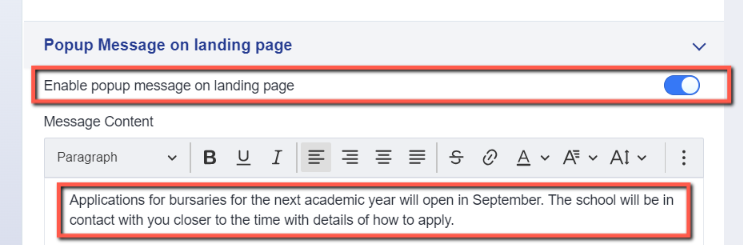
Popup Message on landing page
You may set a popup message on the landing page by enabling this feature and putting in the message. Schools usually use this for important announcements that they don't want students to miss - it will be the first thing they see when they access your landing page.
General Settings
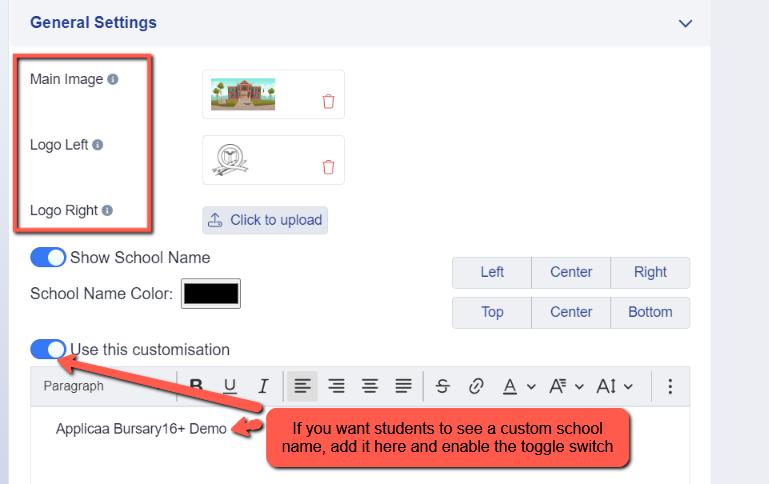
- Main Image - this is where you may upload the photo that will serve as the background image of your landing page
- Logo Left - this is where you may upload a logo that will be positioned on the left side of the landing page
- Logo Right - this is where you may upload a logo that will be positioned on the right side of the landing page, perhaps the MAT logo if you have one
- Note: click on the Click to upload button and select your photos or logos
Show School Name - you have the option to show the name of your school on the landing page by enabling this feature
Note: you also get to decide where you want it to be positioned

For any changes made, click on the Save Changes button to save.