How to colour code your Bursary students
This article will tell you how to use colour coding on the platform.
First of all, you need to open a list of your applicants. In this example we will check and do colour code by going to the 'Bursary' or 'Awarded' dashboard tile but you can go to any list or any place where you can load a list of applicants.

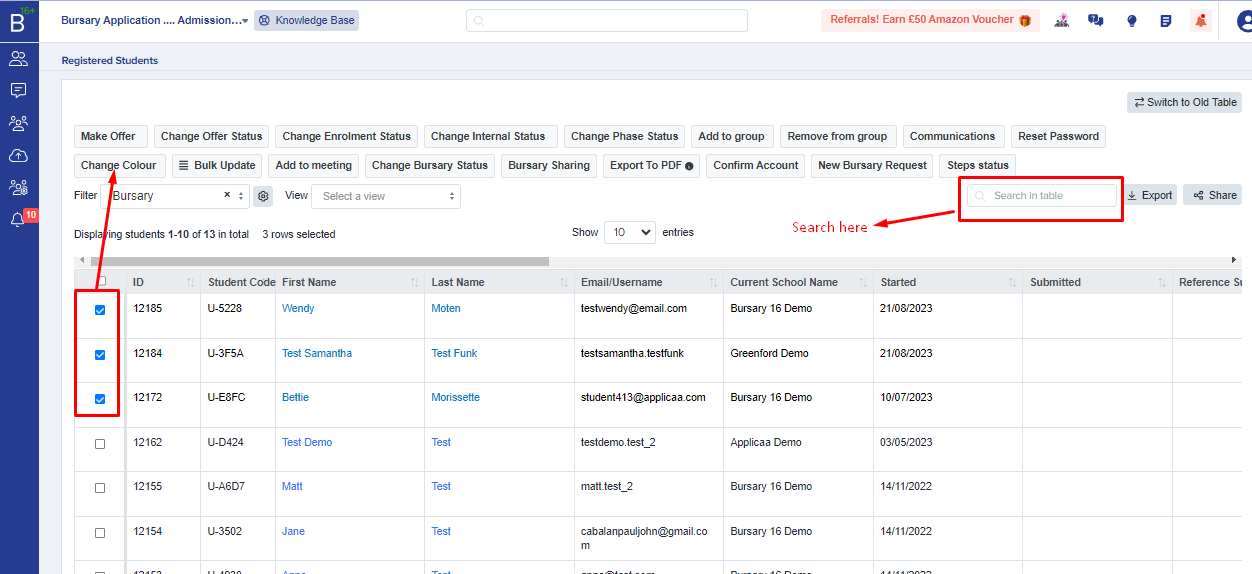
Once loaded, simply “select” the candidates you want to colour code by ticking the check box on your left or you can “search” their name or email on the search tab then you can click on the change colour.

You can choose a colour from the selections. It is up to you to assign the meaning that you want to give each colour internally with your team.

“Refresh” the page to see the colour coding you applied. The great thing about colour coding is that, it will follow the students around on any table they are loaded, and you will be able to see that colour and it is easy to later change their colour.

This is a great way to see the colour and update it on mass.
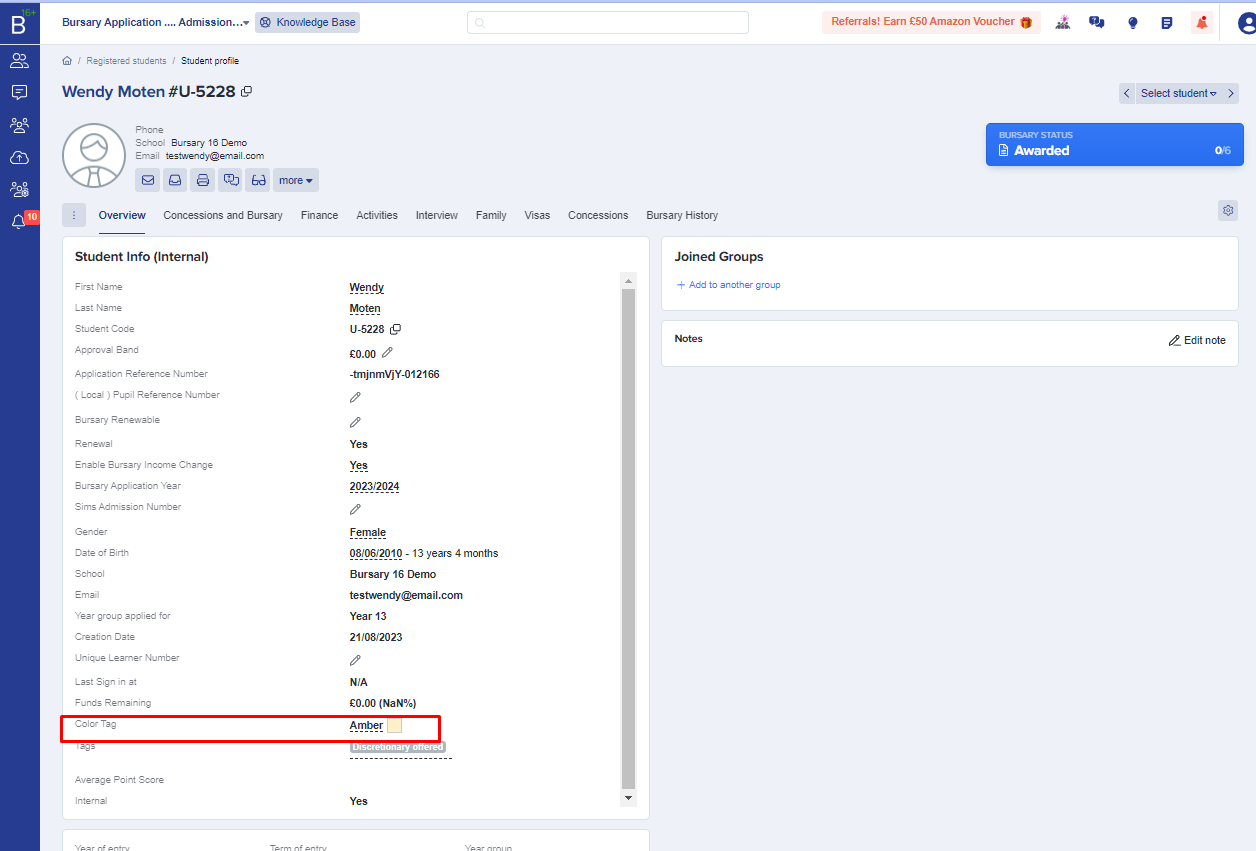
It is also possible to view the colour when you are in an “applicant’s profile”. Just go to the “color tag” and you are able to change colour from here as well.
