How to change a student band by discretion
This article will show you how you can make a discretionary change to a student's allowance band
In certain cases, you may need to grant a student eligibility for a specific Bursary Fund, even if they haven't met the required criteria. Alternatively, there are situations where students will be automatically qualified for one band, and you'll need to allocate them manually to a different band. ( You can do this as long as you're happy that you could show an auditor why you have changed the amount).
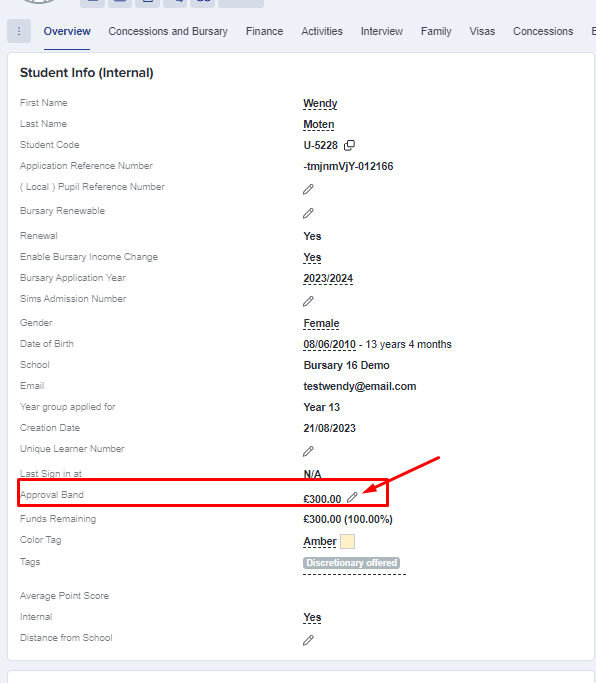
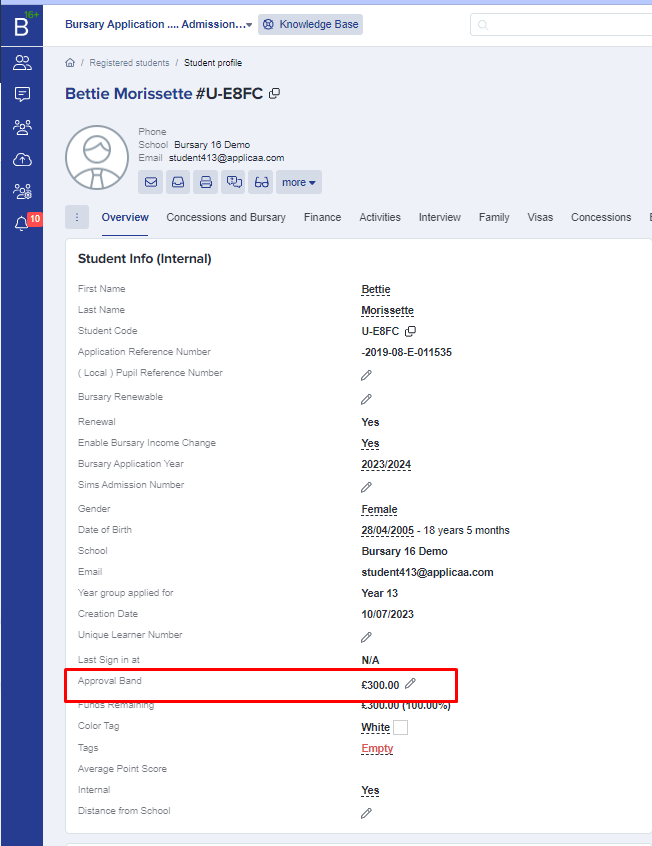
To make this change, go to the student profile > under Overview tab look for the 'Approval Band' field.
Note: Ensure that the student's bursary status is already displayed as 'Awarded.'

Upon clicking the pencil icon, a pop-up preview will appear.

*Overwrite Band Value - This should be the new value you wish to assign to the student, and it's necessary to provide a reason for auditing purposes. Please note that this is a manual input field, so you can enter any amount into it.

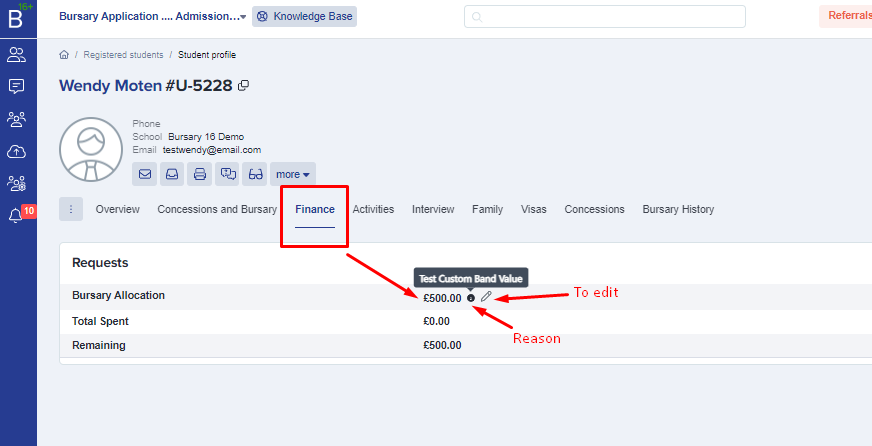
Now, when you navigate to the Finance tab within the student profile, you'll notice an i button next to the allocated amount, which provides an explanation or reason.
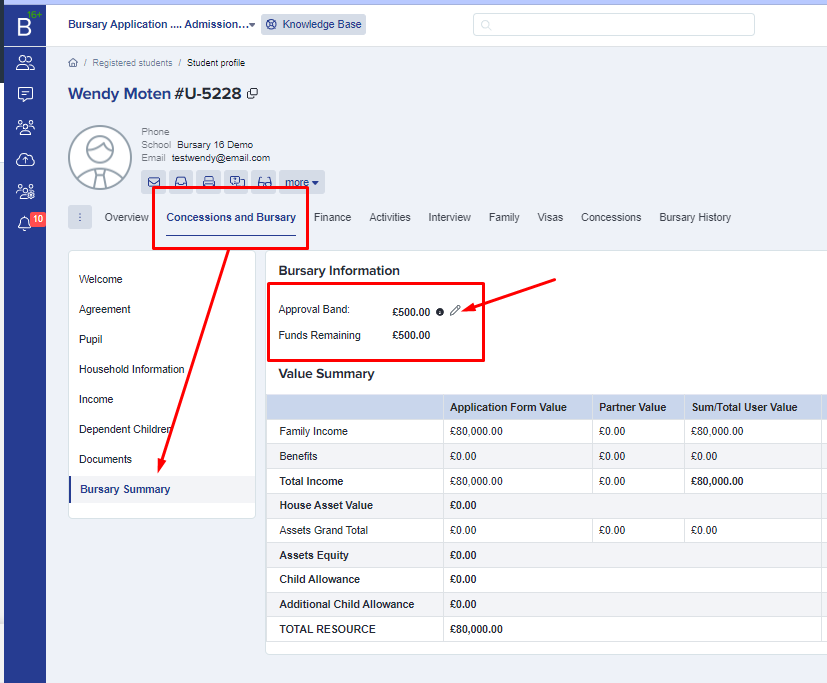
Another way of changing the band is by going into Concessions & Bursary tab via student profile > Bursary Summary section; Within this section, you'll find the Bursary Information, and you can make changes to the approval band by clicking the pencil icon.
Finally, you can determine whether a band has been modified by checking whether the 'Approval band' field has an accompanying i icon in the Overview tab. Hovering on the i will show you the reason for the change.
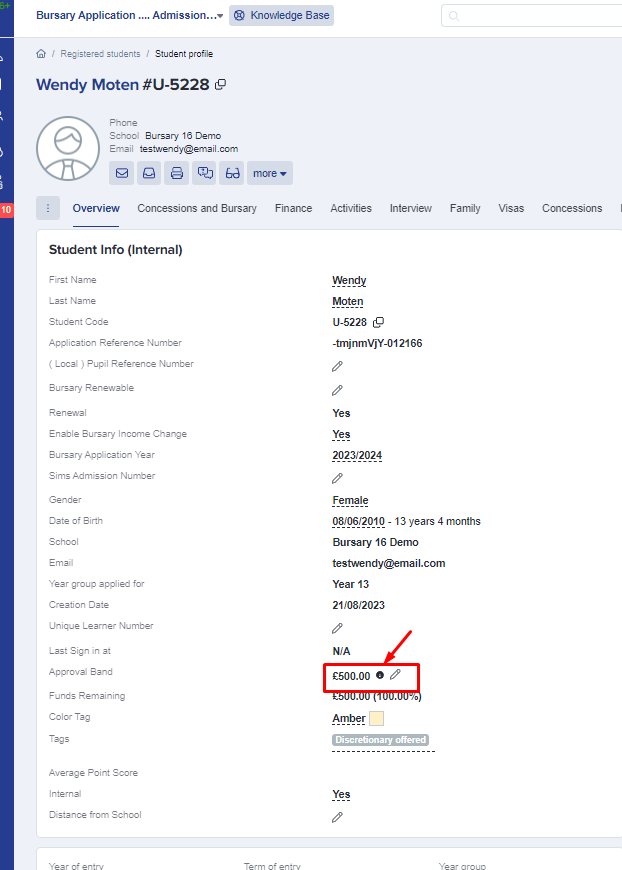
*Sample screenshot of a student's unaltered approval band.
The above is a work-around for extenuating circumstances and we recommend retaining evidence of why you have made this change, in case you are audited at a later date.