This will show you how you can customize and edit your application form; the form has already been tailored for your specific entry/ intake point and has a collection of all the questions that are available for data transfer to your school MIS system. Once your lookups are imported you will see all the available options from your MIS, available as answer options for students/parents.
If you would like to make some changes to your form, then please go to settings > application form. 
New and Old View Options in the Application Form Configuration
The Application Form configuration within the Customise Application Journey now features two distinct views for managing your forms:
- Old View: This is the classic interface you may already be familiar with.
- New View: This updated interface offers an improved experience, with enhanced usability and navigation features designed to streamline your workflow.
You can switch between the Old and New Views at any time with just one click, so you’re always able to work in the interface that suits you best. The New View is now the default across all platforms, but you have the flexibility to move between views as needed, ensuring a smooth transition and letting you adapt at your own pace. This update is designed to make the application setup experience even more intuitive and efficient for your admissions team.


Old View:
To view the questions within a step, simply click on the step’s name or select the settings cog icon found under the ‘Actions’ column.

New View:
On the right hand panel of the New view you can view the questions within a step by opening the drop down of the phase you want to edit then simply click on the step’s name or select the settings cog icon.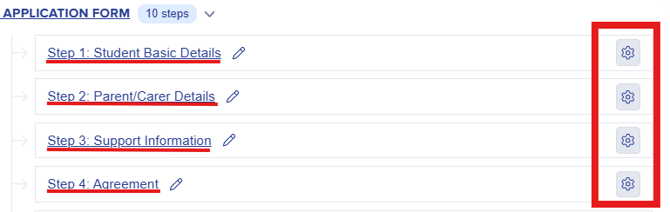
Within these settings, you'll be able to do a number of things, including removing existing questions, adding new questions, making questions either optional or required, and making questions visible to only external or only internal students, or both.
Within each step, you have sections that seat groups of questions.
Step Sections Configuration
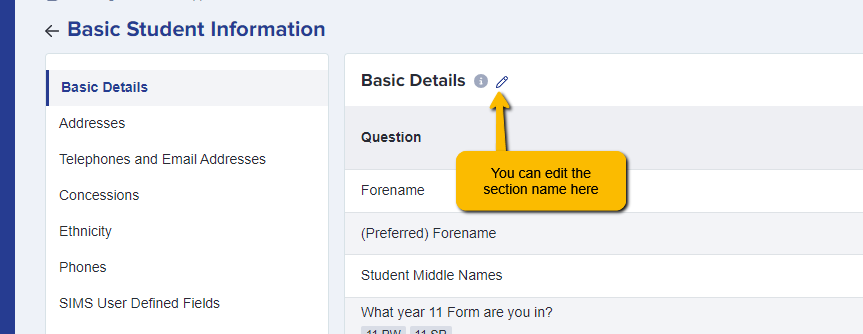
Customise Sections - This is the option you use if you’d like to add another section to the step you are working on. Once a section has been created, individual questions can then be added to it. This is where you can also sort your sections accordingly.

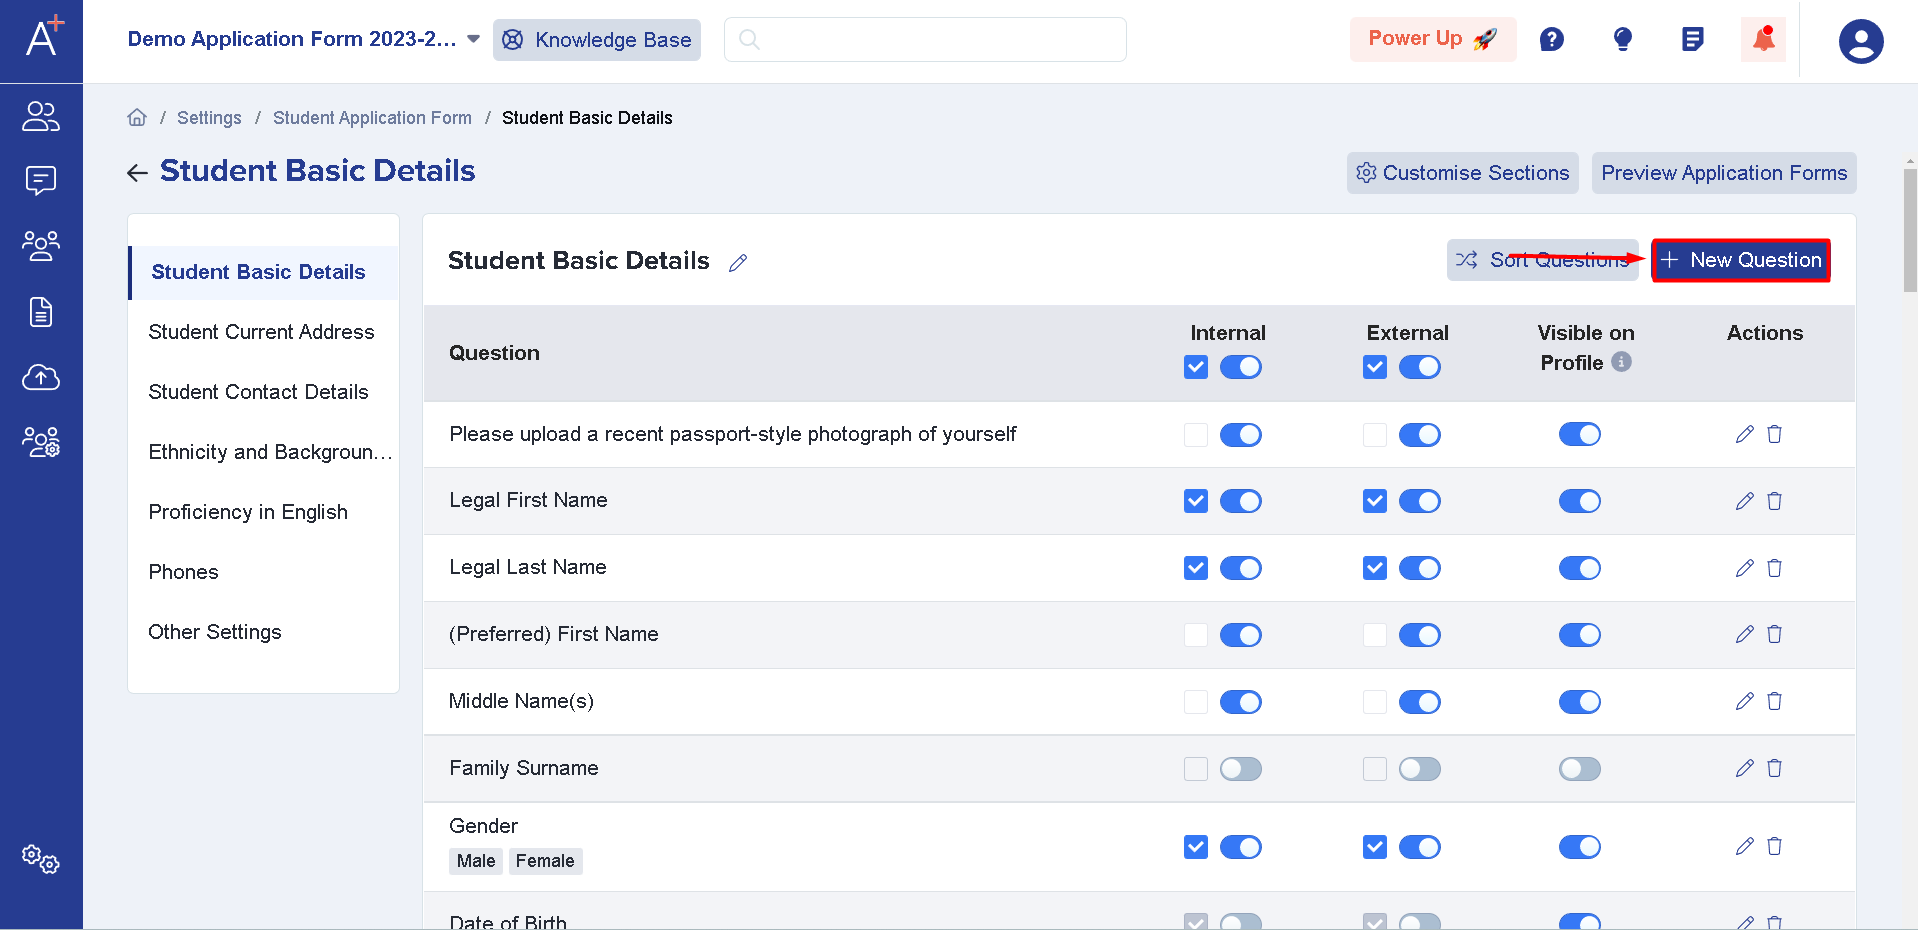
Here in step one - basic details, address, telephones and email addresses, concessions, ethnicity and so on - from the admin view, this is what it looks like.
Internals are students already on your roll in your MIS; externals are those who are not.
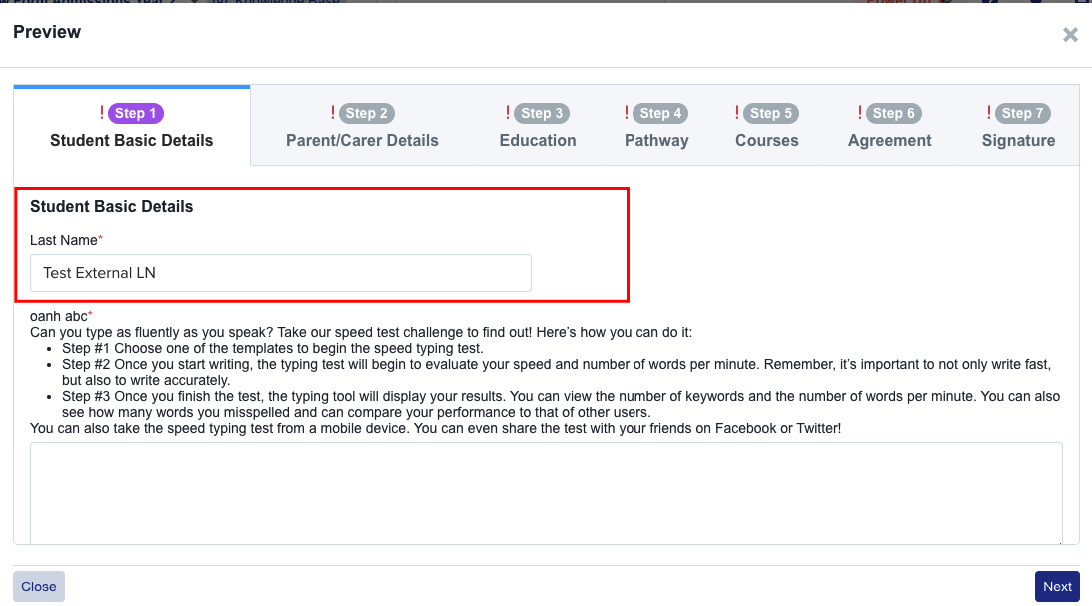
For example, if we turn off one question for external students here, and refresh the page...
 You'll see that this question is now gone for external students once you click the preview application form as external students.
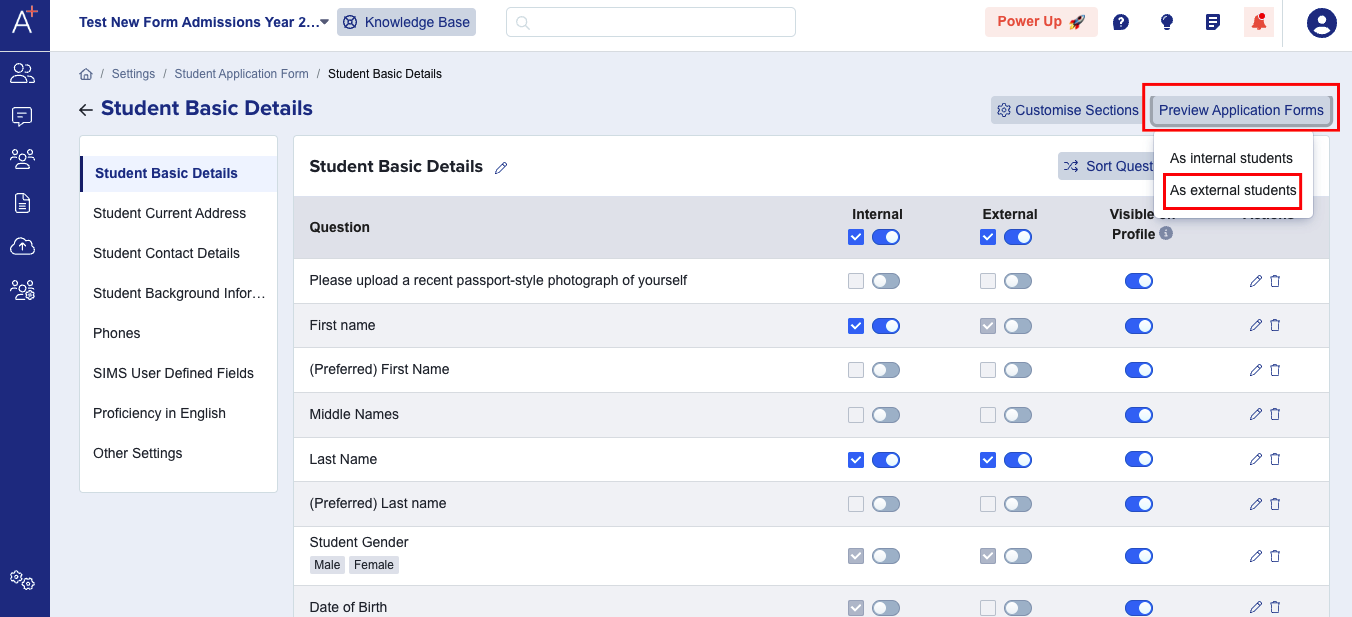
The "First name" text field is not visible for external students.
Another thing you can do is make a question mandatory; you simply need to make the check box ticked for Internal or External or both and unticked if not required/mandatory.
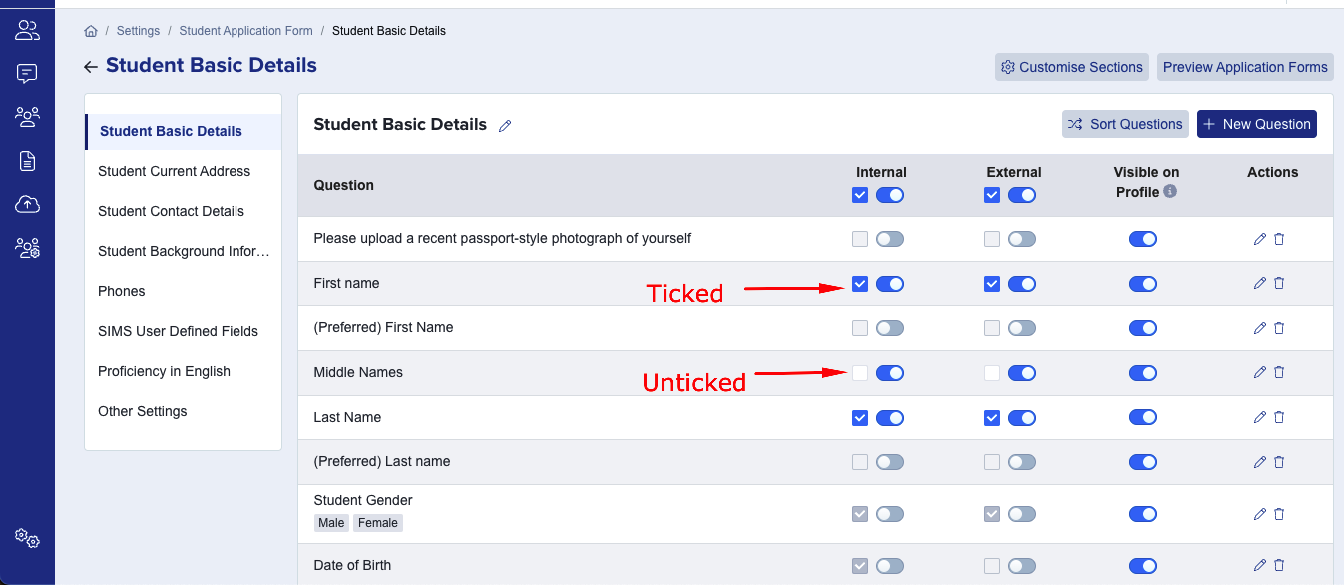
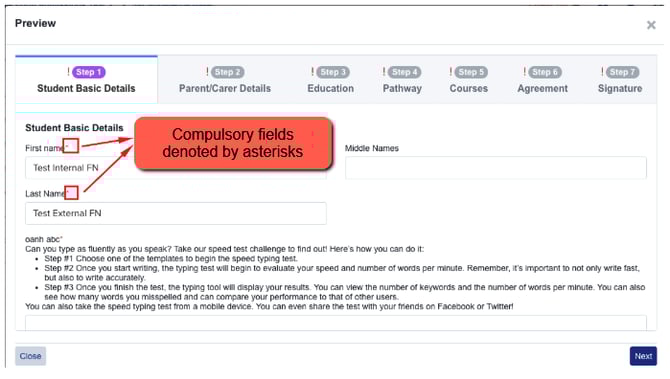
Questions within the application form that are required will be denoted by a red asterisk.
You can also add new questions to the application form, or if you remove a question from your form, you can actually restore it by clicking the + New Question button.

You're able to search for existing properties that you're interested in, or you can also create brand-new questions. So if you search for something and you find that what you're looking for is not a property already, you can go ahead and create it as a custom question.
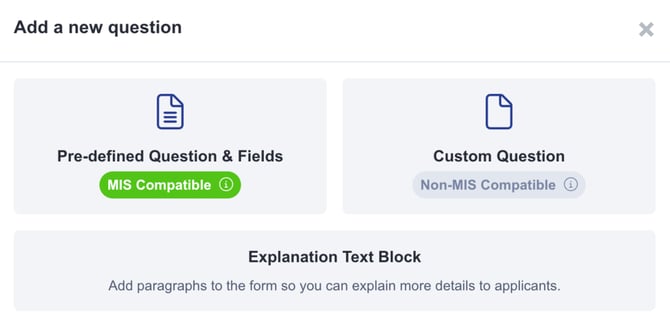
For custom questions, you can choose, text, number, currency, date or any one of these other options, depending on the data that you're collecting.
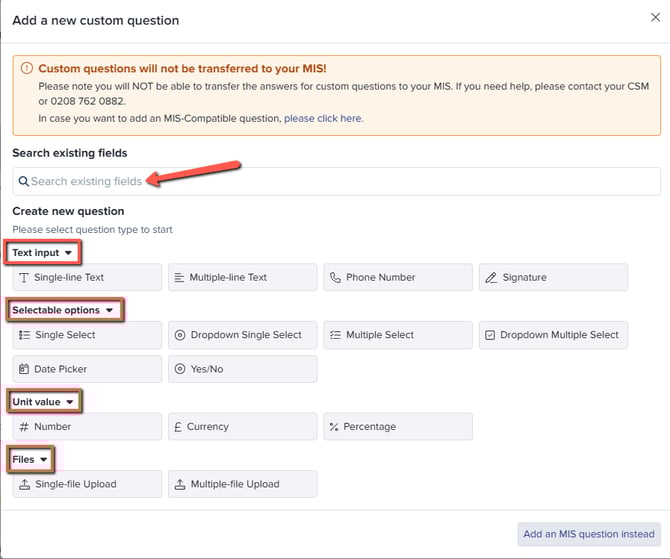
Once you've created your new question, you can actually put the questions in the correct order that you want. 
You can see how long the question is. So at the moment, it's taken across a hundred percent of the width. You can change that to 50% or 33%.
You also have the option to add User Defined Fields (UDF) on your form (Please note that if your MIS is SIMS these UDFs will be synced into the system automatically once you have downloaded the Admissions+ SIMS App).
If SIMS is not your MIS then this is how you could download your UDFs from your MIS.
Please go to Settings > School Settings > Integration.
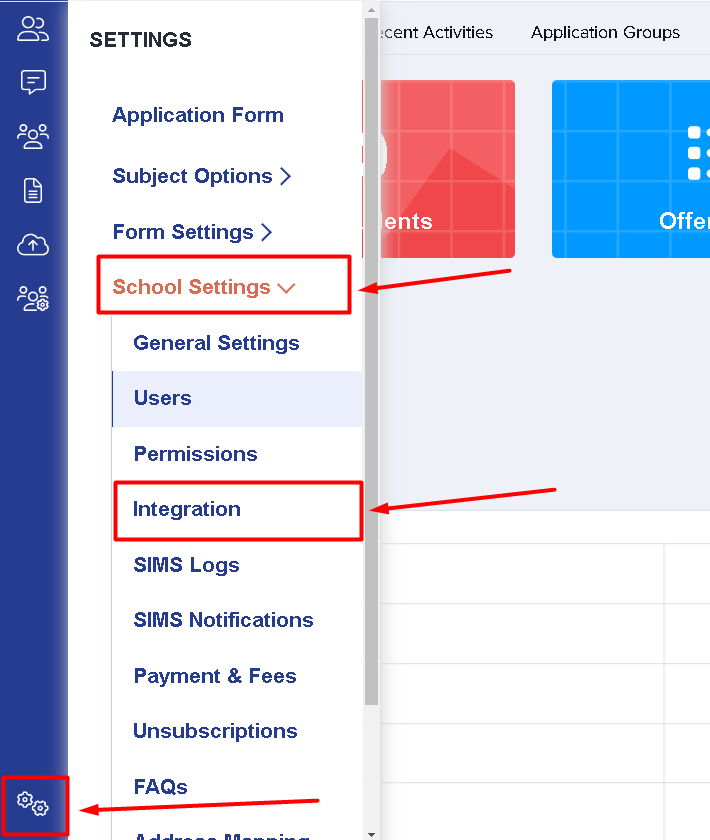
You'll then be directed to the Integration area, please click "Import UDF".
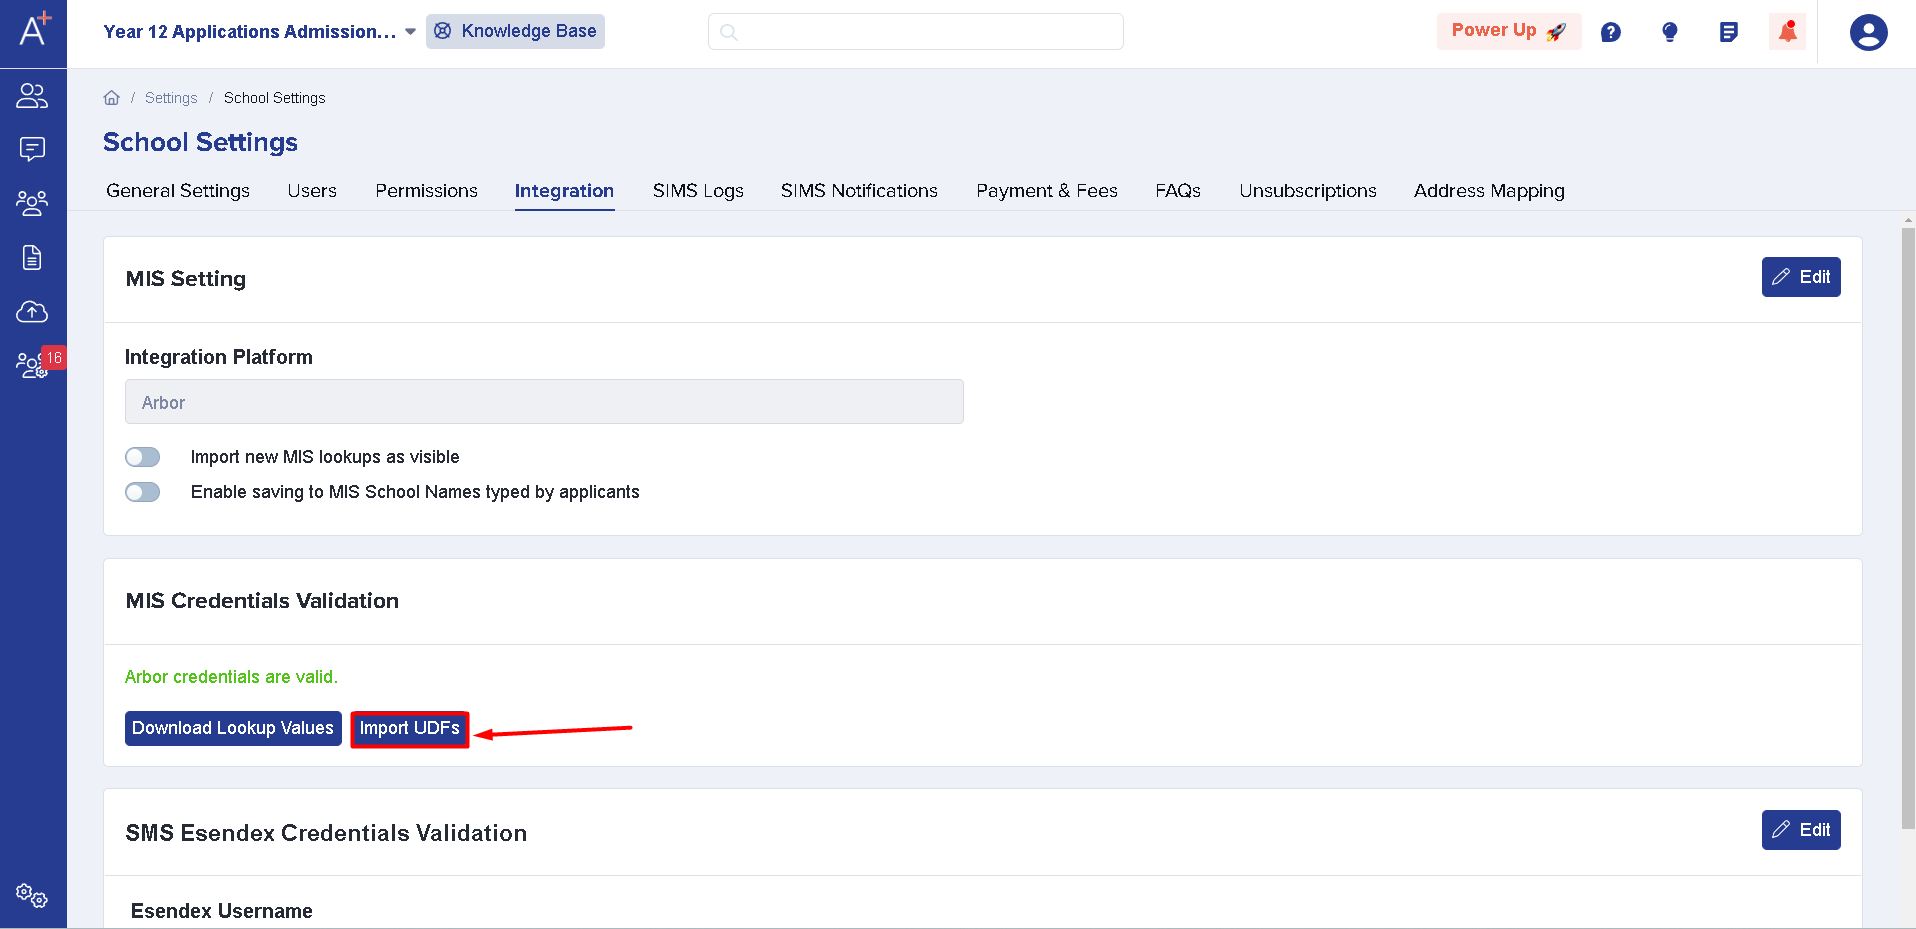
Once you've done this a message should pop up saying that the UDFs have been successfully imported.

You may now start adding the UDFs on your form by doing the following (applicable for all MIS):
Go to Settings > Application Form.
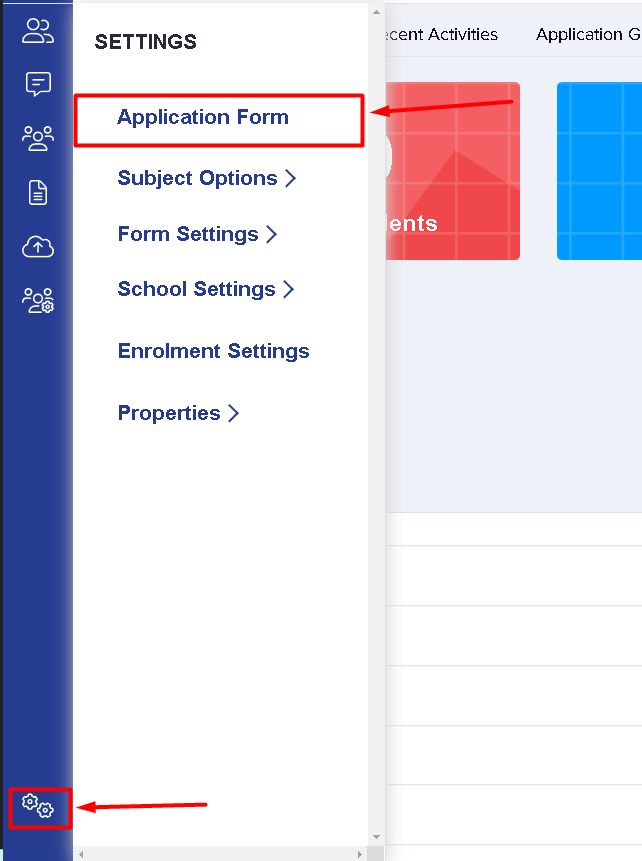
Please select which step you'd like to add the UDF to and then simply click + New Question as you do for other questions, then locate the User Defined Fields section within the MIS Compatible area - from there you can add the question into your form and rearrange as needed.