For Enrolment, classes MUST be assigned to their option blocks. Unless subjects are in blocks or classes have been created, then you will not be able to use the system for enrolment day. If you've already created your blocks, you may also use this guide as an opportunity to slightly adjust them and check everything is correct.
Navigate to settings > application form. Within your Enrolment Form click on the courses step.


Within the settings, you can "activate option block view", and also "prevent subject clashing", if you would like applicants to confirm their course choices by block on Results Day. This will ensure subjects are displayed in option block format and that students cannot select more than one subject within the same block.
You can check and prepare your blocks and classes within the Timetables area of your main dashboard if you need to add them into your system manually .
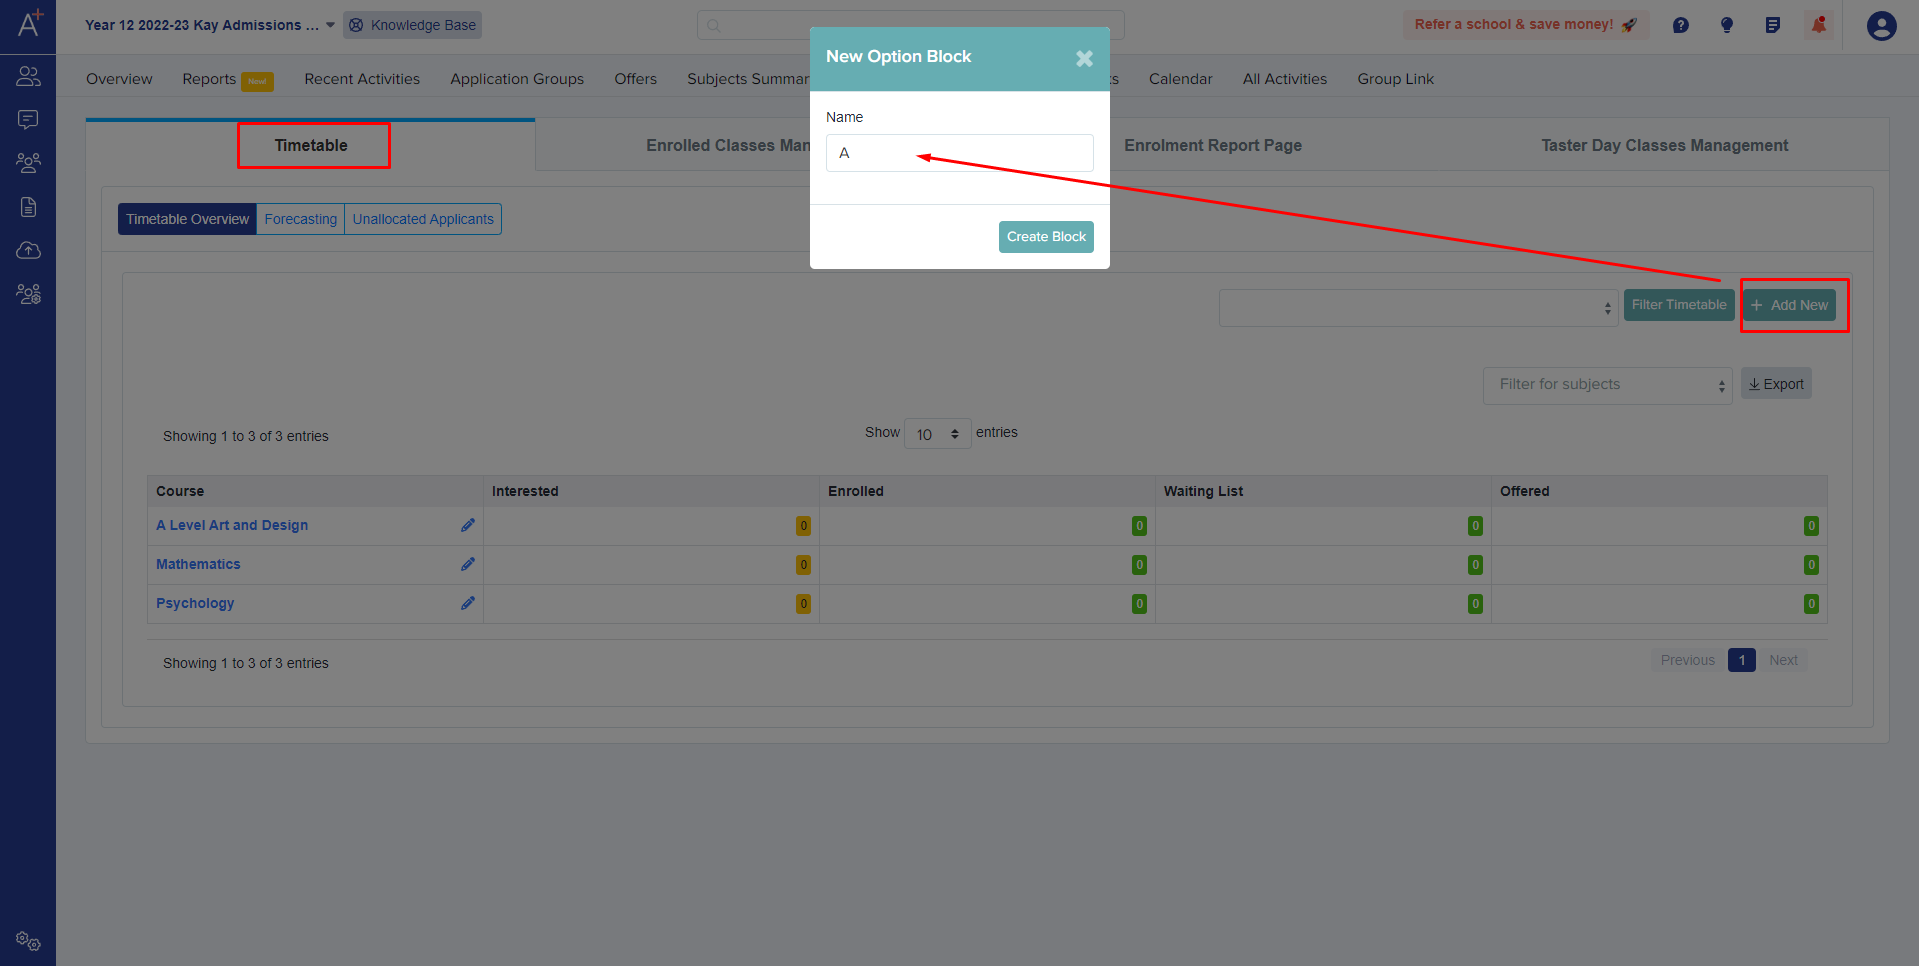
Once you click the timetable it will show you the courses you've uploaded/added to the system and if you click "+Add new" it will allow you to create a "New Option Block", if needed. You can also click on an existing block to rename it, if applicable.
Once done, your page should look like this, depending on how many blocks you are creating: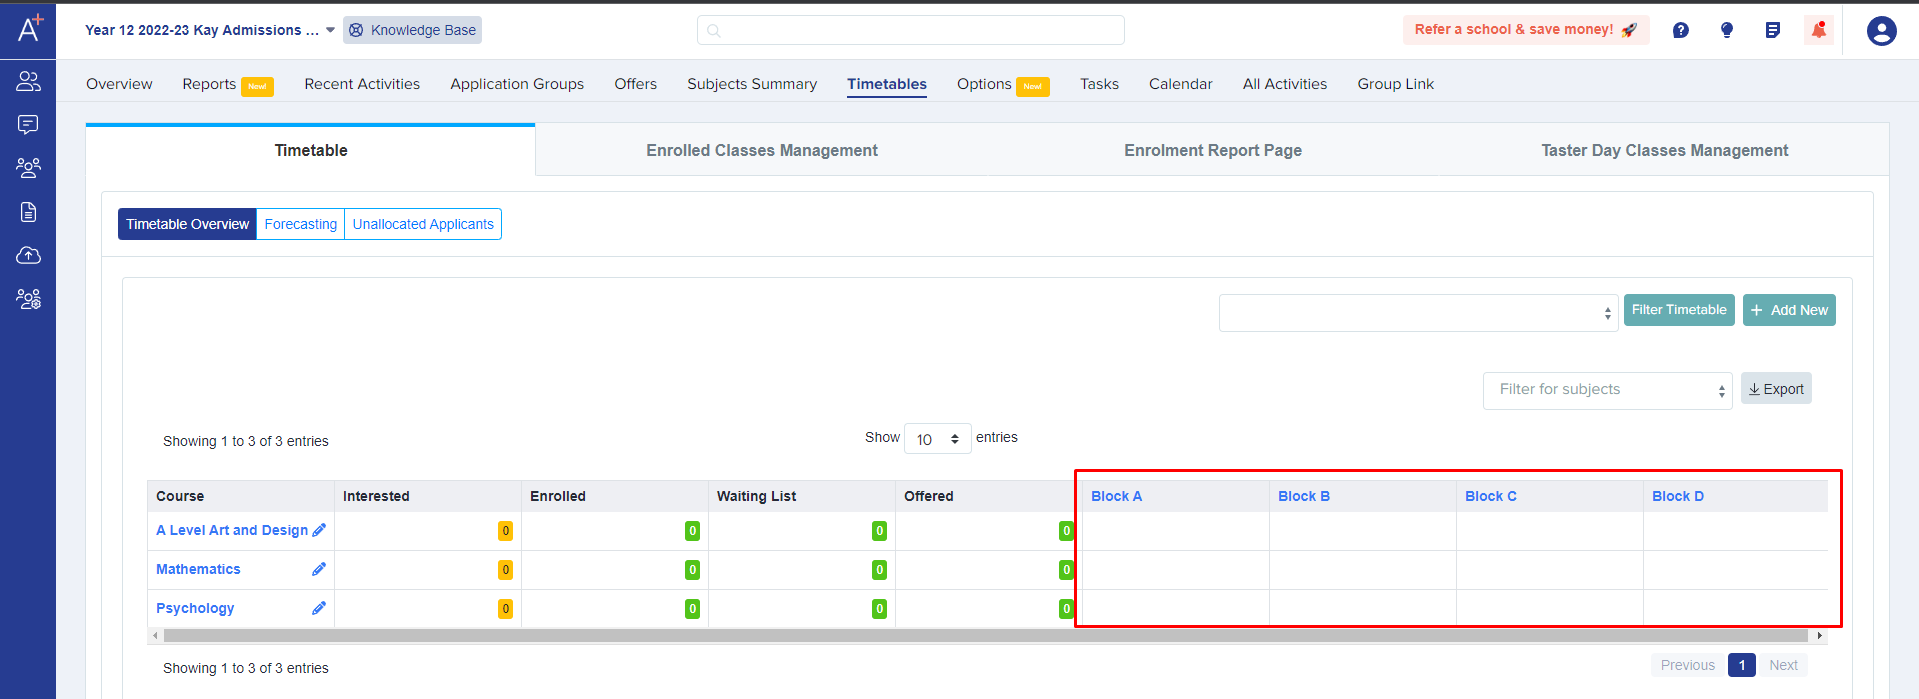
The next step is to create your classes. There are two ways to create classes, and here's how:
1. Click on the pencil icon beside the course name you can add the title of the class, its class code, the number of students that can apply, the number of students teacher can enrol, minimum number of students required to support class and lastly select which option block each class will appear in.
Click "update course" and it will show on the timetable. 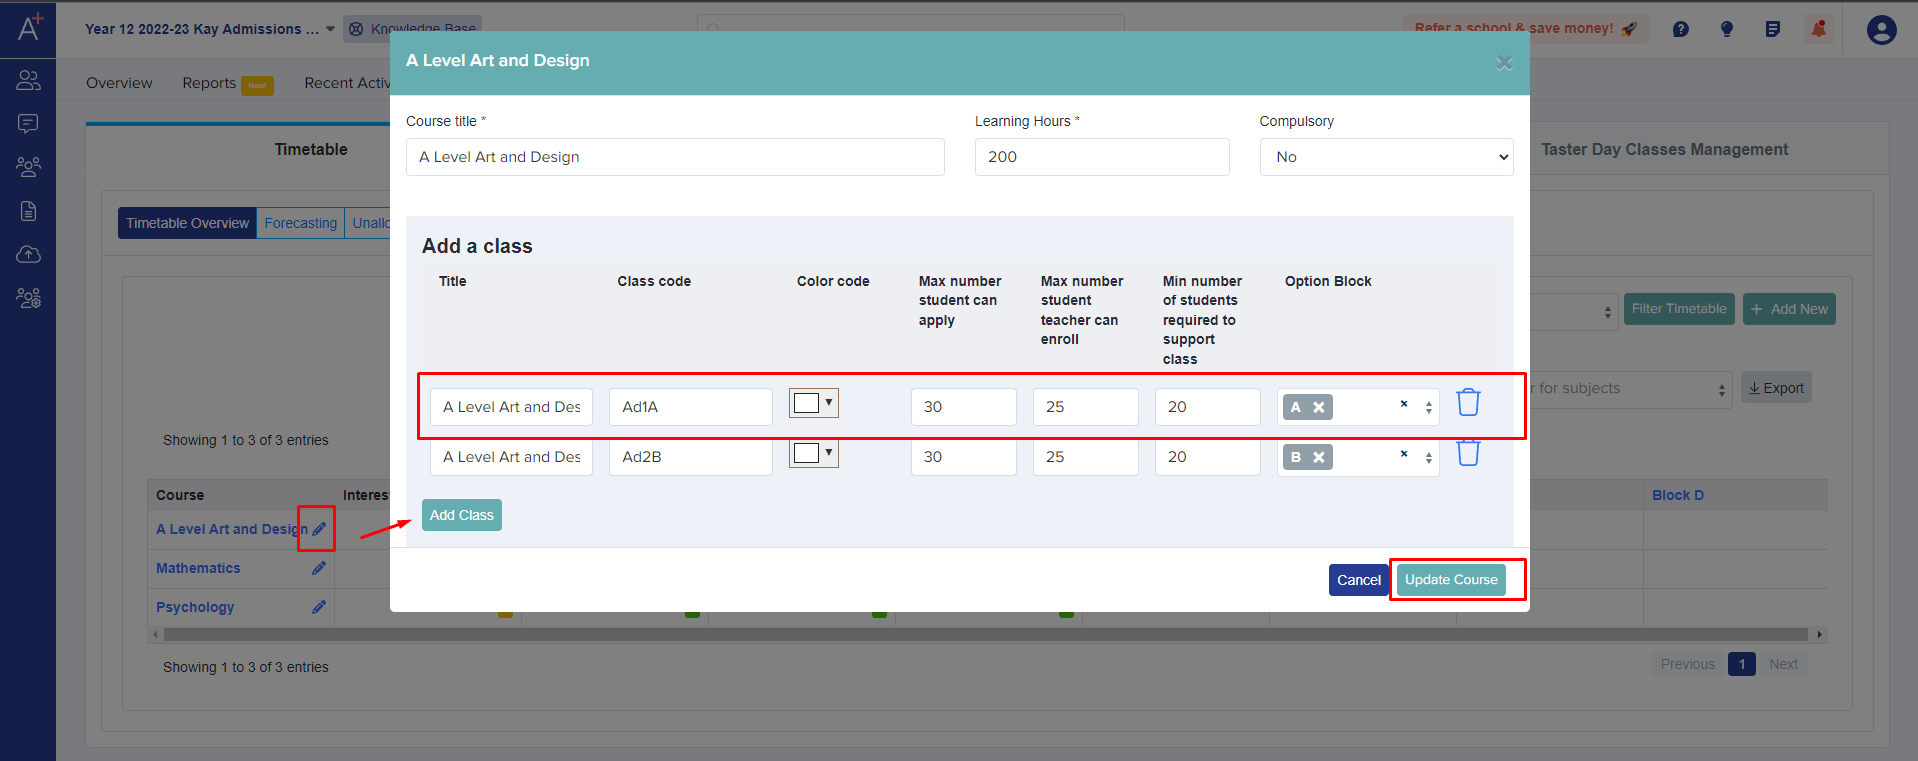
Note: You should use your MIS Class Codes where possible, to ensure that when importing classes, the process is straightforward. The system will use the class codes in Admissions+ to map to the classes within your MIS so ensuring the codes match one another now will ensure a smooth import!
Note: the max number of students that can apply and max number of teachers can enrol will not enforce unless toggled on/off on the respective settings in the Courses step of your application or enrolment form.
If a class will sit across more than one block you may create the class and add 2 blocks as shown below - (when a student selects this class in one of the blocks, it will automatically select it in the other block as well). This is useful for classes which run as doubles or triples, for example and you need more than one block to be accounted for on the student's timetable. 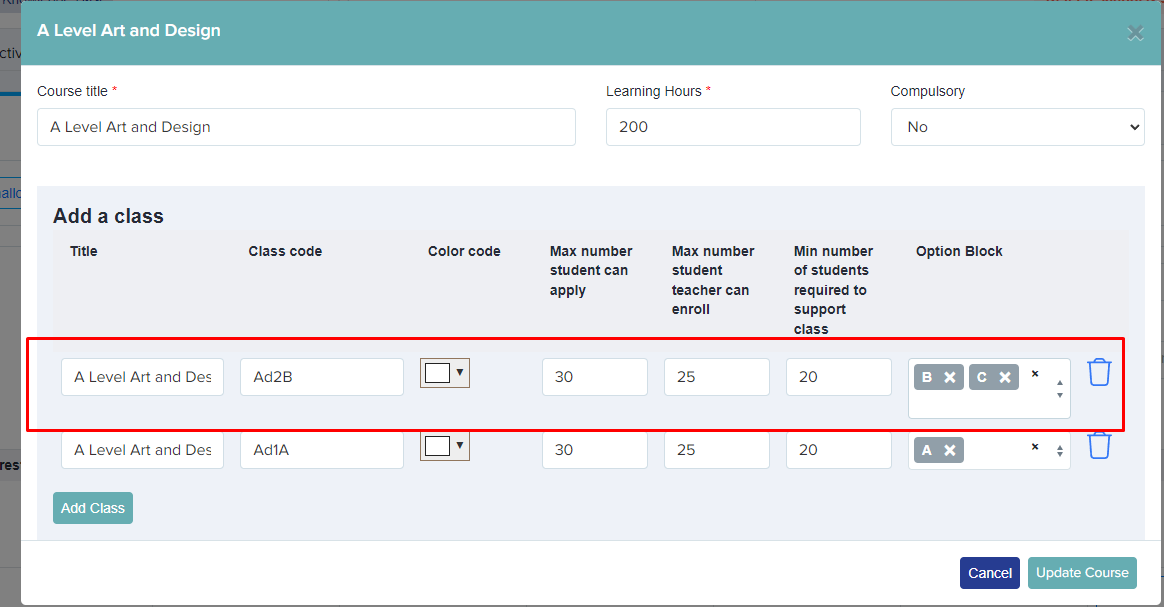
2. The other way of adding classes for each of your courses is by going from Settings > Subject options > Subjects.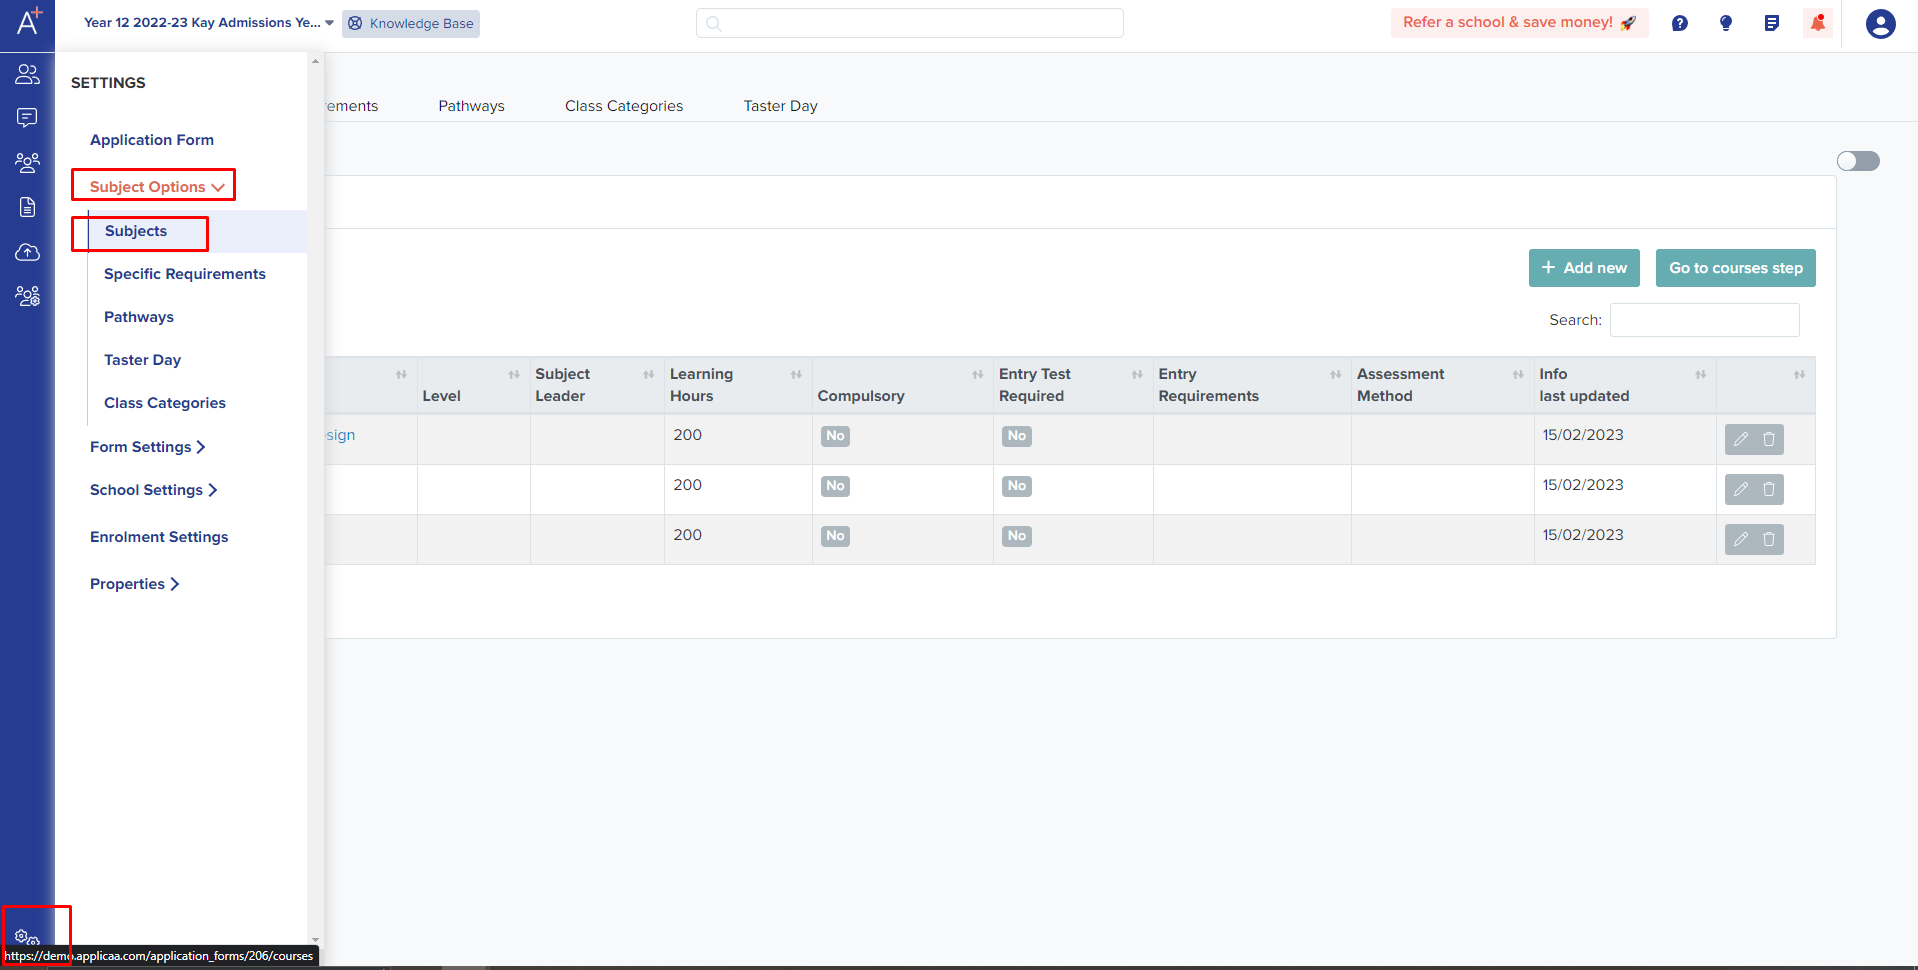
When you're on the subjects area choose which subject you want to create a class in and click edit: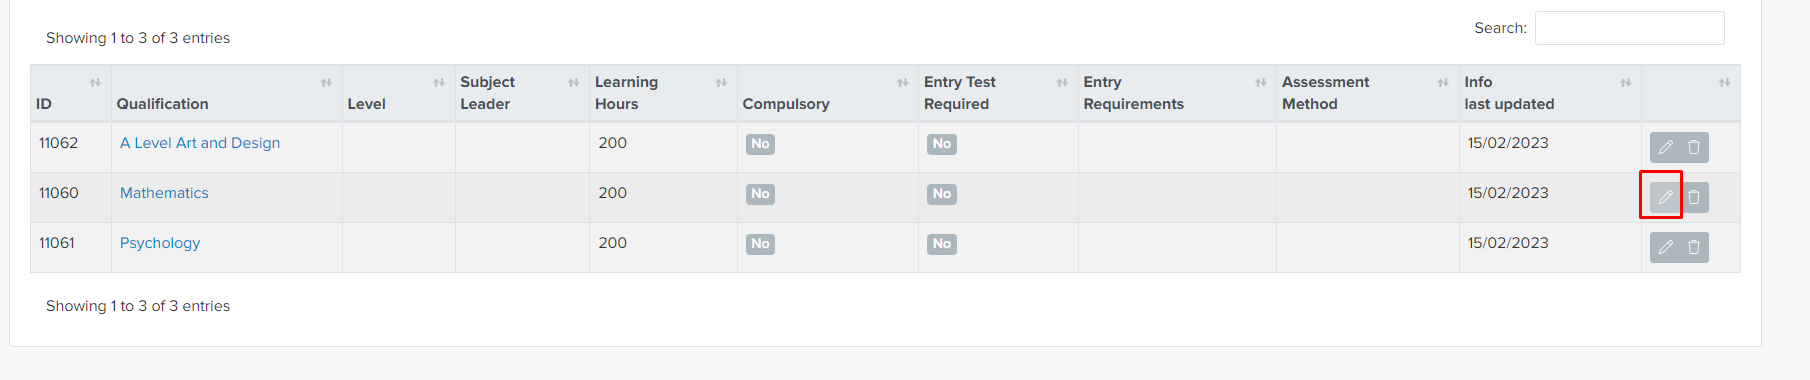
This will bring you to another page, where you should scroll down to the bottom and click "add a class". Complete the fields in the same way as described previously, then click "update course" and it will create the class or classes you have added. 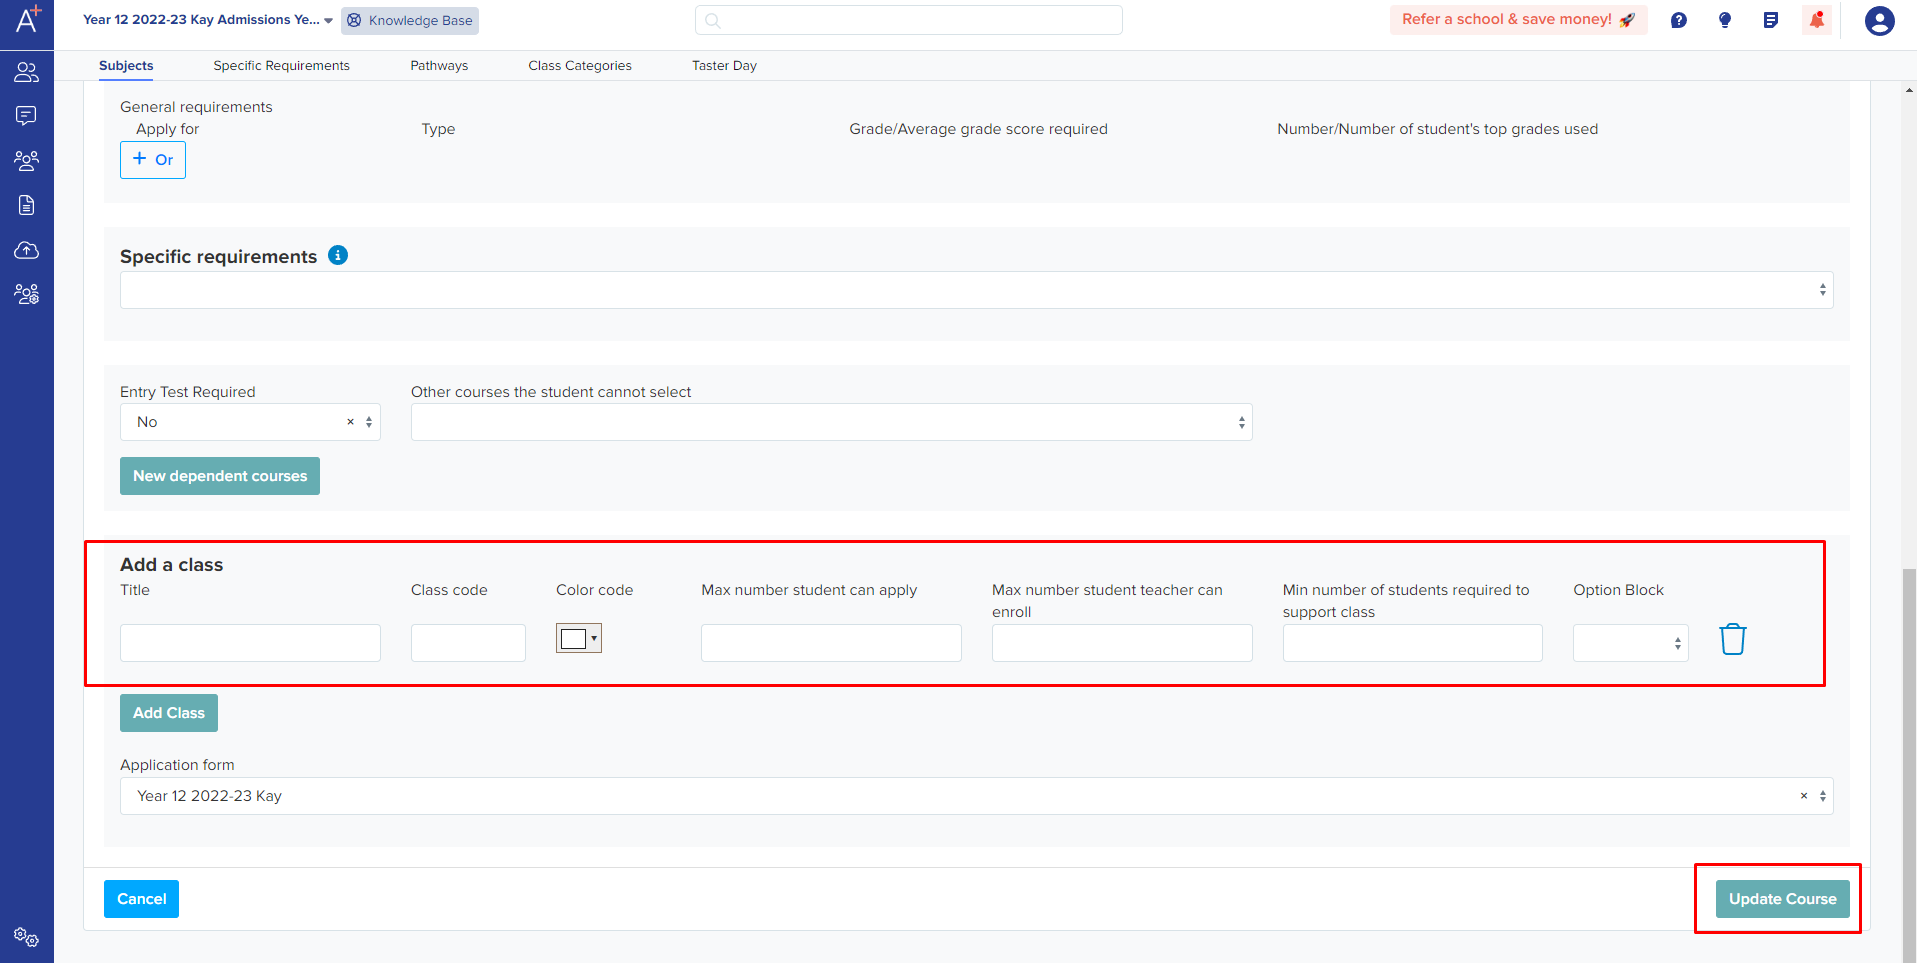
When you are done adding classes you should review them in the timetable area to check they are accurate: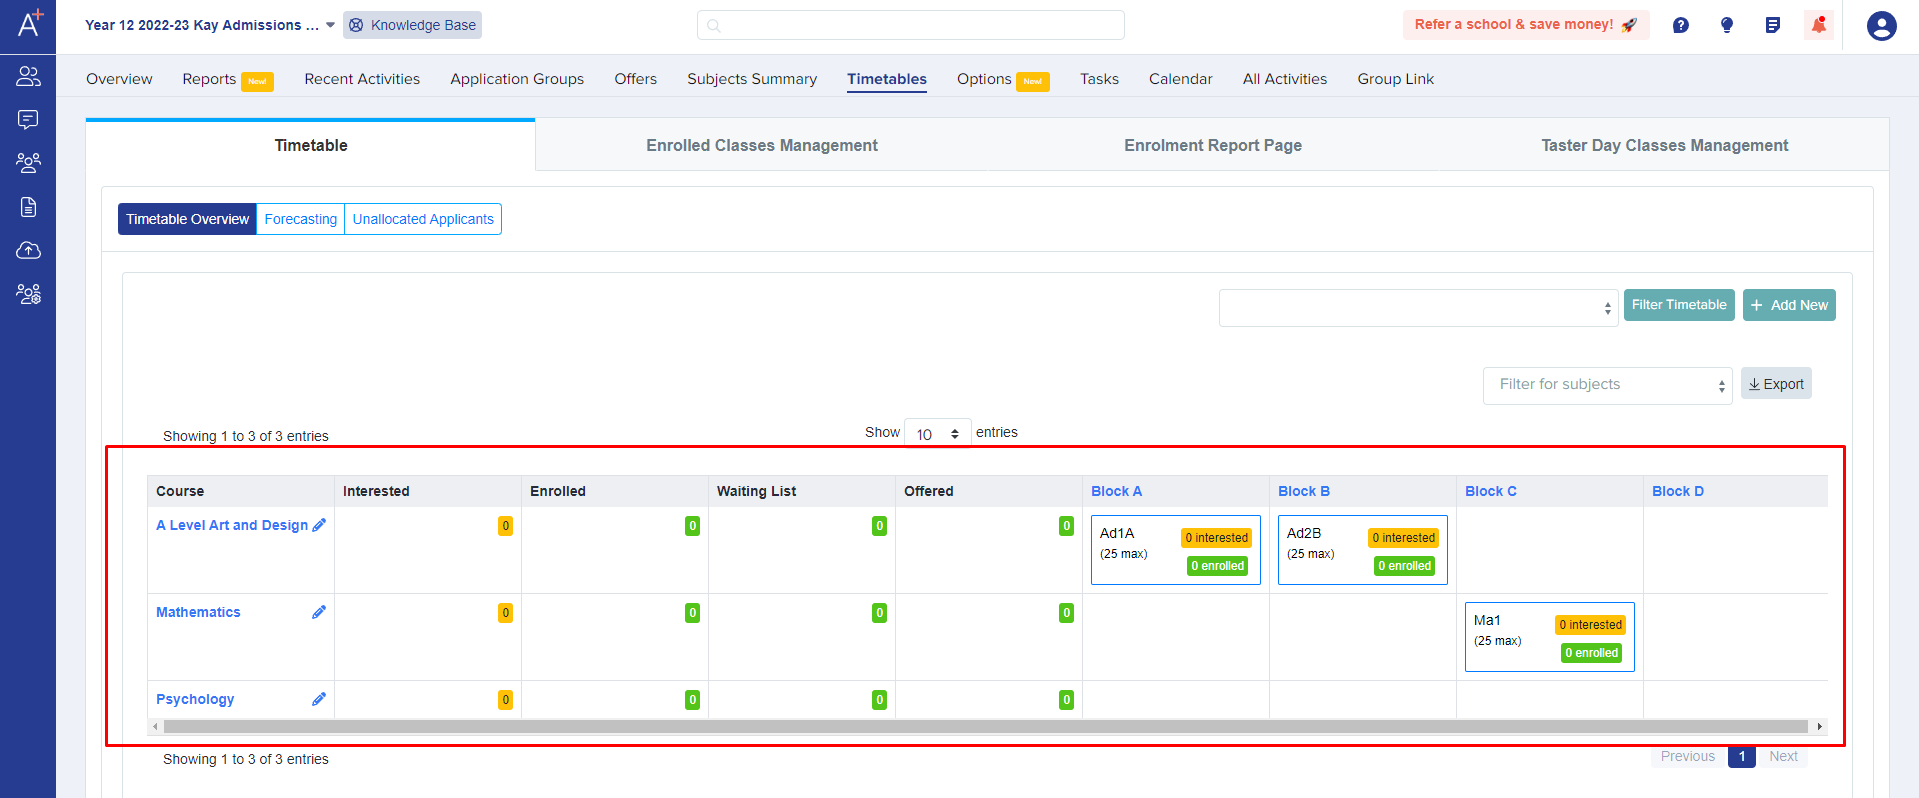
You also have the ability to create and publish your classes using the Options area of your system. This can help you to automate the process of creating the classes, rather than having to prepare them individually as described above. Read more about the Options module here.