Adding UDF's and Documents to Admissions+ SIMS Integration (7mins)
How to configure the Admissions+ platform to capture UDF's and transfer Documents with the Admissions+ SIMS App
- Firstly, you need to install and configure the A+ SIMS App, the app can be downloaded and installed from here where there is also an App Guide Book to help you.
- Once you have the app installed and configured you need to log-in with your Admissions+ email address (username) and password.

- The system will automatically save available UDF's back to the Admissions+ platform when you log-in to the A+ SIMS App.

- In Admissions+ you will need to navigate to Settings > Application Form and choose the Step you want to insert the UDF field(s).

- In the Step click on Add New (+New) and search for the name of the UDF field which will then be added to the Section where you can next decide where the field should be and it's size.

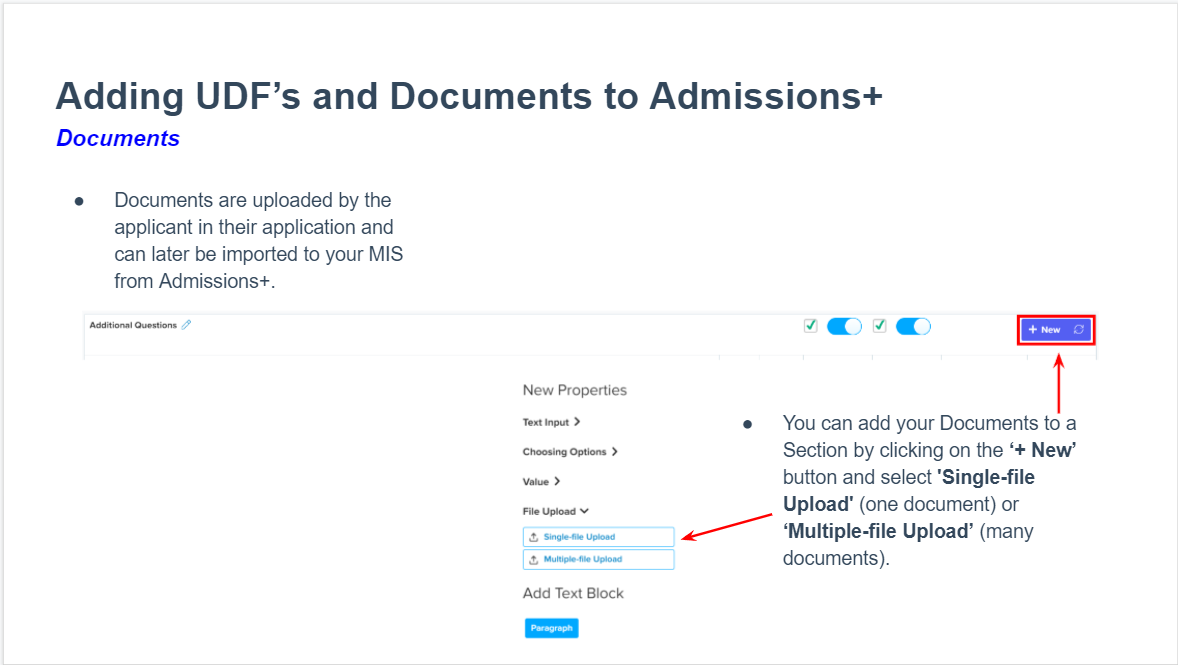
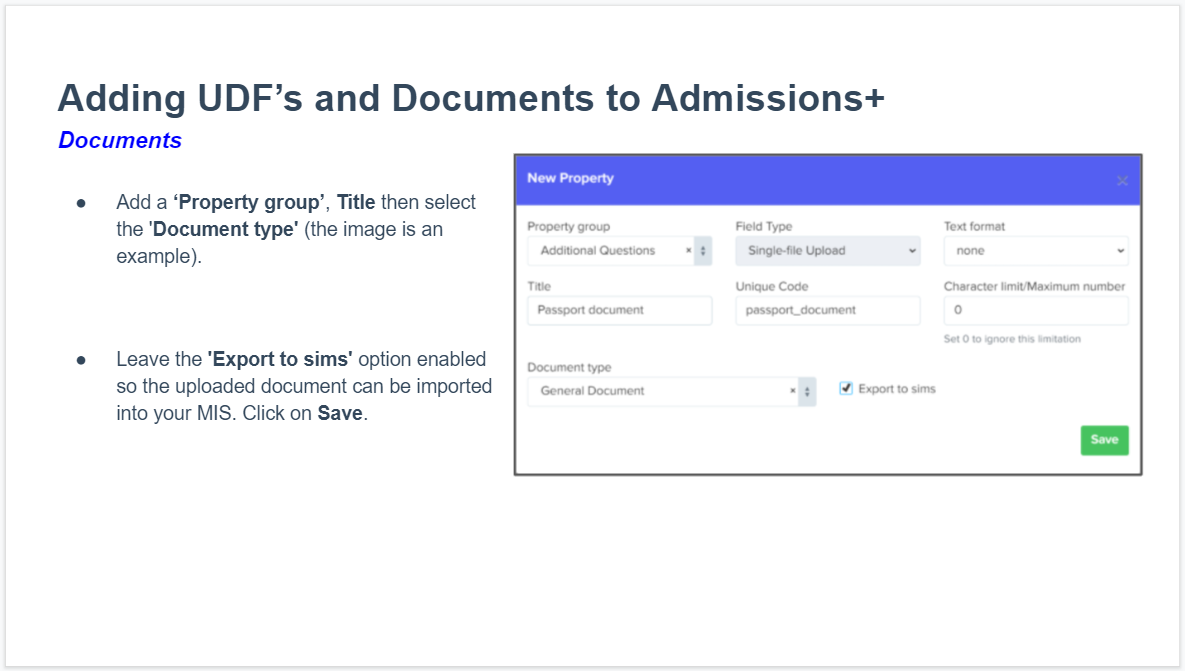
- You can add your Documents to a Section by clicking on Add New (+New) again and select File Upload > Single-file Upload OR Multiple-file Upload then enter a Title, select the 'Document type' and you can leave the 'Export to sims' option ticked or enabled.
- If you have already created your document and you want to update it so the documents can be imported to SIMS you can do this by clicking on your username at the top-right of the screen then on Property. You can then search for the question and edit it to see the 'Export to sims' option which you can tick or enable.
- To use the A+ SIMS App to import your UDF answers and Documents back into SIMS you select Import Application, select your application form and on the Synchronsation Fields screen select 'User Defined Fields' and/or Documents then click on Next.

- Once the import has finished you will be able to view a report.