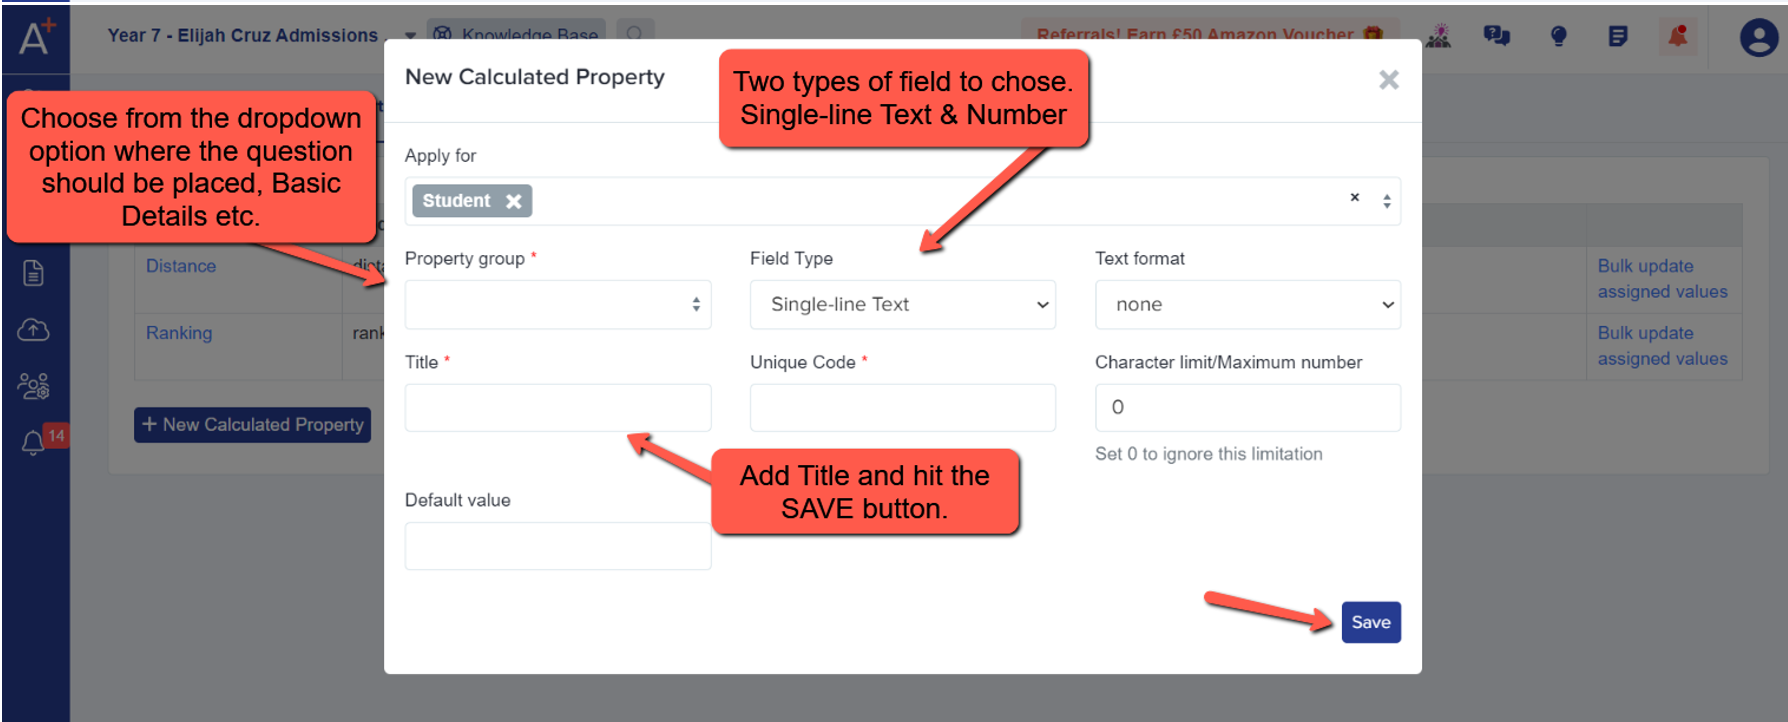
To get started, go to Settings > Properties > Properties.
To proceed with creating calculated properties, click the '+New Calculated Property' button to begin.

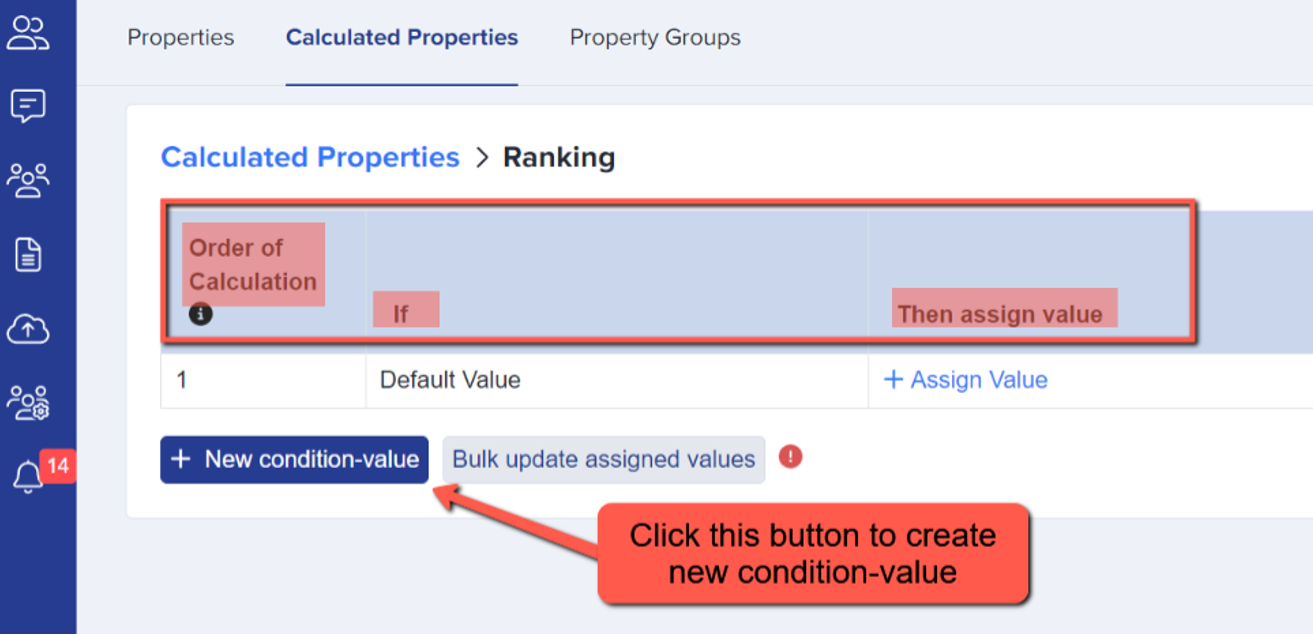
Creating Condition Triggers: Once the calculated property has been created, it will take you to the page where you can set up condition triggers within the Calculation Property.
- Order of Calculation: This column assigns the value associated with the first filter (condition) that is True. If no filters find a match, the default value is assigned.
- IF Condition: The 'If' column becomes clearer when populated. It essentially represents the condition used to determine when to assign values. Reading the columns from left to right, it will be 'If <condition> Then assign value <assigned value>
- Assign Value: This field depends on the criteria you would like to set for each condition.
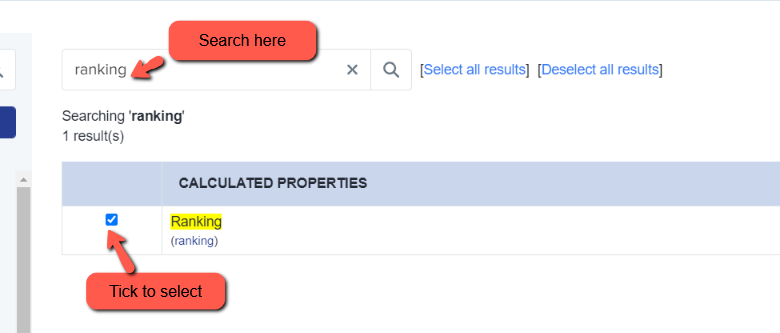
After clicking the button, you will be presented with the option to set the filter for the condition itself.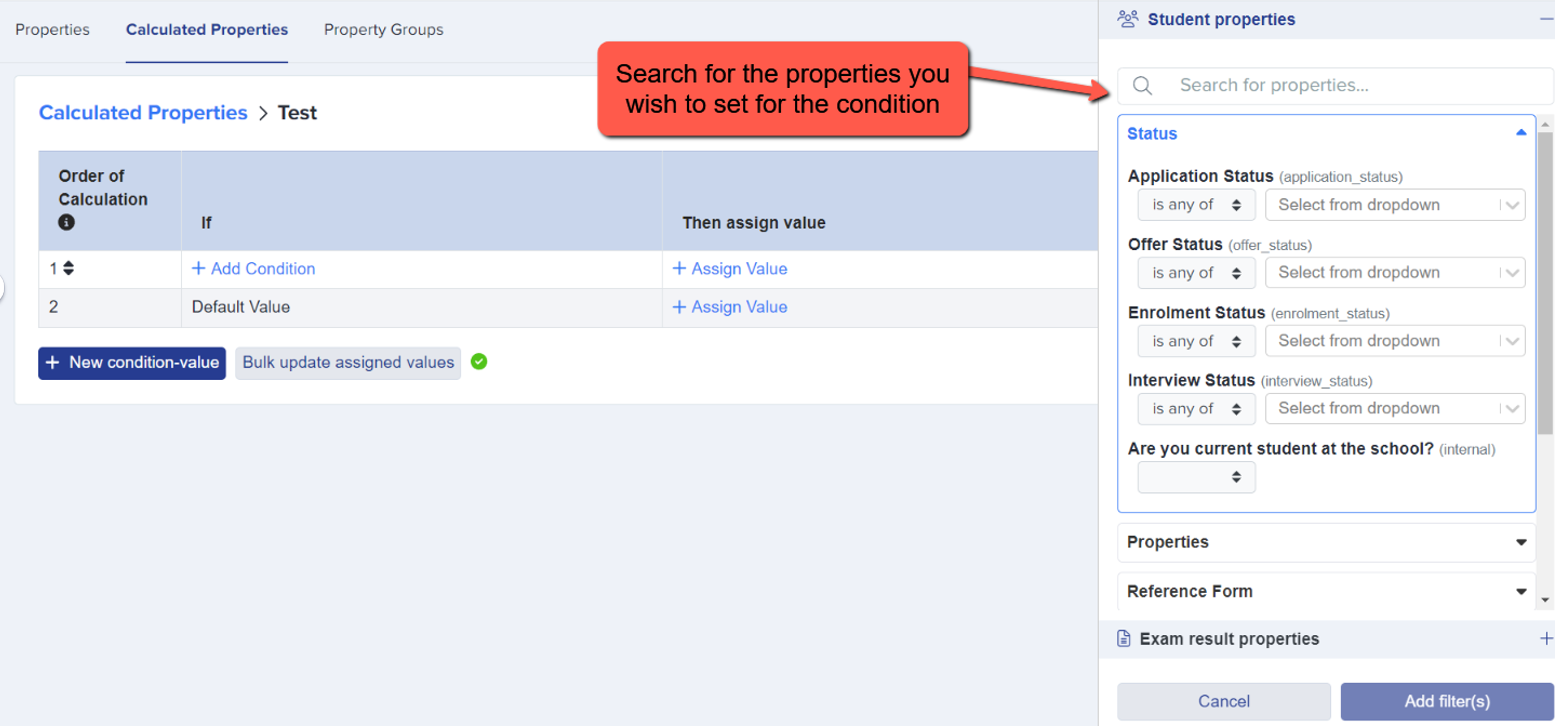
In this example, we will be using 'Gender,' as shown below.

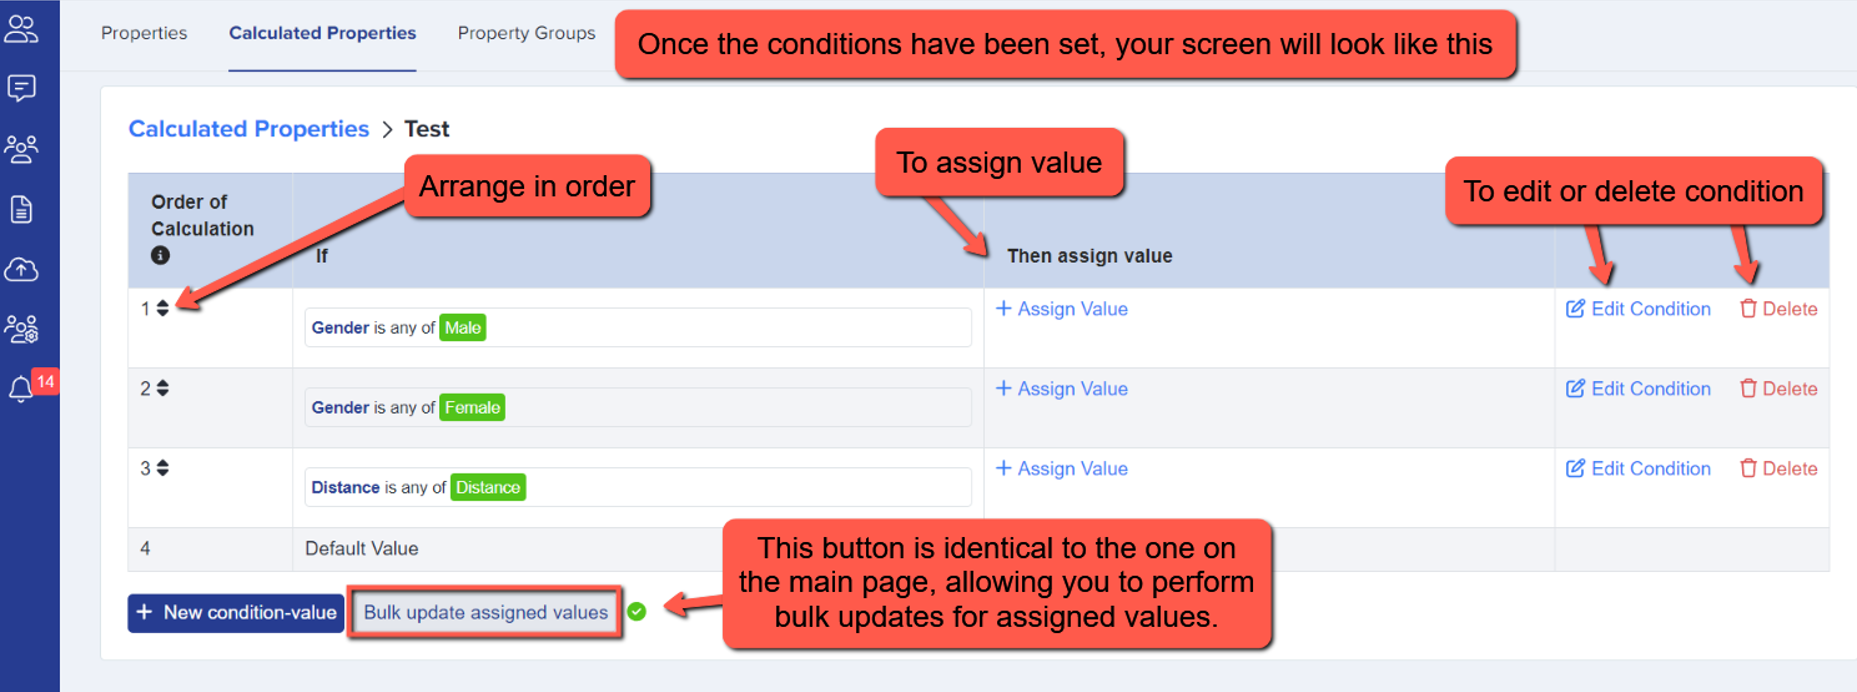
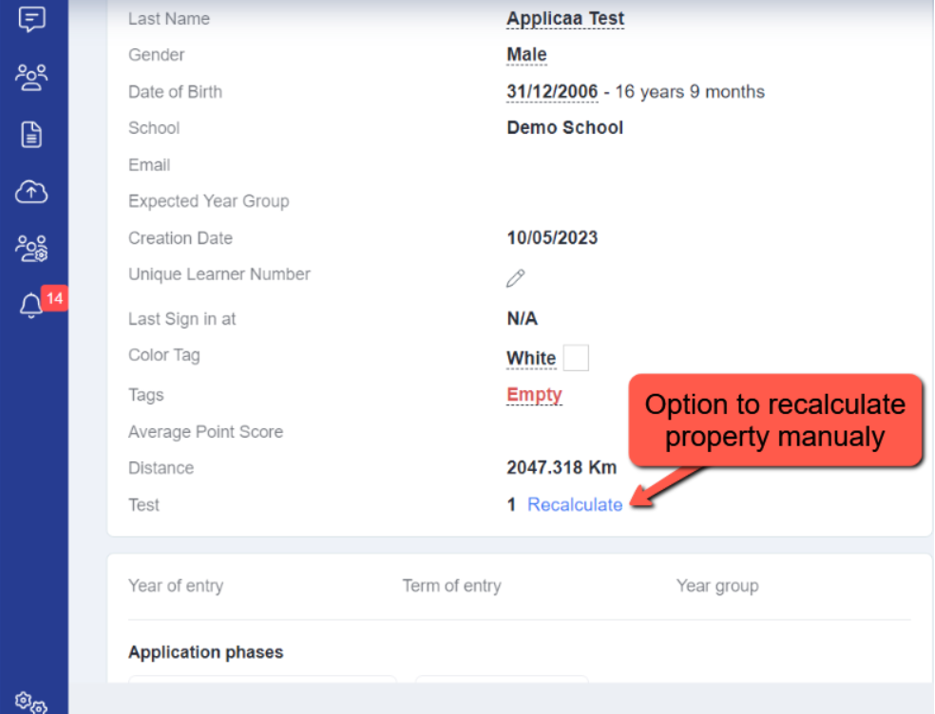
After you have successfully configured the conditions and assigned values, simply click on 'Calculated Properties' to return to the main page area.
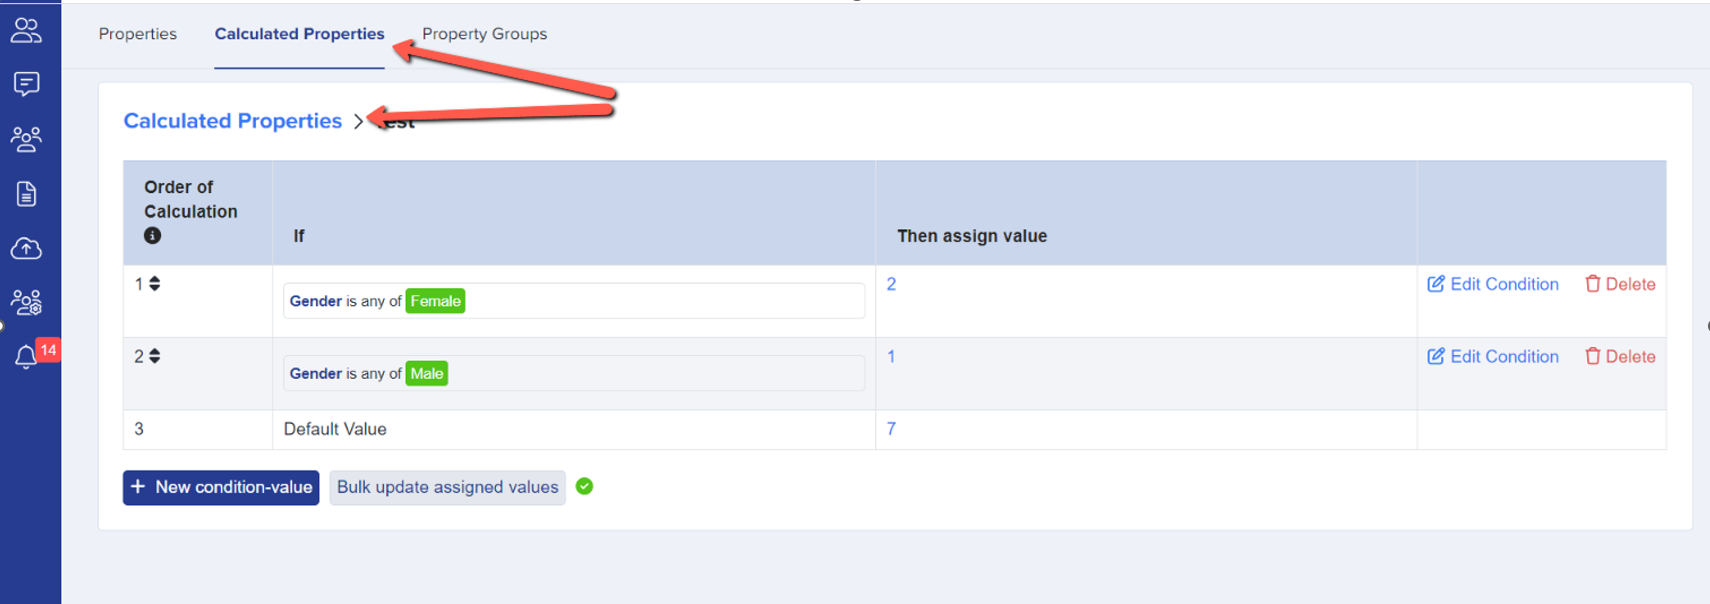
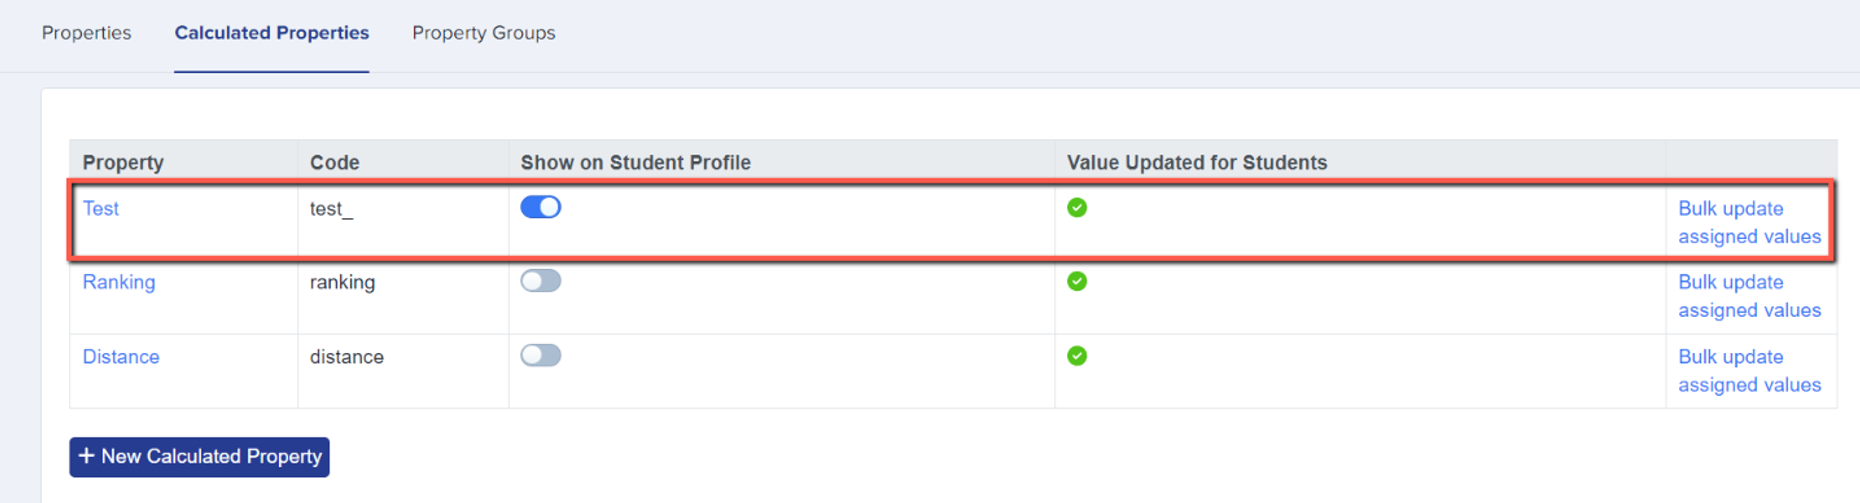
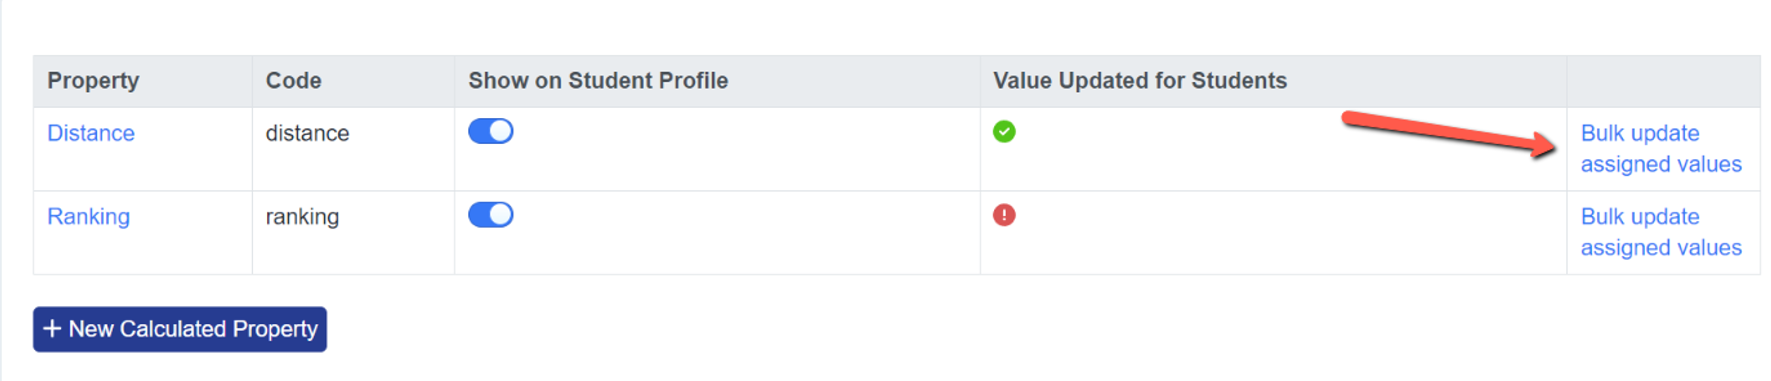
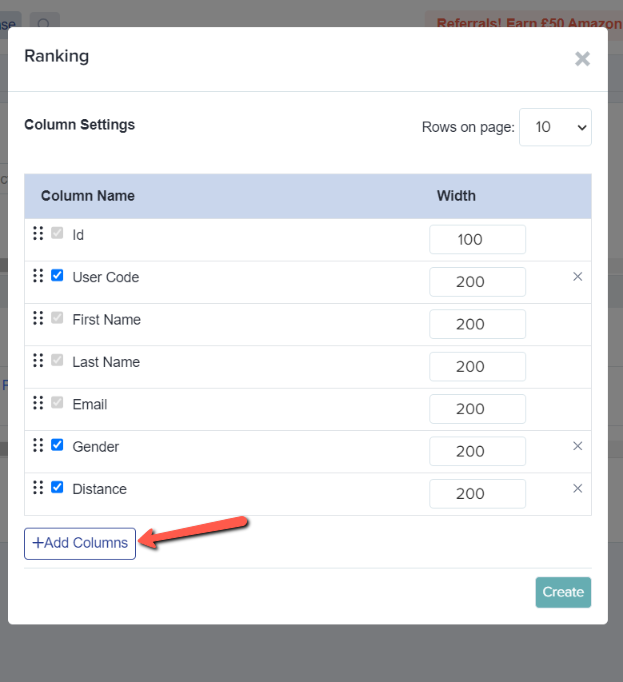
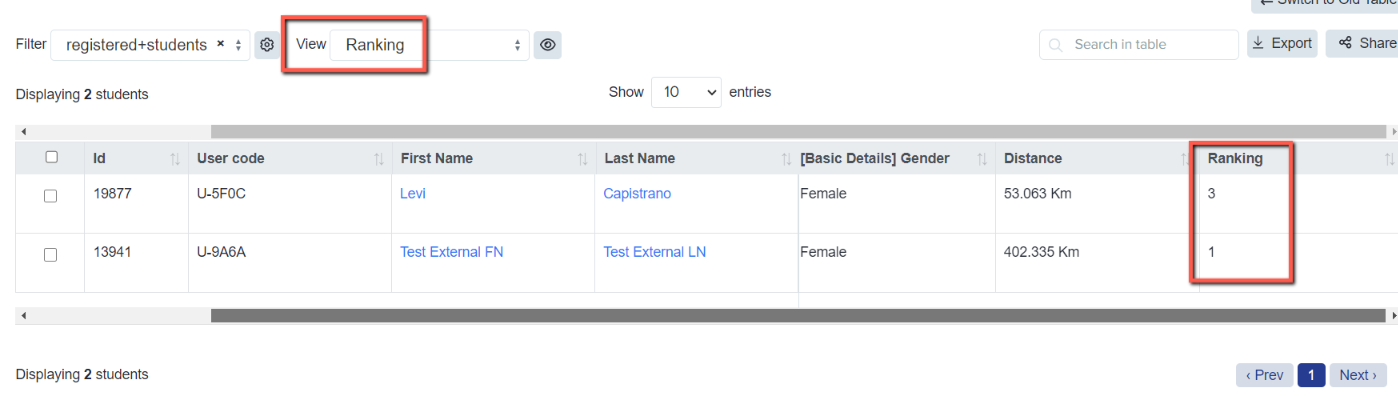
You'll find a list of your calculated Property names, their respective Codes, an option to toggle to Show on Student Profile, and the Value Updated for Students column.
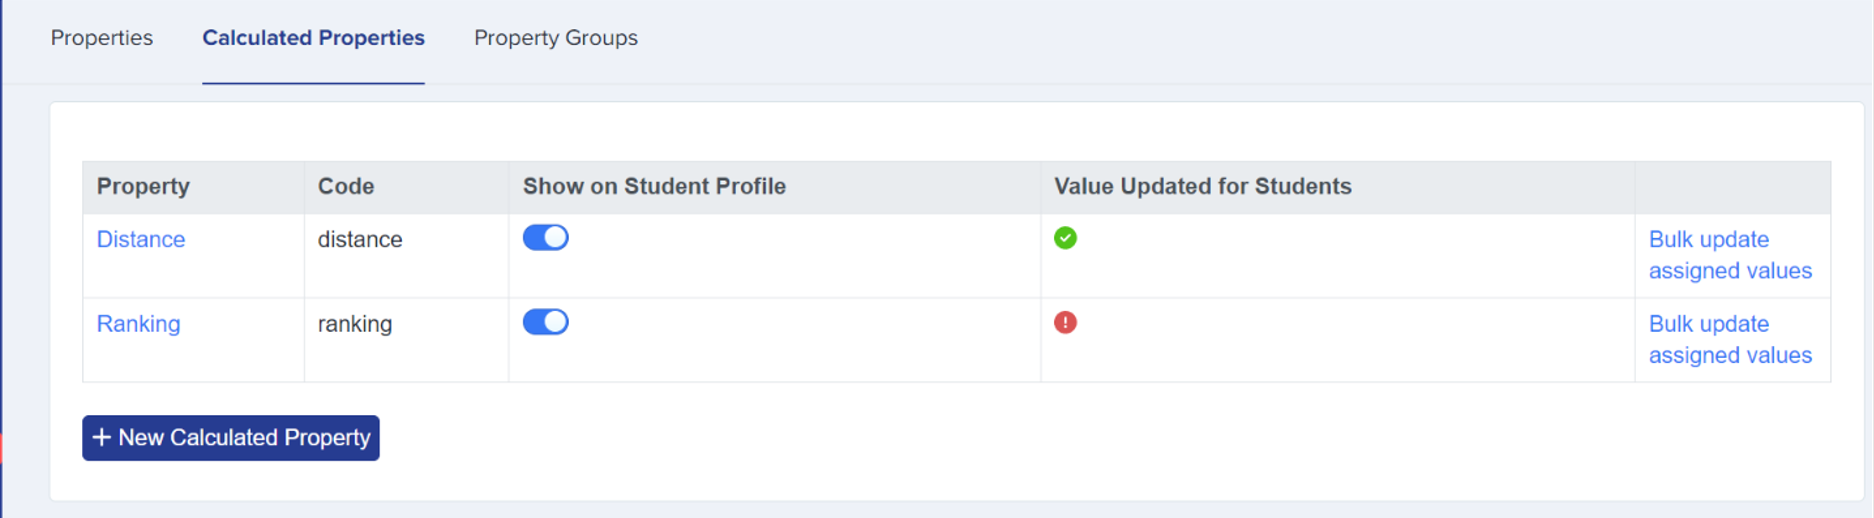
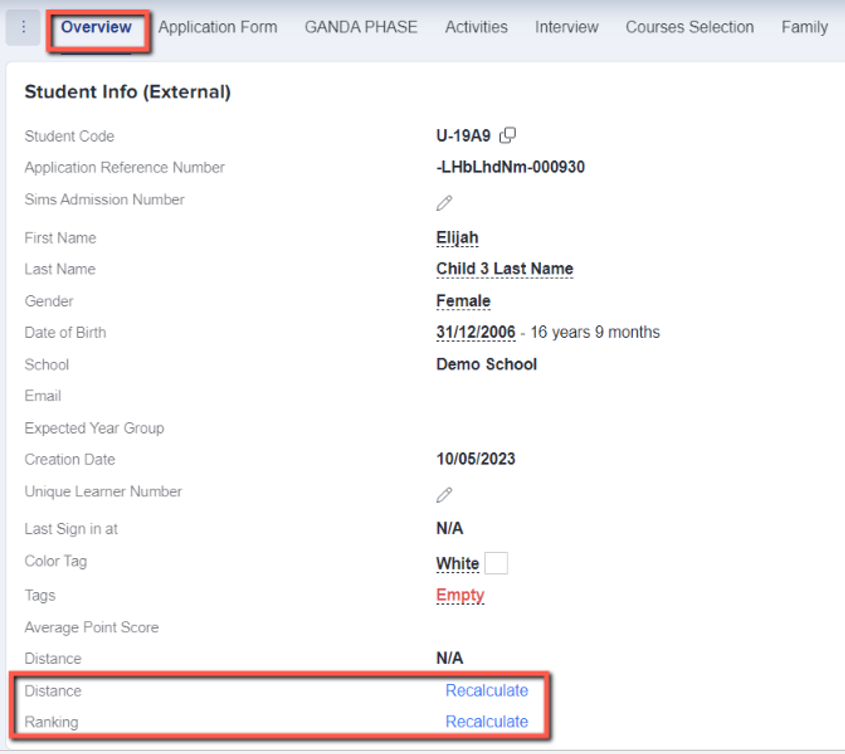

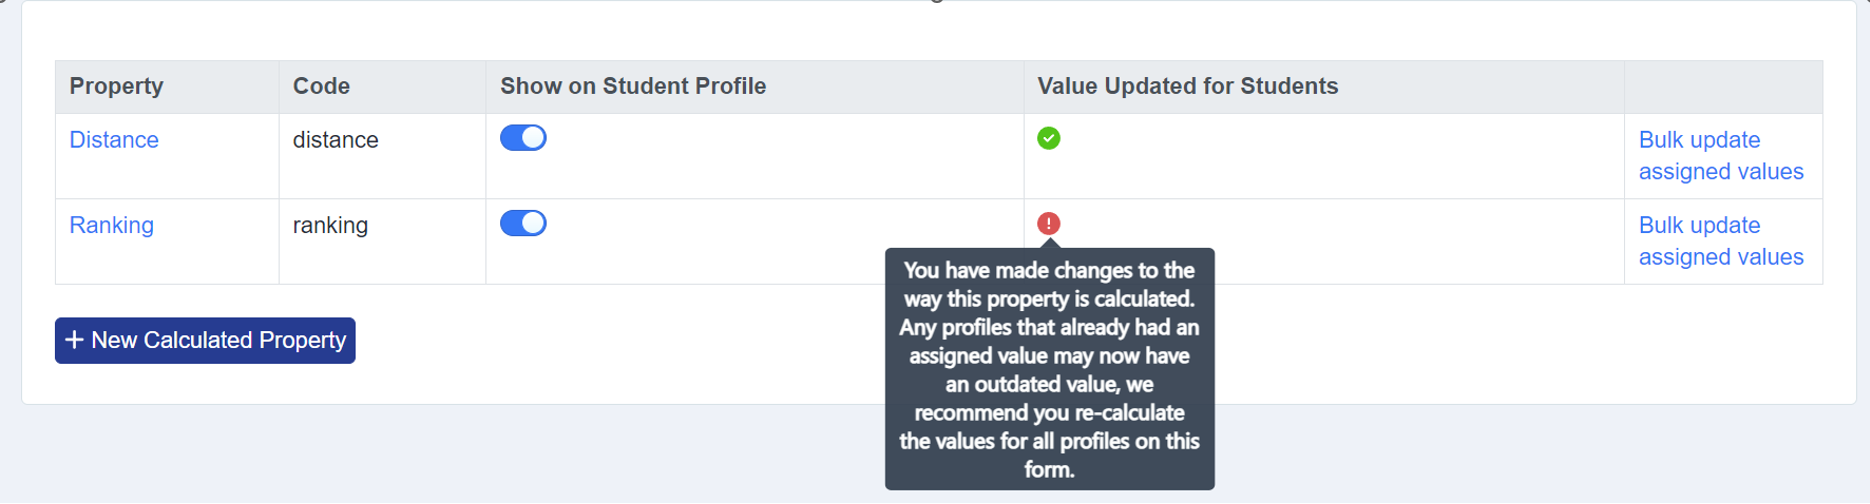
To update the profiles and bring them up to date, you can utilize the last column, which is named 'Bulk Update Assigned Value.' It provides you with three options:
- Calculated and Overwrite
- Calculated but Do Not Overwrite
- Fixed Value