Manage Users of B16+

How to update existing bursary applications using a csv import

This guide will show you how you can update existing bursary applications via a CSV import, to add new data in bulk if required

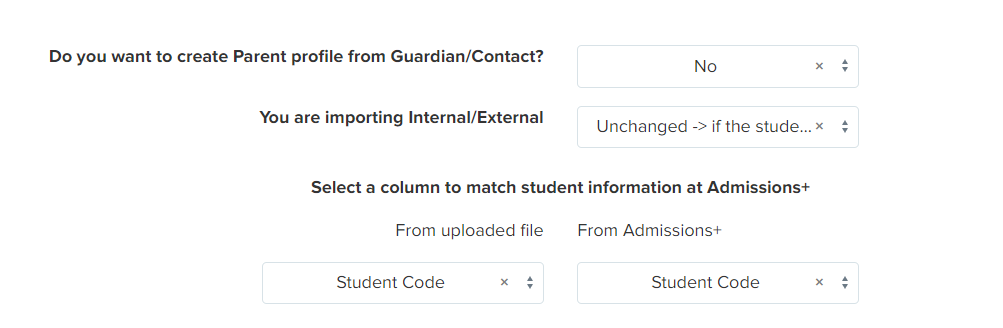
To do this, you will first need to export a CSV file that has a unique identifier for your applicants. This could be their student code or their email addresses, either of these could be used in updating an existing profile. 


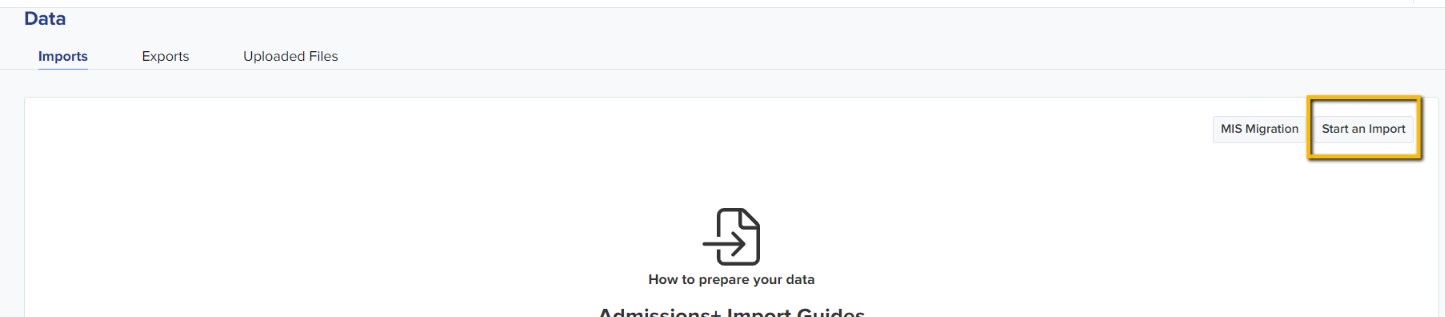
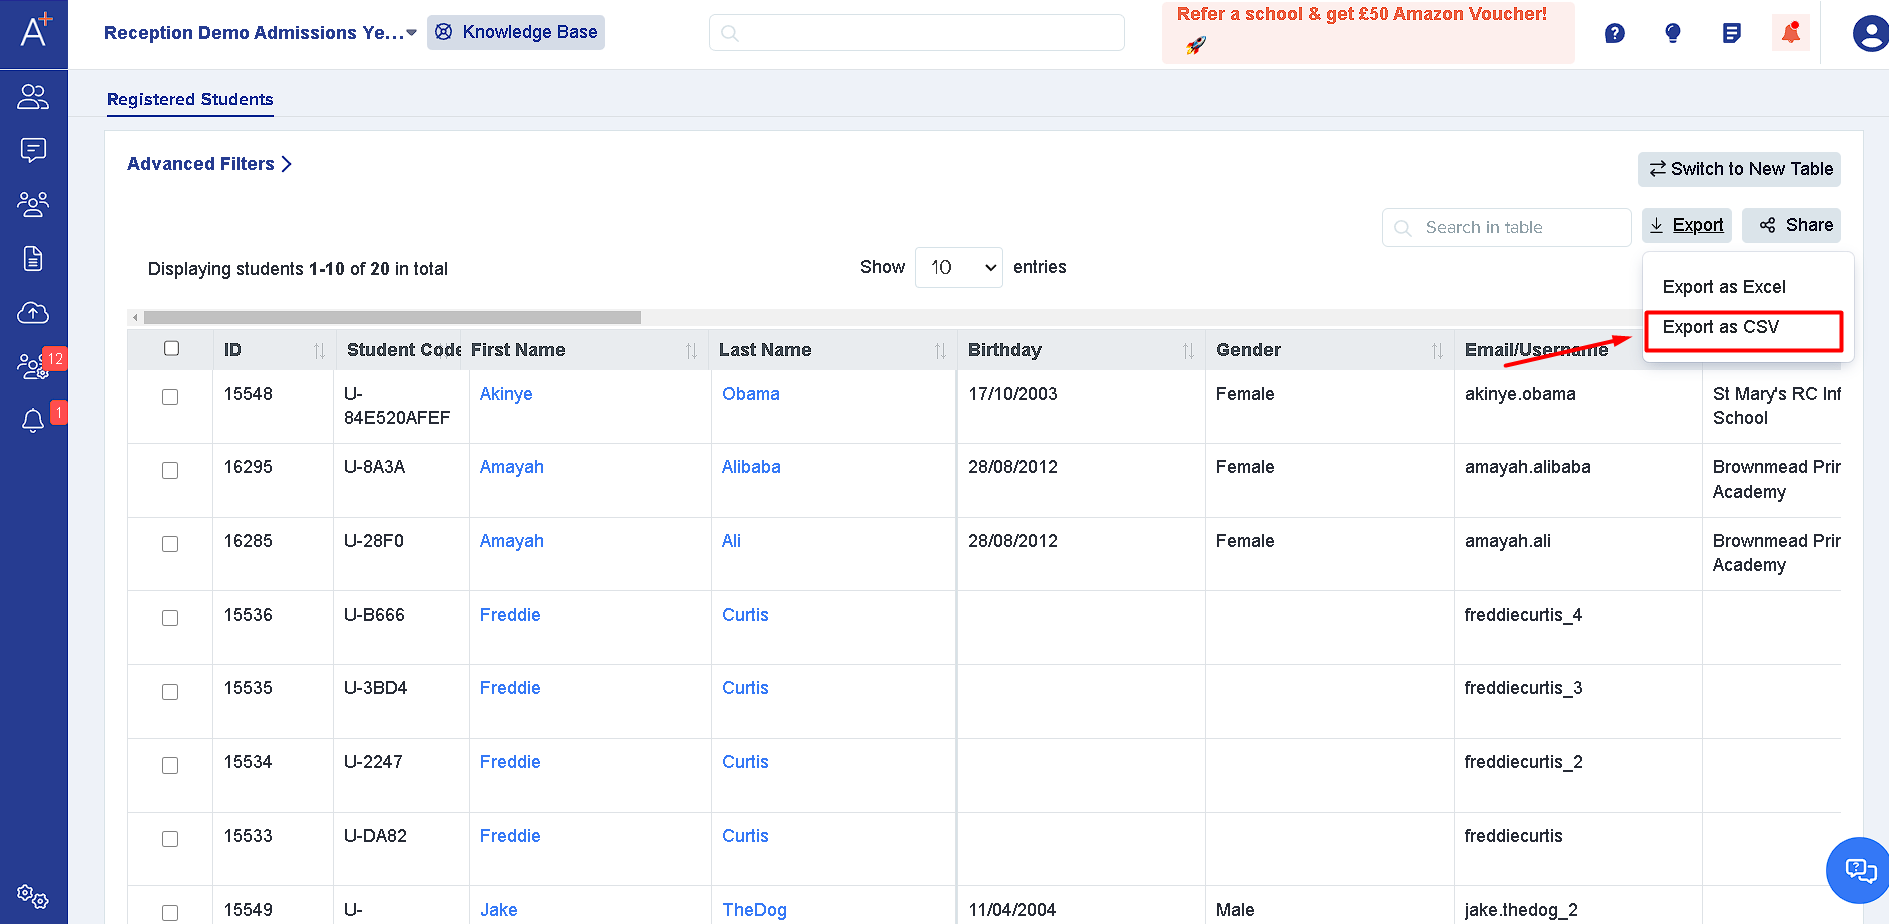
To export this list, you will need to click on the Export button > Export as CSV. 


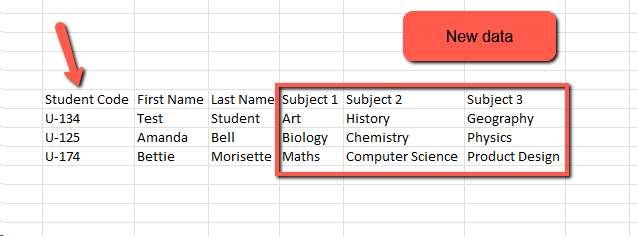
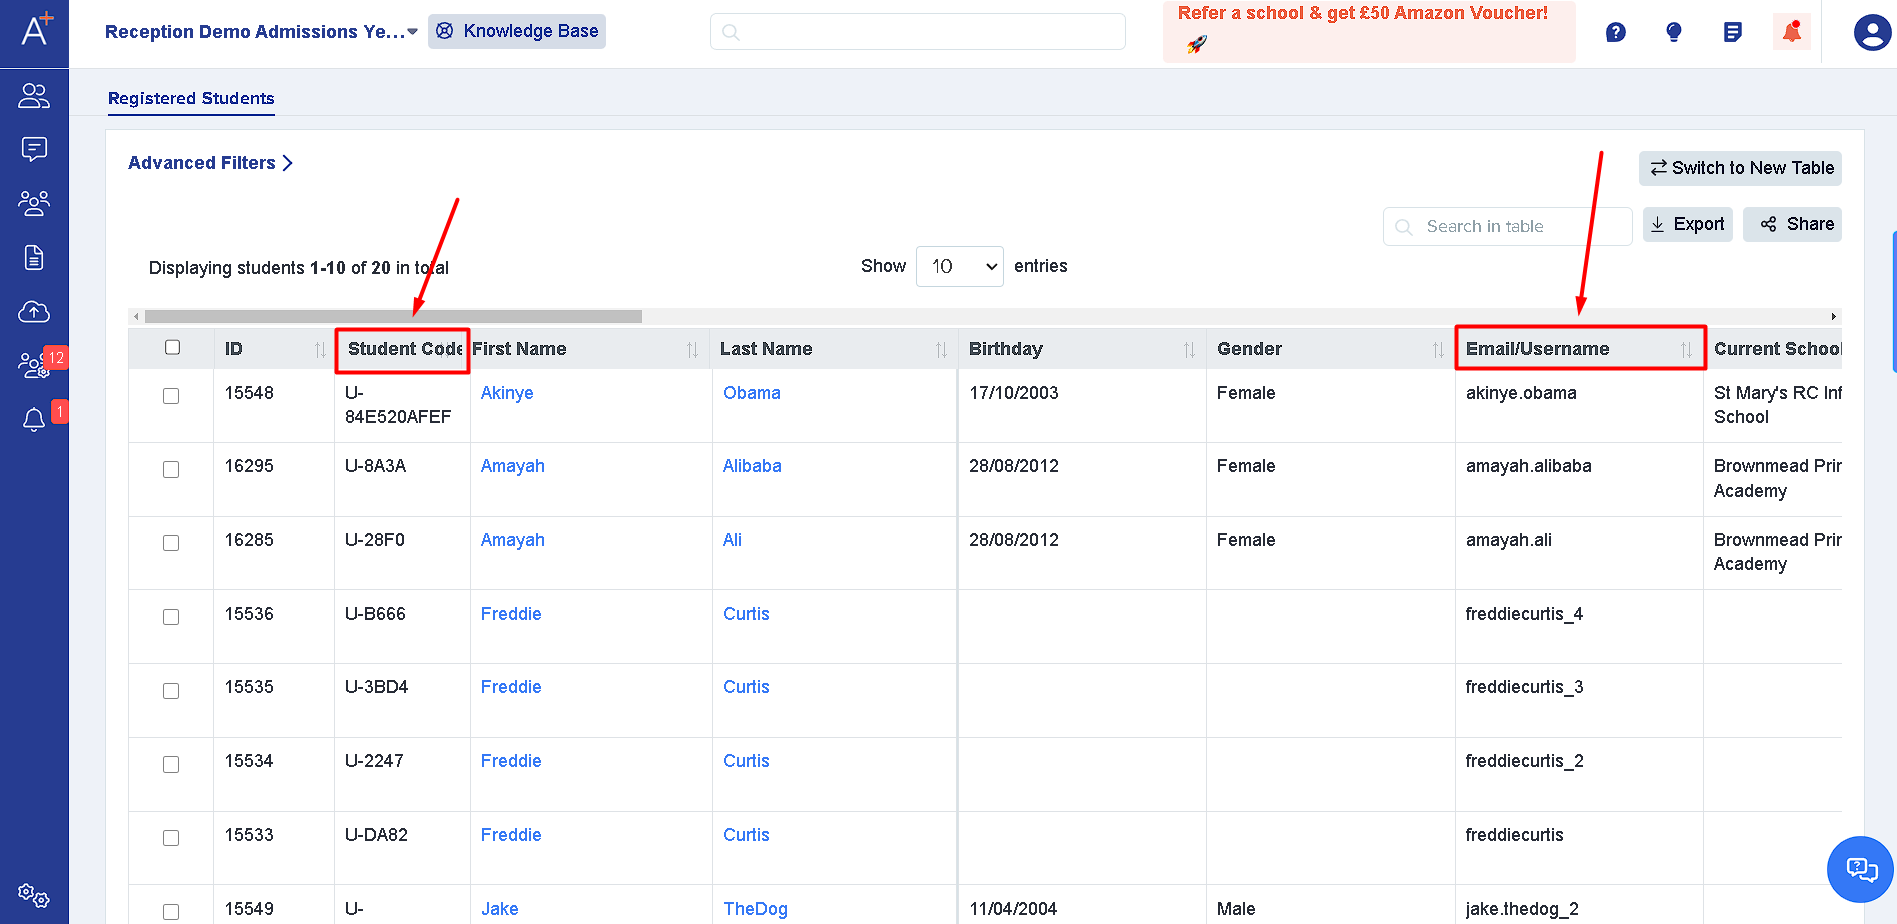
Once you have the CSV, please make sure to keep the student code column. It is then up to the school which other columns you may want to keep (perhaps their names, so you can identify which code belongs to which student).


You may then start inputting the new data that you want to import into the system as new columns in your CSV file - perhaps you are importing a list of their subjects, so you can identify which students are taking classes where a school trip will be running. 


Next: Create the fields in your bursary form to receive the data into
1. Go to settings > application form and either click to access a step which already exists, or create a new step to contain the additional information. 
 
2. In the step, click the + New Question button and select "dropdown single select"; set the property group as "additional questions" and the title can be "Subject 1", as in the example above. You can then repeat this to add any additional fields you wish to add. 
 
3. Turn off the internal and external switches, and leave visible on profile turned on (this makes it an "office use" field - you can see it, but applicants cannot)
 
Finally: Import that data in from the CSV:
 
1. Go to Data > Import > Start an Import and give the import a name
 
 
2. Choose "users", next, "existing users", next, "students" and then attach your CSV
 
3. On the mapping step, you don't need to create parent profiles, and the type of student is "unchanged" 
 
4. For the "select a column to match" fields, choose "student code" for both - this is the best way to ensure the data gets mapped to the correct child
 
5. The only fields you need to map underneath are for the new data (their names and DOB are already in, so you don't need to reimport those) - map the columns on your CSV to the corresponding fields in A+ and click "next" to complete the import.
 
Check the profiles of some students, to see that the data has been imported successfully.