This guide is used to make sure that your template is correctly set up prior to sending the offers to your students.
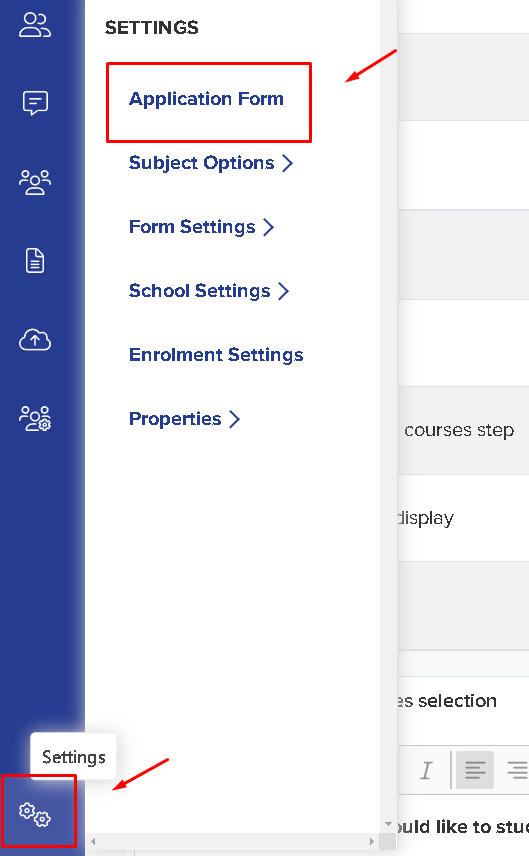
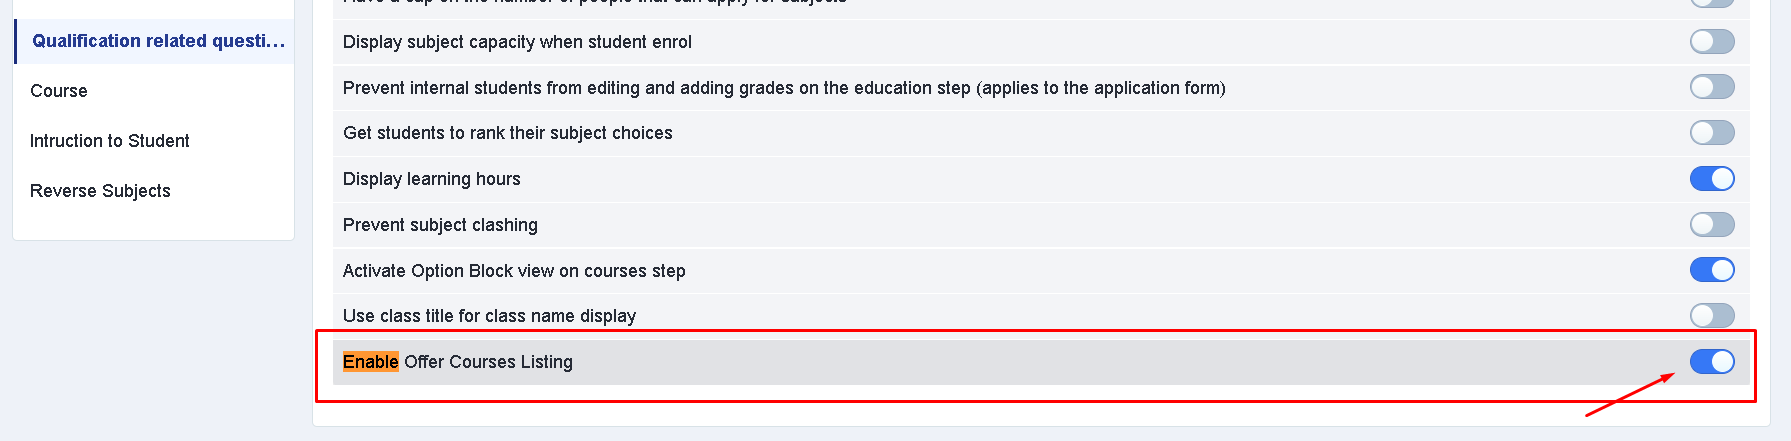
First, you need to make sure that your offer list is switched on. To verify that, go to settings > application form and then go to Courses step and look for the 'Enable Offer Courses Listing' then switch that on.

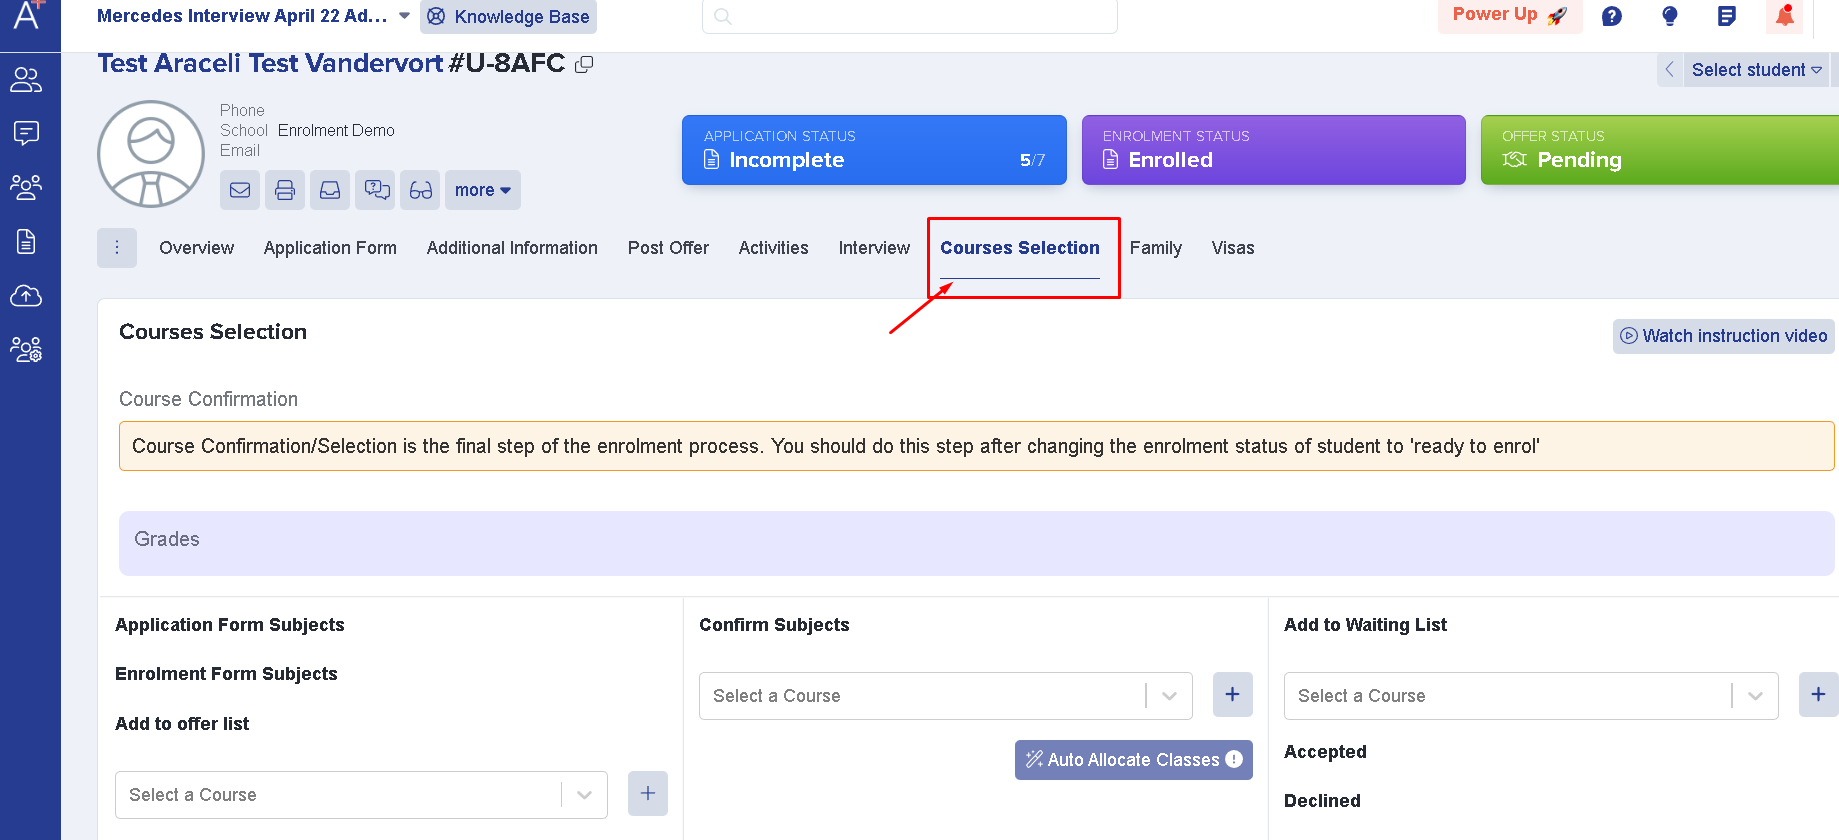
So when you're going to do your interview and you visit their student profile. Click the 'Courses Selection' tab and look for 'Add to Offers list' button. From there, whichever courses you add into the offer list, the student will see on their offer email.
In the communications & events area, go to Automated messages area and look for 'Make offer to student' email template.


Note: You may access this guide on how to make an offer to a student, once you have completed the template customisation.
To edit the template, click on the pen icon. You can change the Subject Header, Sender Email address (This is where your template will be sent from) & the Reply to email address (This is where the parents & students can send their replies). Once done, proceed to the next pages and proceed in checking the email content.
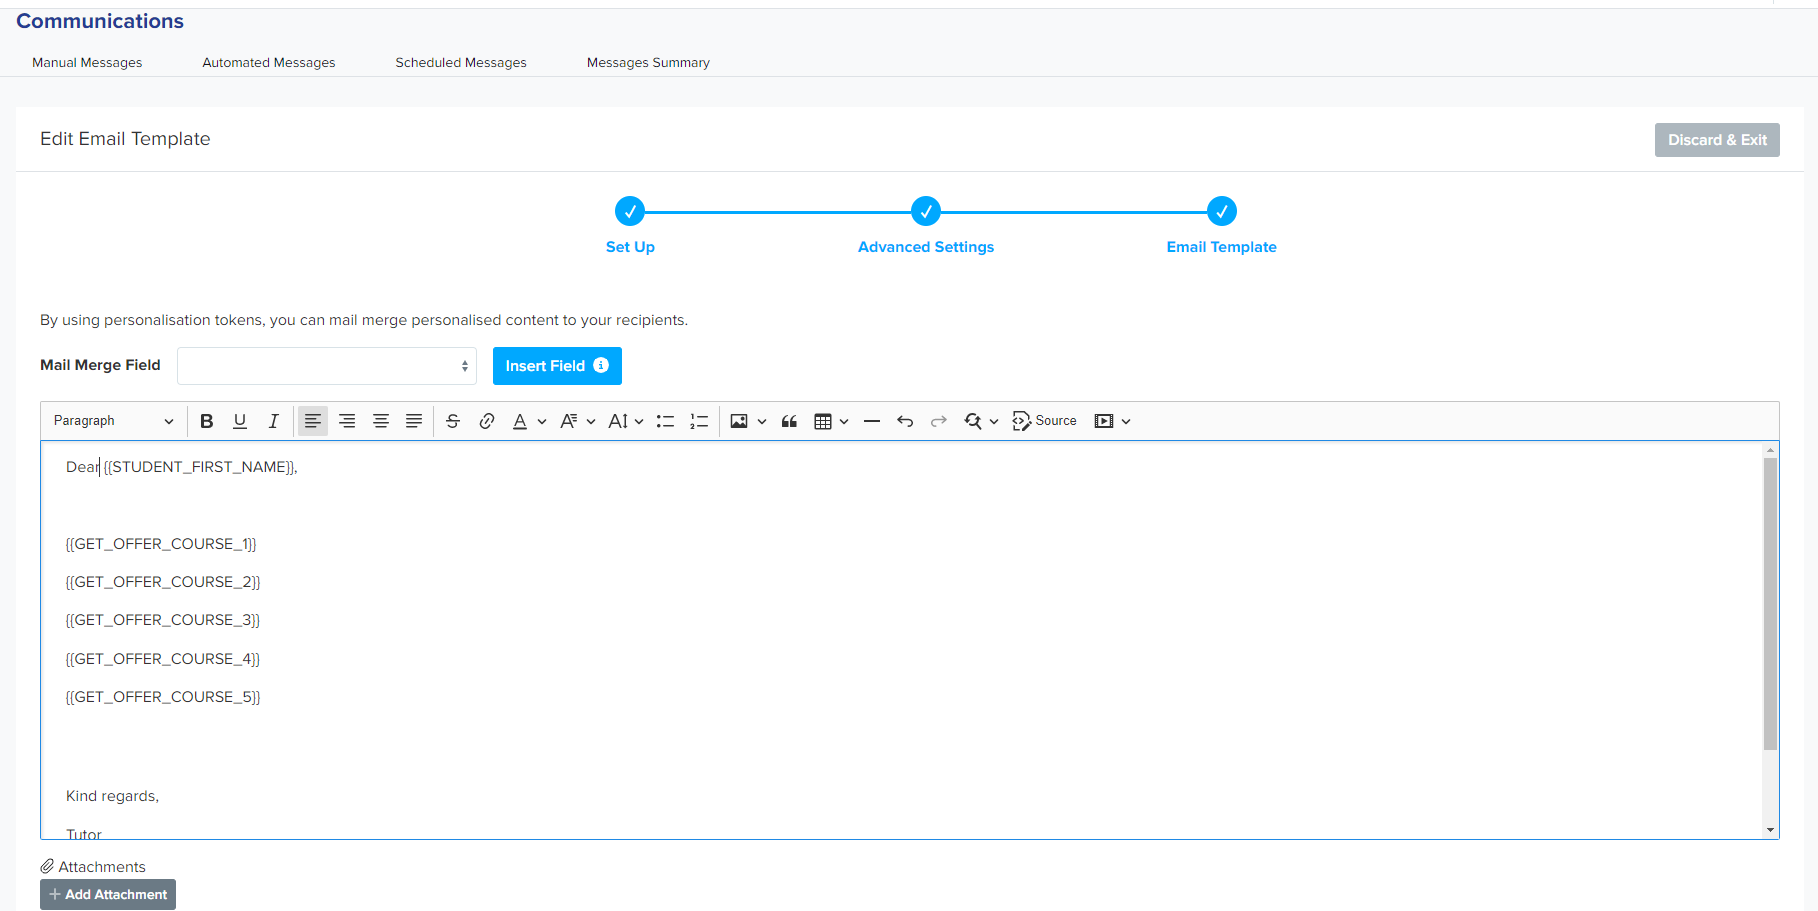
By using the mail merge fields the offered courses will pull through what you have entered on the 'offered subjects' in the courses area.