Table of Contents
- Navigation
- Reference Status
- Editing referee details
- Multiple reference types
- Resending Reference Request
- Sending custom email to referees
Navigation
You can view the list of students awaiting references on the Dashboard. This can be accessed through the Application Form Statuses Graph, the Phase Status Details Table, or the Dashboard Tiles if you have created one.


Reference Status
You can check the status of each student's reference request by scrolling to the right in the student table. Additionally, you can utilise the sort button to organize the list according to different statuses.

Here is a brief explanation of the meanings behind each reference status:
| Status | What it means |
|---|---|
| Sent | The email has been sent successfully, but the referee has not opened it yet. |
| Opened | The referee has opened the email, confirming it was delivered and viewed. |
| Clicked | The referee has clicked the link and accessed the form, but has not yet submitted it. |
| Partially Completed | The referee has previously submitted a reference for this applicant at another institution. Some responses are pre-filled, but they must complete any remaining questions. See Centralised References. |
| Bounce | The email could not be delivered due to an invalid address or delivery issue. |
| Dropped | The email was not sent because the system identified it as undeliverable. |
Multiple reference types
Tip: Multiple reference types are configured within the Reference step of your application form. You can create up to five form types, each with its own questions and conditional trigger. See How to set up multiple reference types for full instructions.
If your school uses multiple reference types, the status column displays an aggregate badge showing how many references have been completed for each applicant — for example, 2 of 3 or ⚠ 1 Failed.

Click the ↗ arrow icon on any row to open the Reference Status Panel. This shows each reference type individually with its own status, referee details, and available actions. From the panel you can:
- Resend the request for a specific reference type
- Send a custom email to a specific referee
- Use Resend Request to all to follow up all outstanding referees at once
- View and Download PDF to save a copy of any completed reference record

Editing referee details
Changed in latest update: The References section has moved. It is no longer found within the Initial Application tab. References now have their own dedicated References tab in the student profile navigation bar.
If a reference request has bounced or been dropped, open the applicant's profile and navigate to the References tab to check and update the referee's contact details.

Once referee details has been updated, you may then resend the reference request.
Tip: You may contact the student to confirm the accuracy of the referee information they provided. Alternatively, you can review the referee details of other students who have successfully completed reference requests from the same institution and copy the correct information. If the referees differ, you can still copy the email address, as referees have the option to securely reassign the reference request to the appropriate individual.
Resending Reference Request
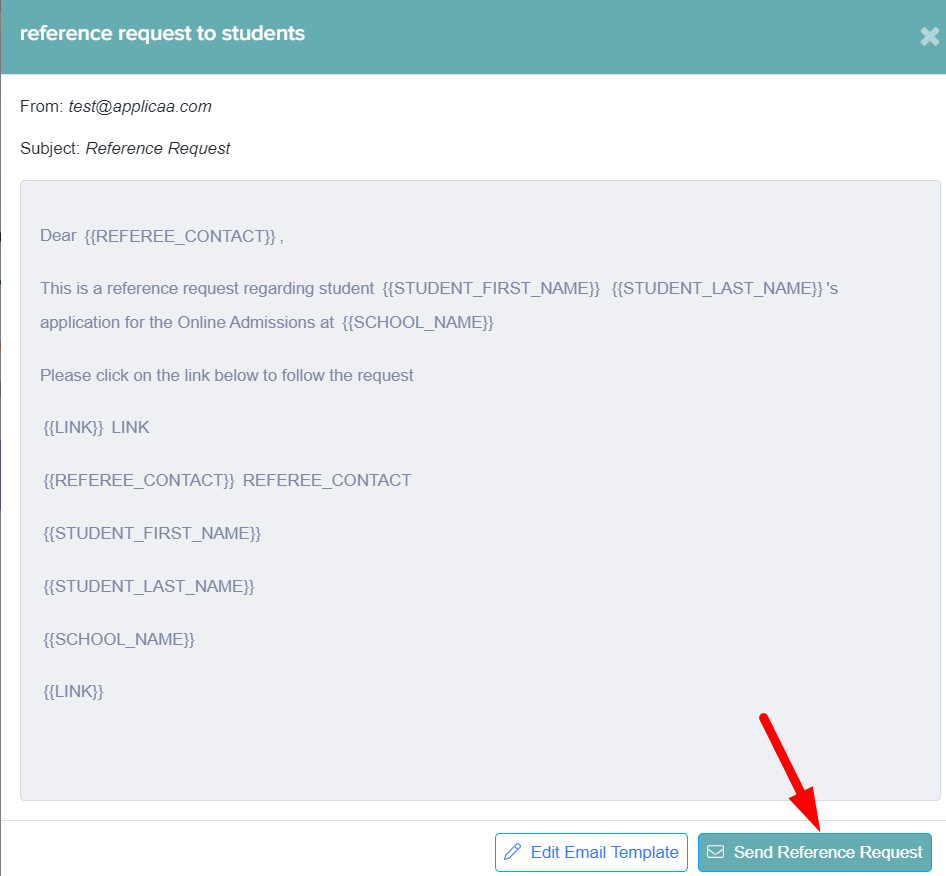
Select the students for whom you would like to follow up on their reference requests by checking the corresponding checkbox(es) on the left side of the table. Then, click on the 'Communications' button located at the top of the student table and choose 'Send reference requests' from the dropdown menu.

A preview of the message will be displayed, allowing you to review and edit the template as needed. Once you are satisfied with the content, simply click the 'Send Reference Request' button to finalise and confirm your action.
Sending custom email to referees
You also have the option to send a personalised email to referees by choosing 'Send custom email to referee' from the dropdown menu. This feature allows you to craft a message tailored to the specific needs or circumstances of each referee.

Once you select the option to send a custom email, a preview page will appear, allowing you to compose and customize your message directly in the text editor to convey all relevant information effectively.
Additionally, if you have a pre-customised template saved in the system, you can easily select it from the templates list and click 'Add Template' to populate the email with your pre-written content. This can save you time while still allowing for personalisation.
 After composing your email or adding a template, take a moment to review the message in the preview pane. This step allows you to ensure that all details are accurate and that your communication is polished before you send it off to the referee. By taking the time to personalise your message or utilise a well-crafted template, you can enhance the clarity of your communication and increase the likelihood of a prompt response from the referee.
Tip: To set up automatic reminders so you don't need to follow up manually, see How to create an automated reminder for incomplete referee forms.