What is the Enquiries & Leads Area?
The Enquiries & Leads area replaces the old Enquiries section with a modern, activity-aware workflow. It is split into two main sections accessed from the Parents & Enquiries tab:
- All Enquiries (the pipeline) — manage and track every enquiry received through your website forms or manual entry, from first contact through to application.
- Enquiry Forms — create, edit, and publish the forms families use to submit enquiries on your website or ApplicaaOne profile.
Both are available only when the Enquiry Redesign feature flag is enabled for your school.
The All Enquiries Pipeline
The All Enquiries page gives admissions staff a real-time view of every enquiry in the system, grouped into a pipeline based on engagement and progress.
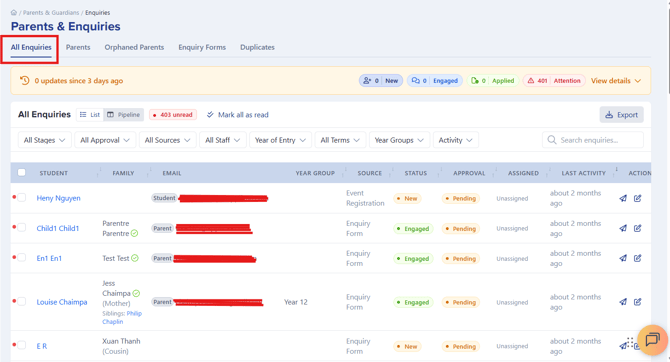
Activity Summary Bar
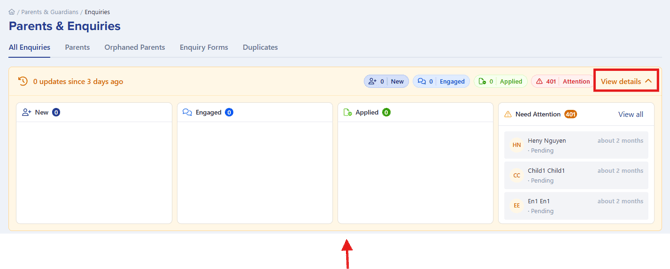
When you open All Enquiries, a summary bar sits at the top showing activity since your last visit. Four badges give you an instant picture:
- New (blue) — enquiries received since your last login.
- Engaged (teal) — enquiries where the family has replied to an email, attended an event, made an inbound call, or created/claimed an account.
- Applied (green) — enquiries that have progressed to a formal application.
- Attention (red) — enquiries with no activity for an extended period that may need follow-up.
Click View details to expand the full breakdown with quick-access cards for each enquiry needing attention.
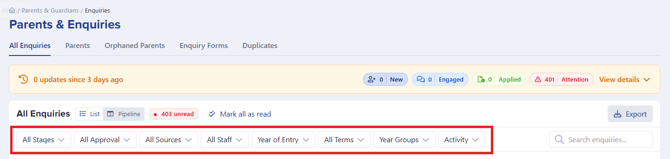
Filtering the Pipeline
Use the filter bar above the enquiry list to narrow results by:
- Stage — filter by enquiry stage (New, Engaged).
- Approval Status — filter by enquiry approval (Pending, Approved).
- Source — filter by where the enquiry came from.
- Assigned Staff — show only enquiries assigned to a specific team member, or unassigned.
- Year of Entry — filter by the expected intake year.
- Entry Term — filter by the expected term of entry.
- Year Group — filter by the year group the child is applying for.
- Activity — filter by enquiry inactivity.
- Search — type a name or email to find a specific enquiry.
Filters combine together. Click Clear all to reset.
Working with an Enquiry Record
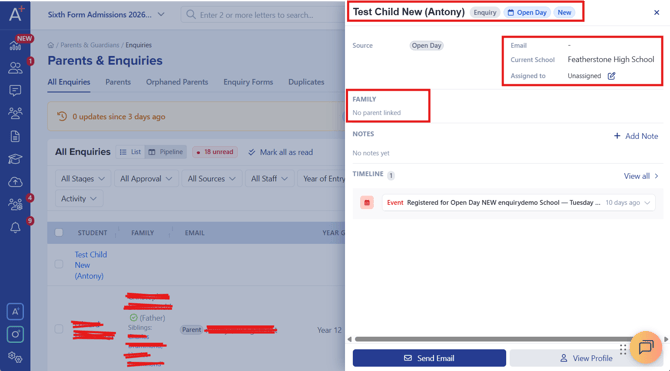
Opening an Enquiry
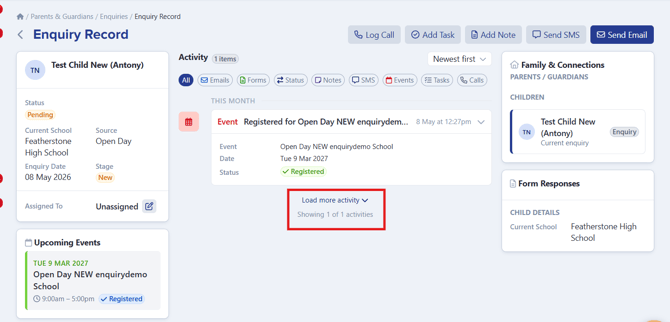
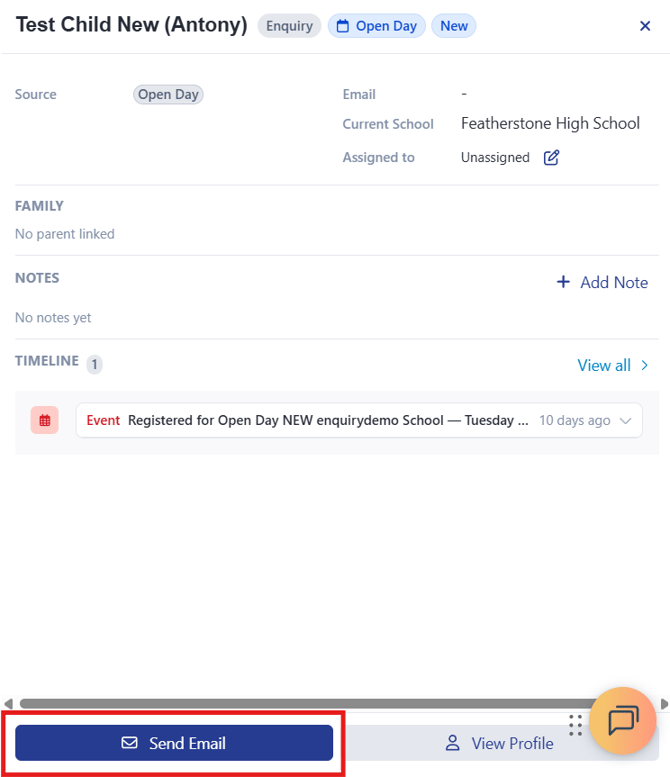
Click any enquiry row in the pipeline to open the detail panel on the right. This panel shows:
- Name and status badges — the child's name, enquiry type, and engagement status (New or Engaged).
- Key information grid — date of birth, entry year, entry term, and source of the enquiry.
- Email — the family's contact email address, linked directly.
- Current School — the school the child is currently at, if provided.
- Assigned Staff — who is responsible for following up this enquiry.
- Family section — the parent or guardian's name, relationship, and email. Clicking the name opens their full parent record in a new tab.
Assigning a Staff Member
From the detail panel, click the pencil icon next to "Assigned to" to reassign the enquiry. A dropdown lists all active staff members. Select a name to assign the enquiry to them. This updates immediately and is reflected across the pipeline.

Activity Timeline
The detail panel includes a chronological Activity Timeline showing every interaction that has taken place with this enquiry. Activity types include:
- Enquiry received — when the form was submitted.
- Status changes — when the enquiry moved between pipeline stages.
- Emails sent — communications from staff to the family.
- Notes added — internal notes left by staff.
- Events registered — if the family registered for an open day or event through the system.
- Form completions — when specific form steps were completed.
Activities are shown most recent first. Click View All, and then click Load more at the bottom to pull older activity from the past six months.
Sending an Email from an Enquiry
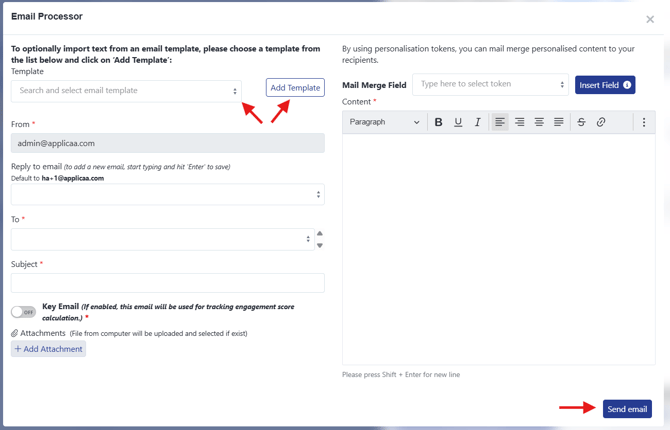
From the detail panel, click the Send Email button in the footer to open the email composer. This pre-fills the recipient with the enquiry's email address (or the parent's email if the child has none).
Use the Email Templates dropdown to select a pre-approved template, or write a custom email. Templates are filtered to those relevant for parents or students depending on who the primary contact is.
Click Send to dispatch the email. A copy is automatically logged in the enquiry's activity timeline.
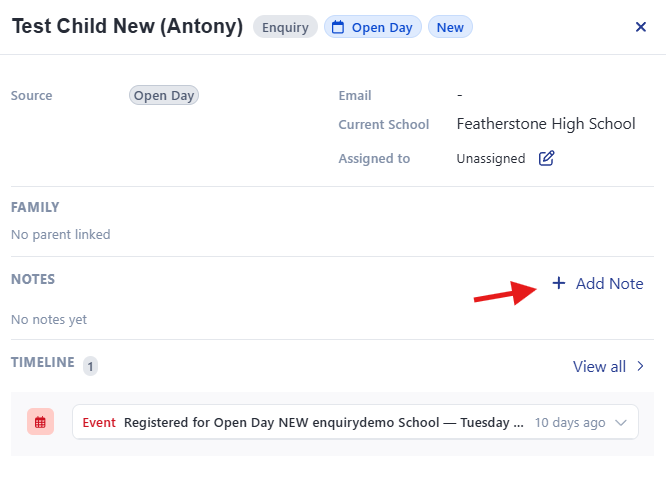
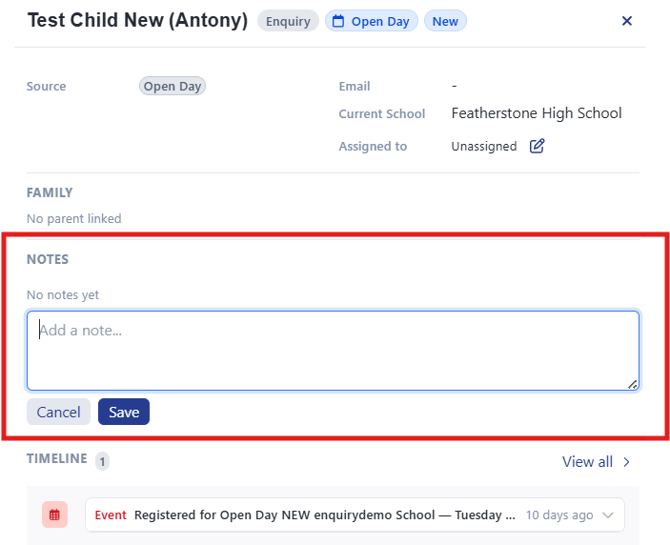
Adding Notes
From the detail panel, scroll to the Notes section or use the Add Note button to leave an internal note on an enquiry record. Notes are:
- Visible only to your school's staff — not to the family.
- Timestamp and author-stamped.
- Shown in the activity timeline immediately after saving.
Use notes to record phone call outcomes, school visit feedback, or anything that needs to be picked up by a colleague later.
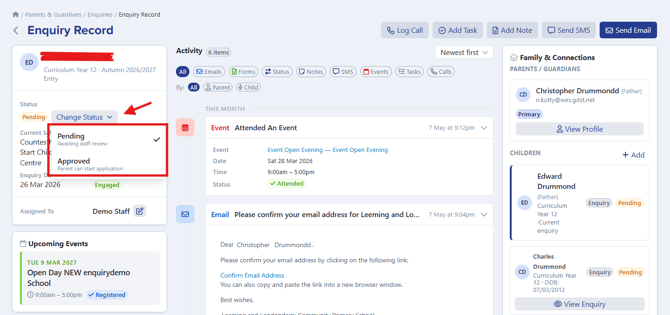
Managing Enquiry Status
Enquiries progress through three statuses: Pending, Approved, and Application Created. Status is shown as a badge on each enquiry card and in the detail panel.
To change the status of an enquiry, click it to open the details page, and use the Status dropdown (or change it from the pipeline view if your role allows bulk updates). When a family submits a full application, the status updates to Application Created automatically.
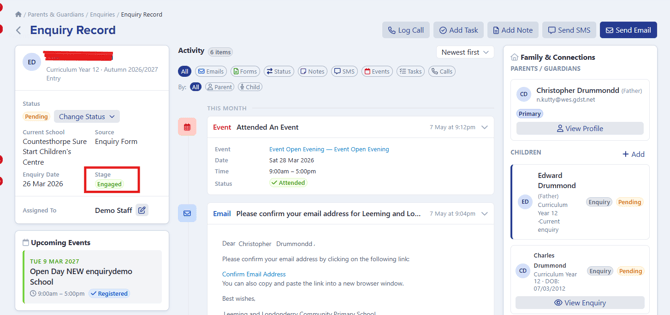
Engagement Status
In addition to pipeline status, each enquiry has an Engagement Status:
- New — no response or interaction detected from the family yet.
- Engaged — the system has detected a response: an email reply, event registration, inbound call, or account login.
Engagement is tracked automatically and updates the summary bar badges.
Enquiry Forms — Overview
The Enquiry Forms section lets you create and manage the forms families use to submit enquiries. There are two types of form:
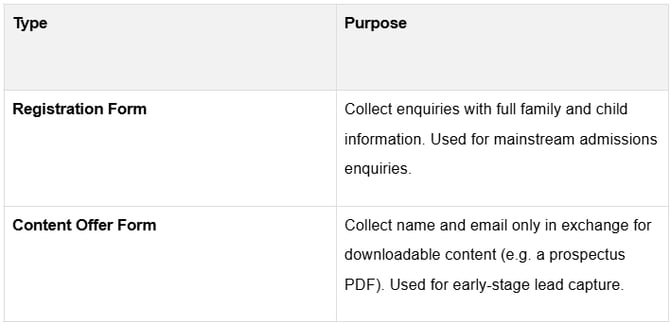
Both form types can be published (live and accepting submissions) or kept as a draft (visible only to staff).
Creating a New Enquiry Form
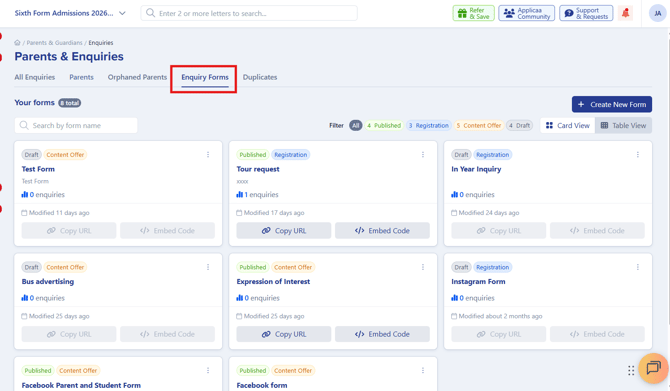
- Go to Parents & Enquiries > Enquiry Forms.
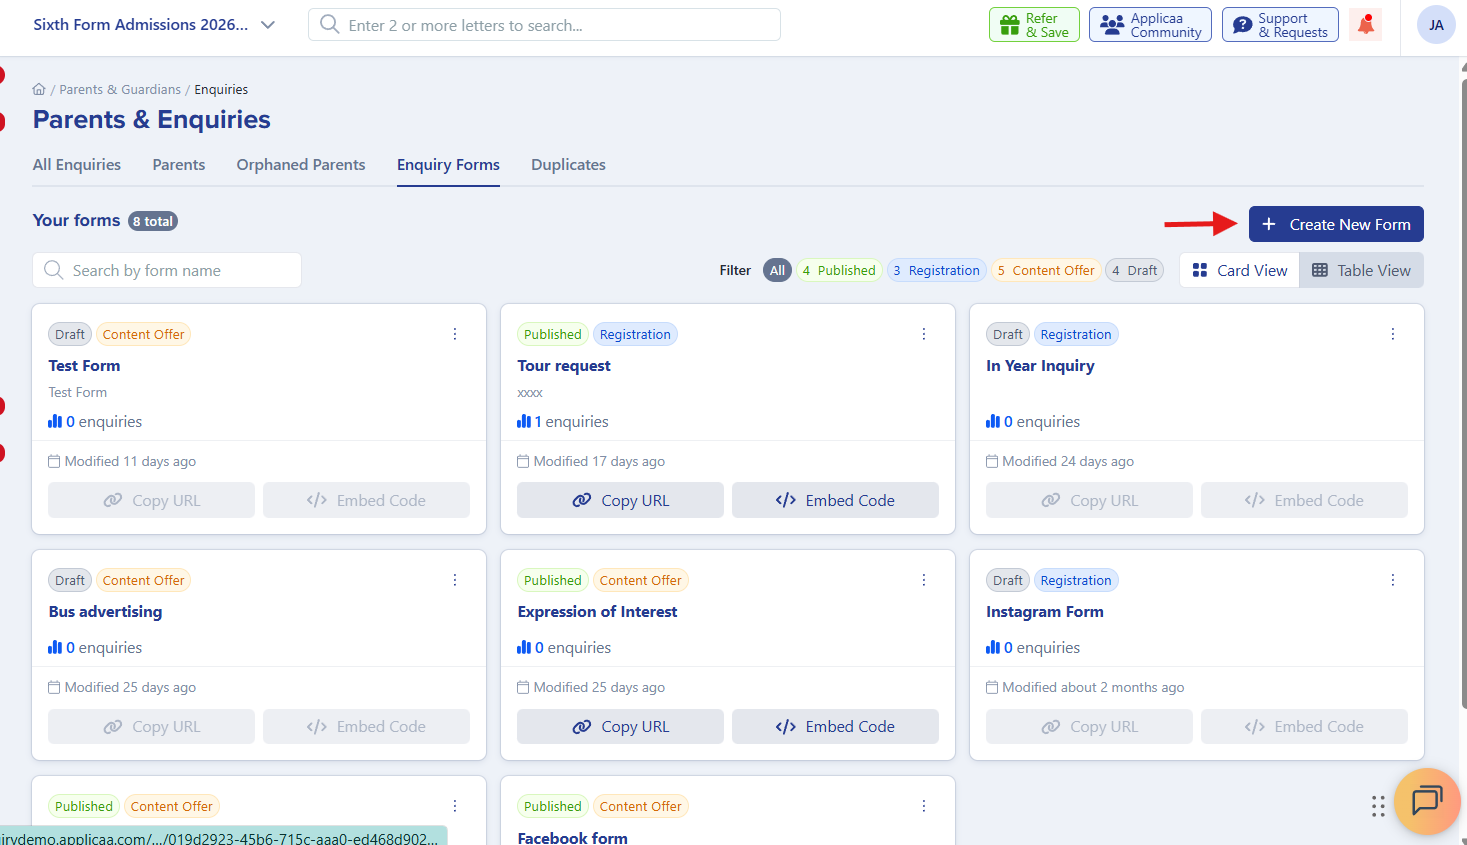
- Click Create New Form in the top right
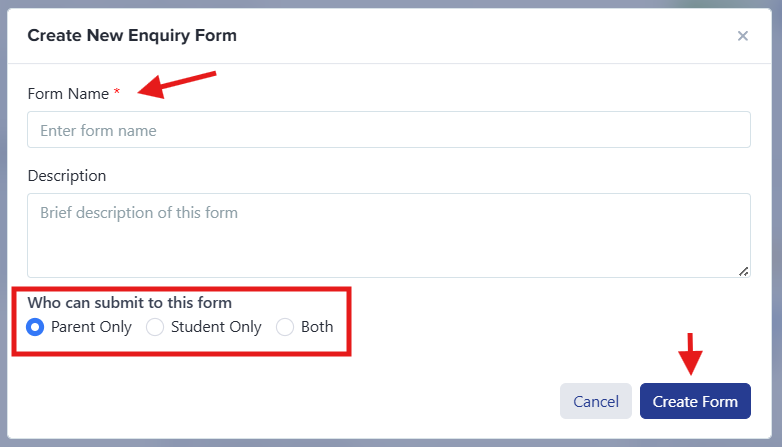
- Enter a Form Name — this is internal only, not shown to families.
- Select who can submit an enquiry — Parent Only, Student Only, Both
- Click Create.
You are taken to the form editor where you can add fields, set completion messages, and configure how the form behaves.
Building the Form — Fields and Steps
Enquiry forms use a step-based builder. Each step contains one or more fields, and you can reorder steps using drag handles.
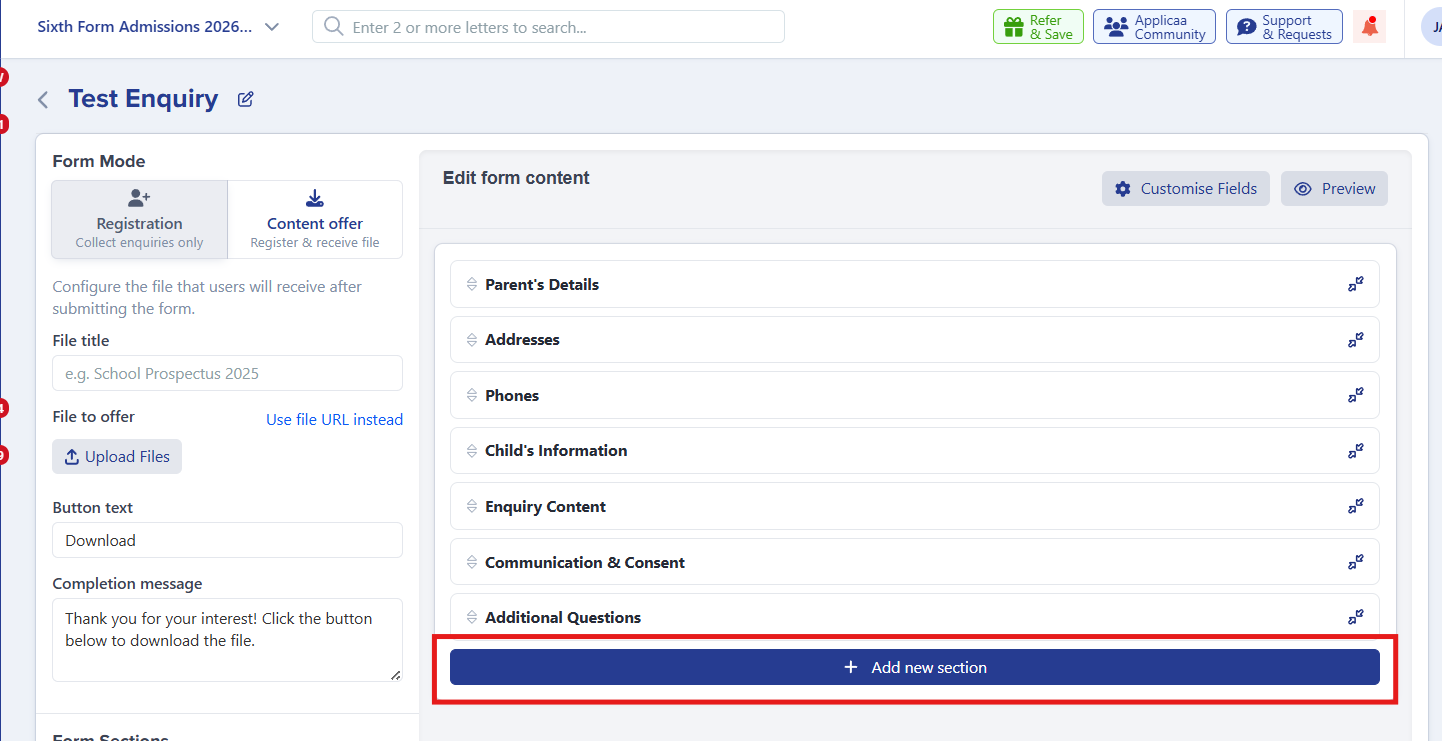
Adding a Section
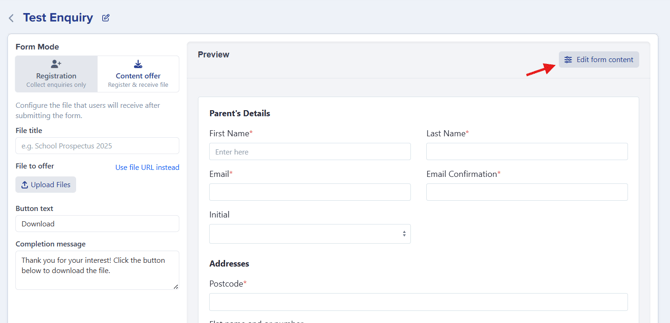
Click Edit form content to edit the form.
Click Customise Sections to view all sections. If you wish to reposition the sections, you may do so by clicking and dragging them.

Click Add new section to create a new section of the form. Name the step (e.g. "Child Details", "Parent Contact") — this is shown as a section header for families.
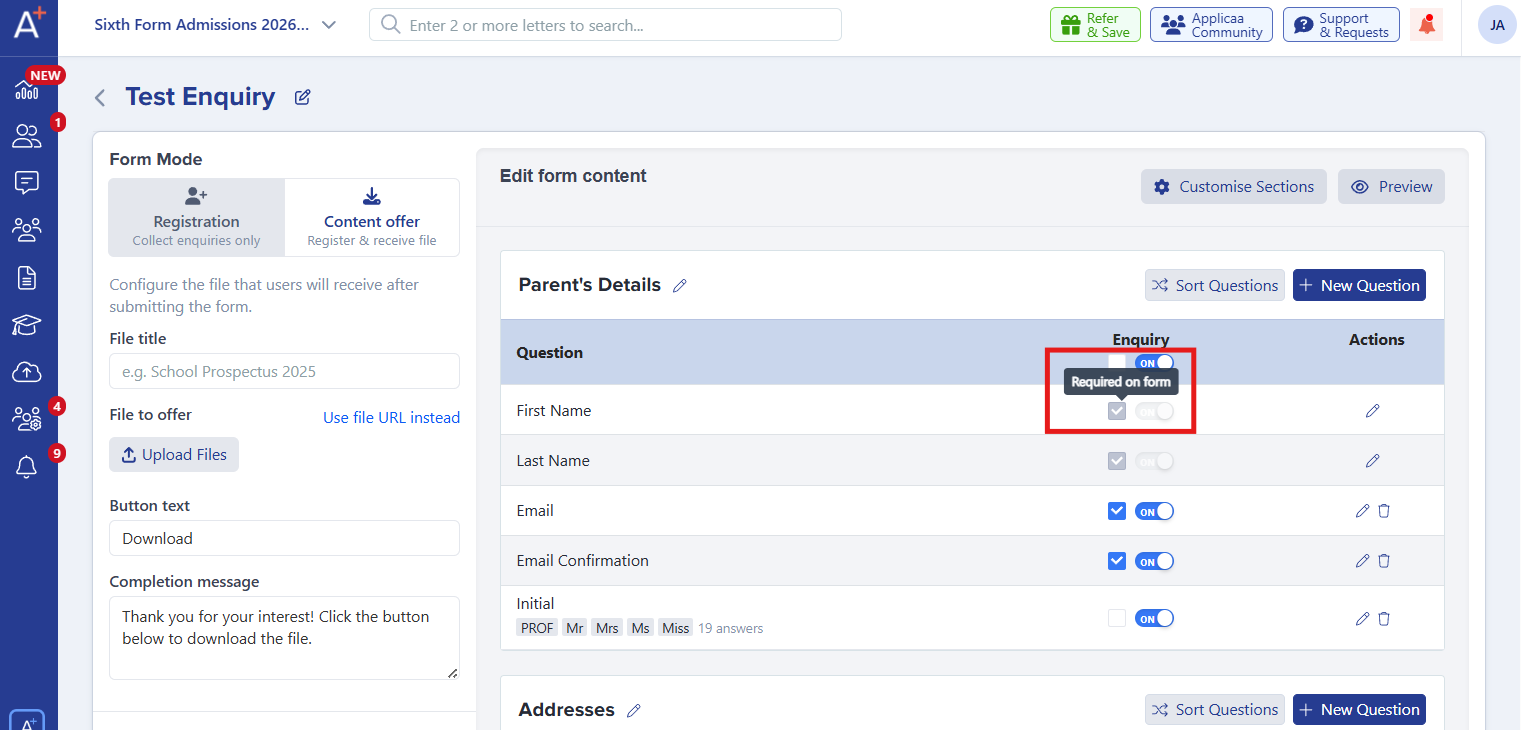
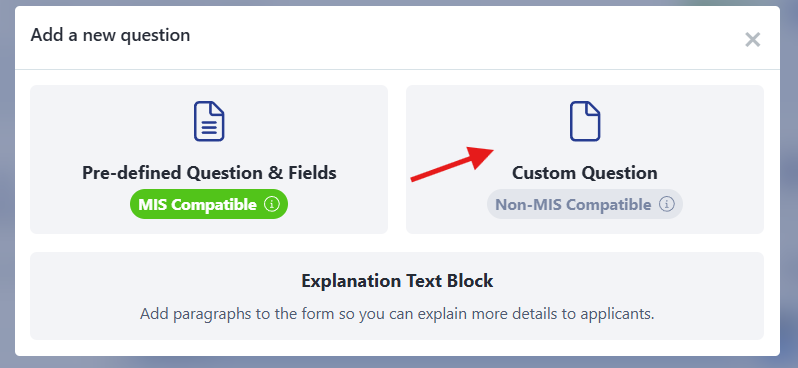
Adding Fields to a Step
Within each step, click New Question to choose from available form fields including:
- Child's first name
- Child's last name
- Date of birth
- Current school
- Reasons for enquiry
- Expected year of entry
- Expected term of entry
- Parent email
- Parent phone (home, mobile, work)
- Address fields
Drag fields to reorder them within the step.

Making Fields Required
Click the Required checkbox on any field to make it compulsory before the form can be submitted. Required fields are marked with an asterisk on the public form.
Custom Fields
If your school has configured custom fields in Settings, these appear in the field picker and can be added to any step just like standard fields.
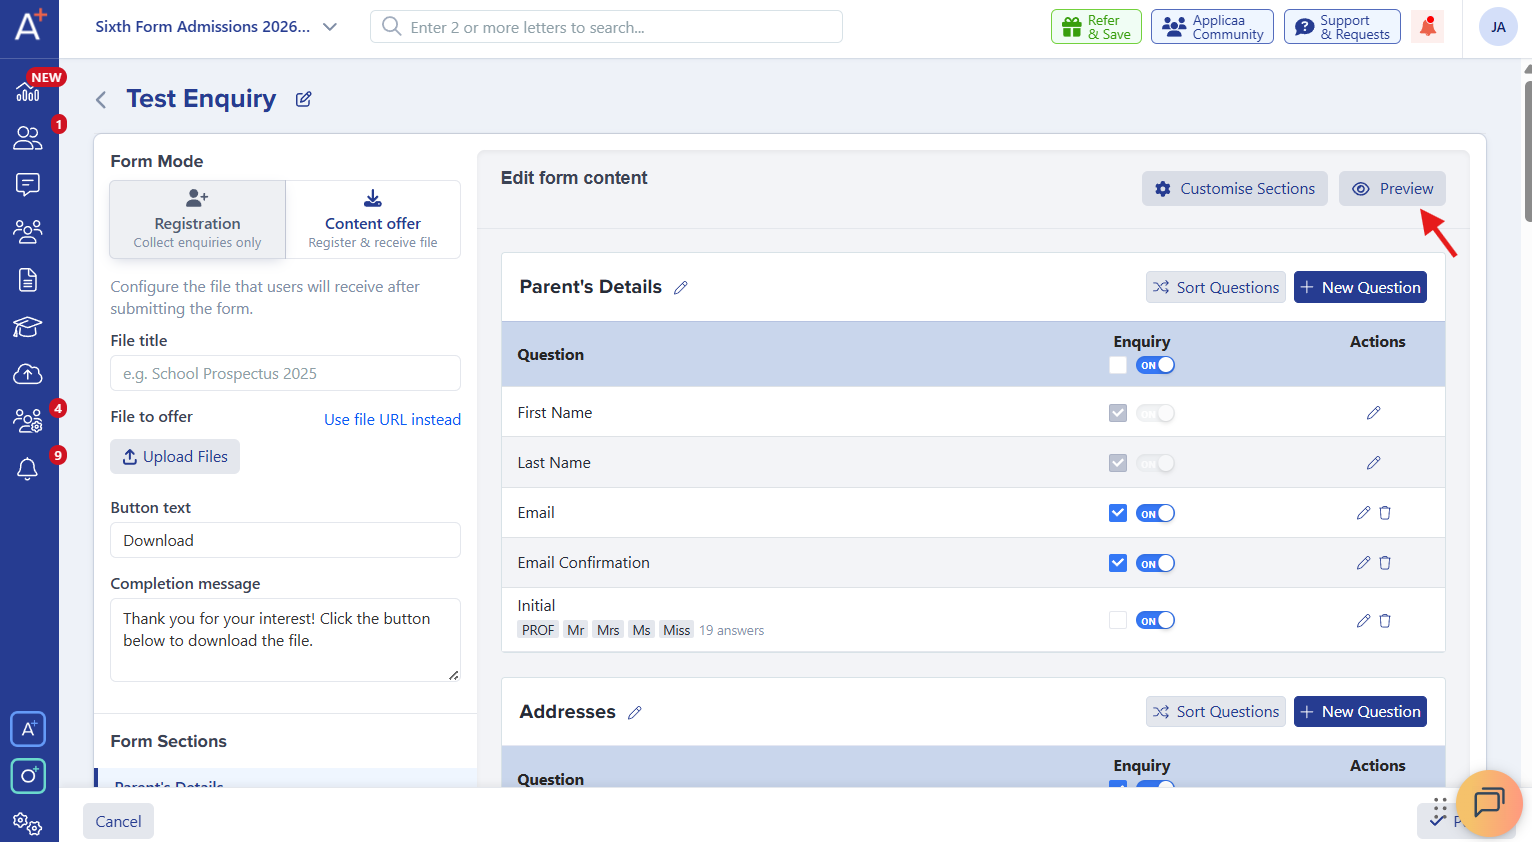
Form Preview
Click Preview in the top right of the form editor to see exactly what families will see. The preview updates in real time as you make changes to the form. Use Back to editor to return to the builder.
Publishing the Form
When your form is ready, publish it to make it live:
- In the form editor, click Publish.
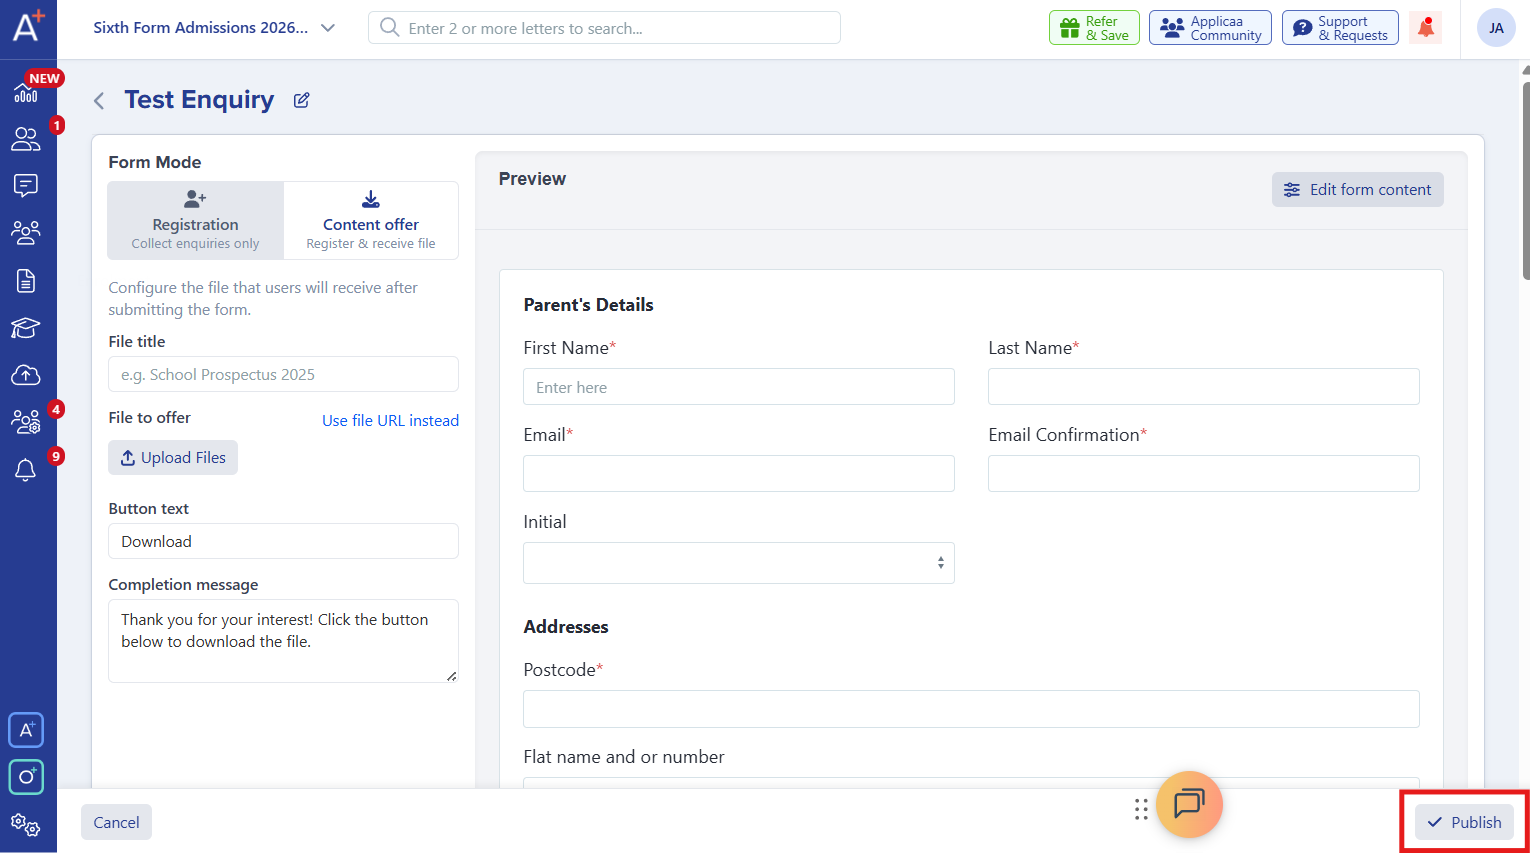
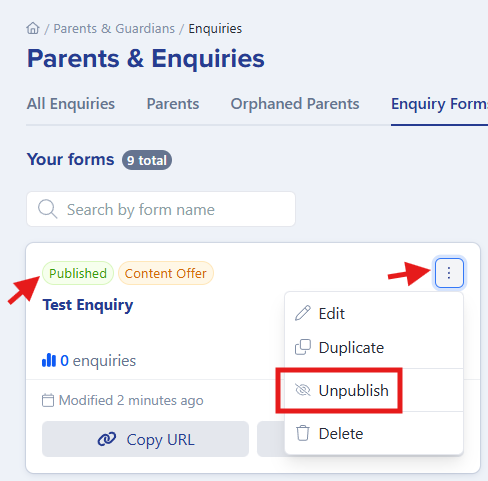
Once published, the form card in the list shows a green Published badge. You can Unpublish at any time to take the form offline without deleting it.
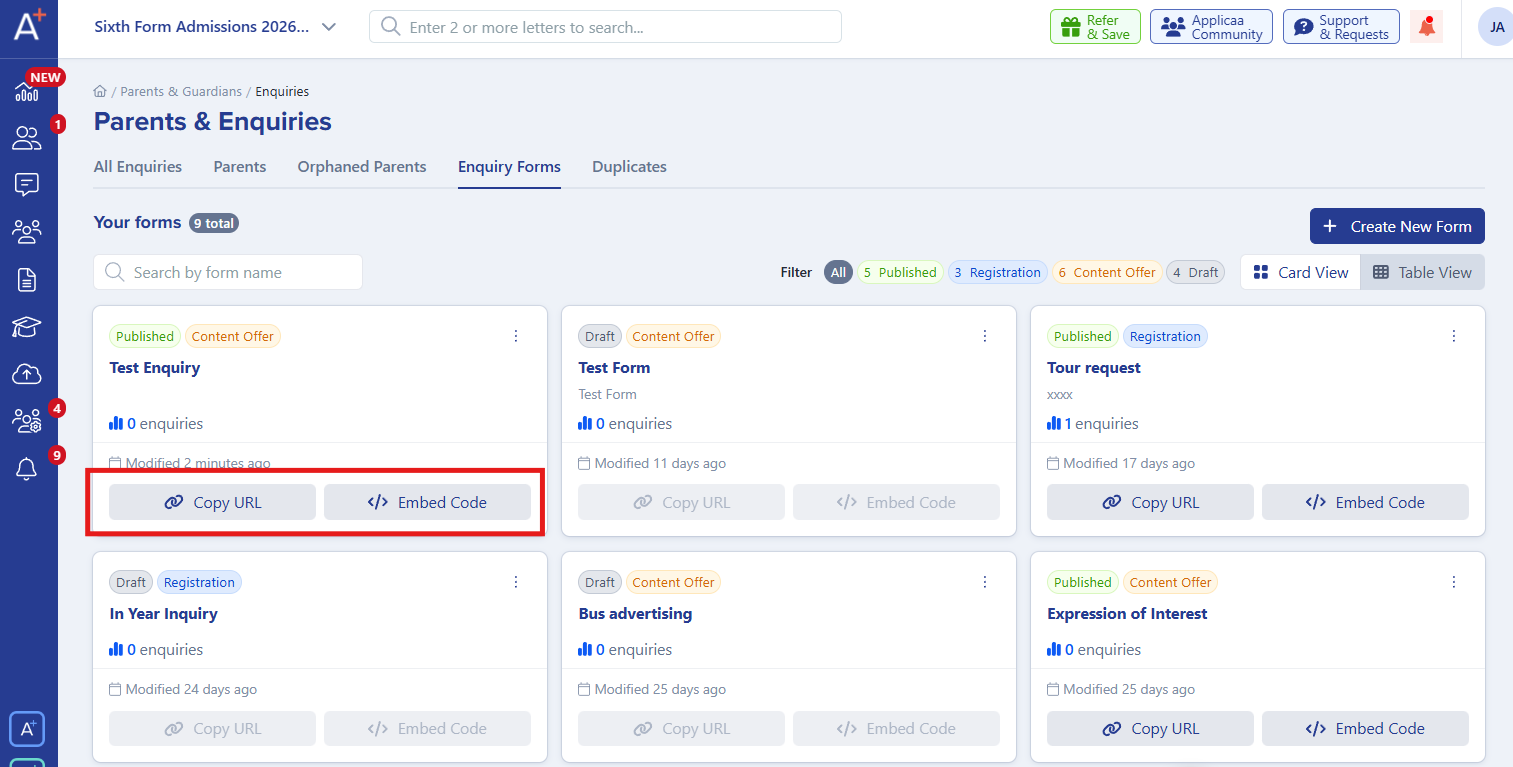
Getting the Form Link
For published forms, click Copy Link to copy the form URL, or Embed Code to copy an iframe snippet that you can paste into your school website to embed the form directly.
Duplicating a Form
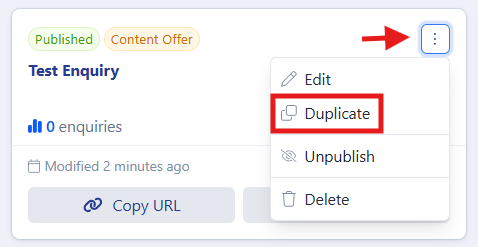
To create a copy of an existing form (useful for creating variations for different year groups):
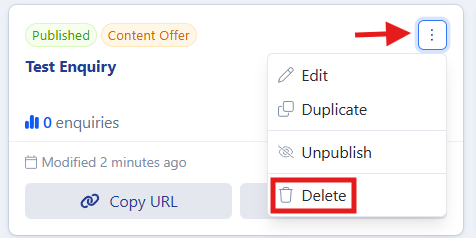
- In the form editor, click the menu icon on the form card.
- Select Duplicate.
- A new draft form is created with "(Copy)" appended to the name. You can rename and modify it independently.
Deleting a Form
A form can only be deleted if it has no submissions. If a form has received enquiries, the delete option is not available and a message indicates it cannot be removed.
To delete a draft form with no submissions, use the menu icon on the form card and select Delete.
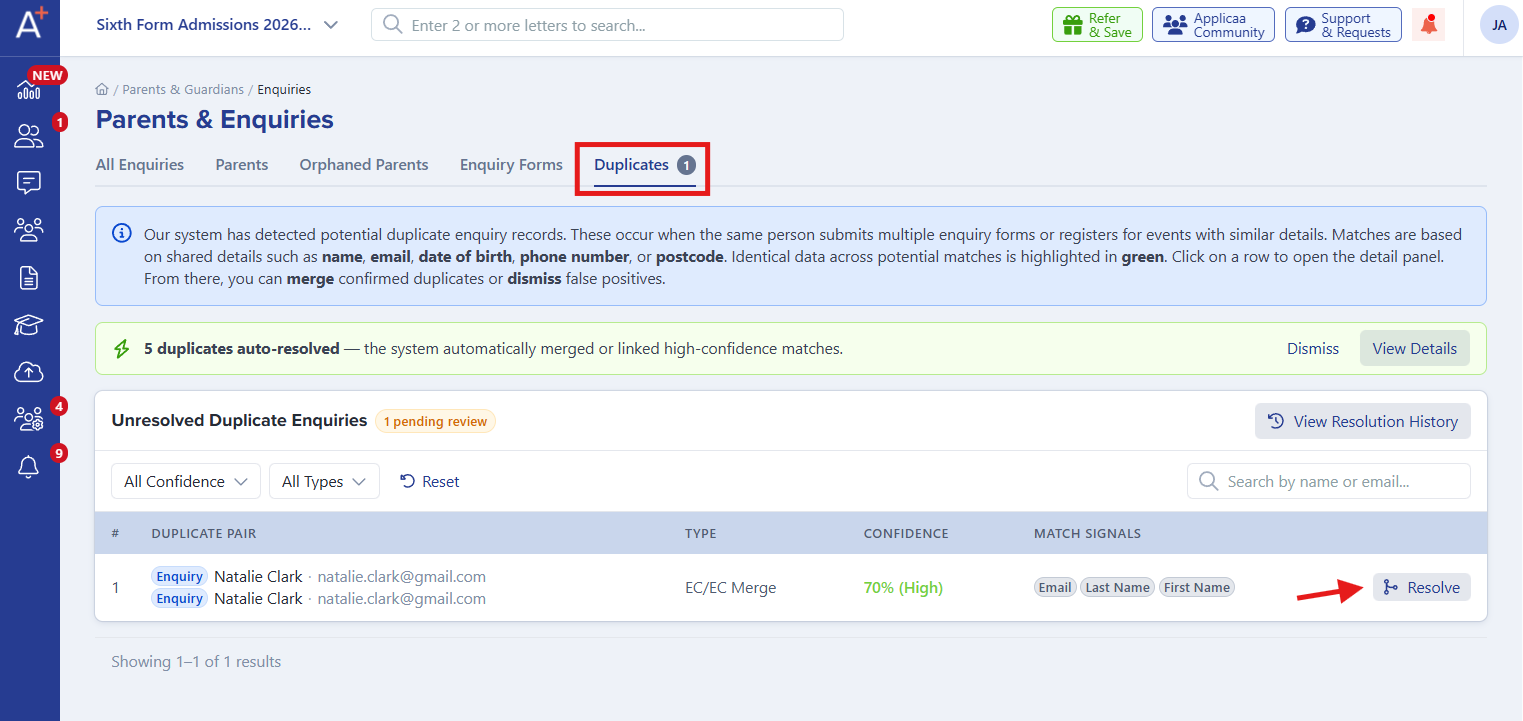
Managing Duplicates
The Duplicates tab (within the Parents & Enquiries area) flags enquiries that may be duplicates based on name, email, phone number, or postcode. This lets admissions staff review and merge duplicate records to keep the pipeline clean.
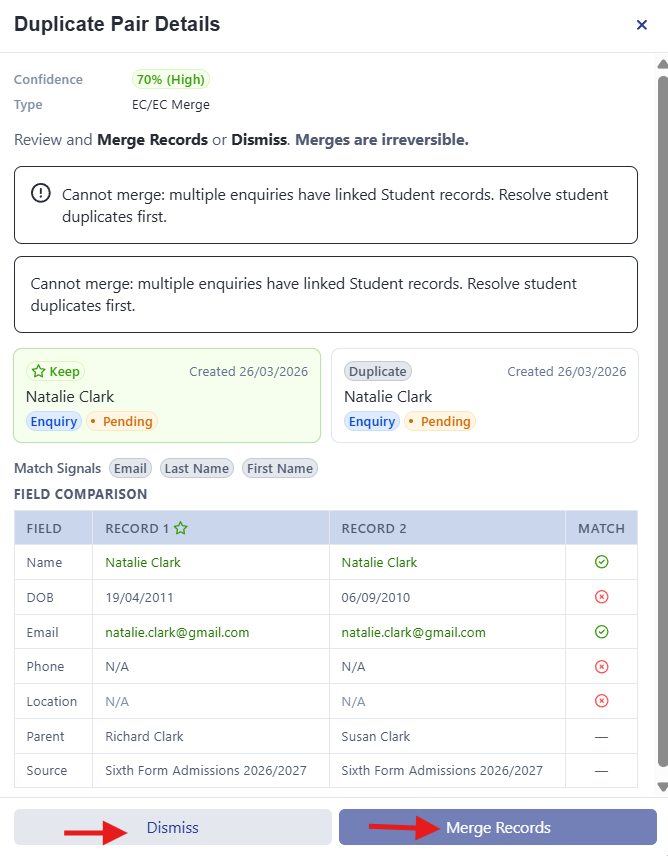
For each flagged set of duplicates:
- Review the entries side by side.
- Choose Merge to combine records, or Keep Separate if they are genuinely different families.
- Merged records combine the enquiry history and activities under a single profile.
Understanding Enquiry Sources
Each enquiry records how the family found the school. Sources are tracked based on the marketing channel or referral that brought them in, and may include:
- Website form — submitted directly through an Enquiry Form on your website or ApplicaaOne profile.
- Event registration — came from registering for an open day or event.
- Manual entry — added by a staff member directly.
- Import — loaded in bulk from a data import.
The source is shown in the enquiry detail panel and in the activity timeline. This data helps admissions teams understand which marketing activities are generating the most enquiries.
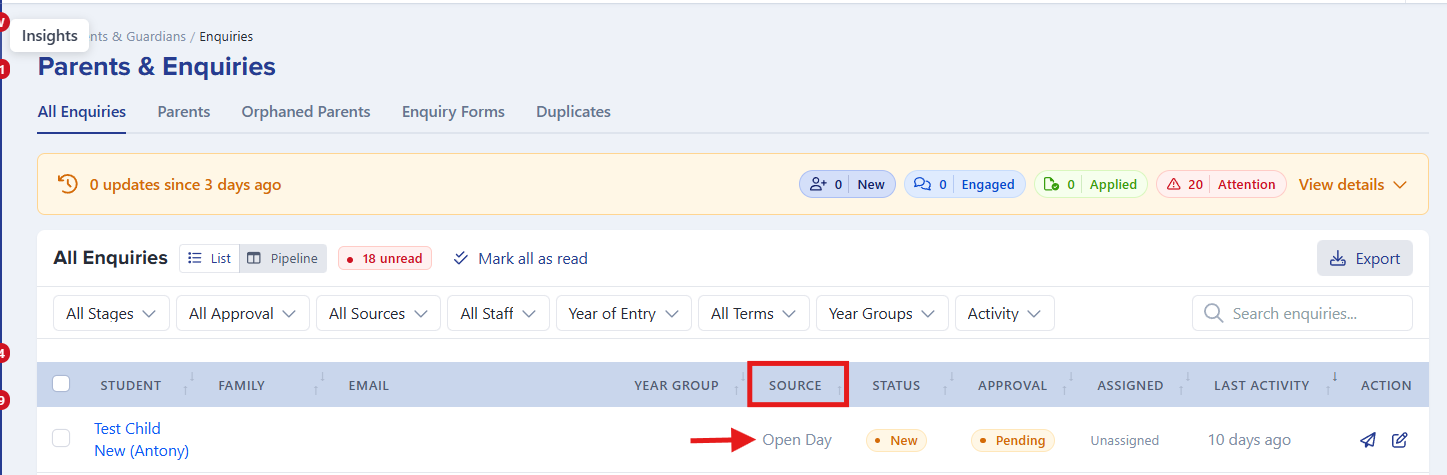
Event-Linked Enquiries
When a family registers for an Open Day or Open Evening through the system and on the event you have enabled the “creation of enquiries”, the enquiry is automatically tagged with the event type and linked to the event record. In the All Enquiries pipeline, these enquiries appear in the Source column so you can track the conversion rate from each event.
Notifications and Alerts
New Enquiry Alerts
When a new enquiry form submission arrives, admissions staff with notification access receive an alert in the system. Check the activity summary bar on the All Enquiries page for a count of new enquiries since your last visit.
At-Risk Enquiries
Enquiries in the Attention column have had no recorded activity (no email, note, event, or status change) for an extended period. Assign these to a staff member and take action to re-engage the family before they lose interest.
Reply Detection
When a parent or student replies to an email sent from within Admissions+, the system automatically updates the enquiry's engagement status to Engaged and records the reply in the activity timeline. No manual action is needed.
Key Differences from the Old Enquiries System
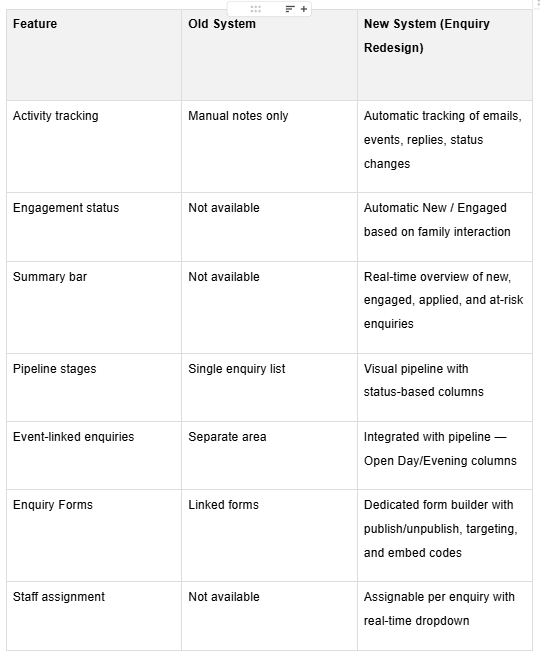
We hope this guide helps you get started with the New Leads area and makes it easier to manage prospective students and family engagement more effectively. As we continue to enhance the experience, additional improvements and features will be introduced over time. If you have any questions or require support, please don’t hesitate to contact our team.