There are different steps to follow, depending on your MIS.
This guide will cover all MIS we integrate with: SIMS, Bromcom, Arbor, Cloud School and iSAMS.
MOVING YOUR YEAR 9 STUDENTS FROM SIMS INTO YOUR OPTIONS FORM
- Load the Admissions+ SIMS App and select “Export Applications”.

- Select the correct application form (your Year 9 Options Form) to ensure this is where the students are exported to.
- Note: if the form is not showing in the list, you will need to log into your Options Form system and ensure the toggle switch is turned on in your forms area.
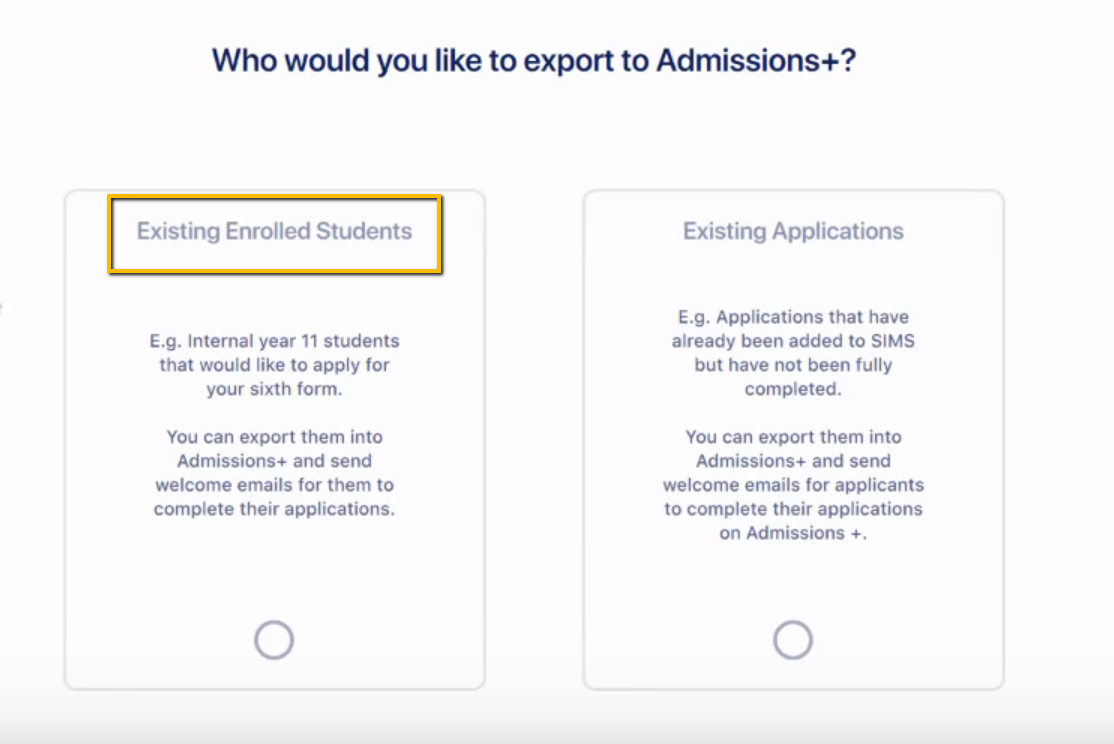
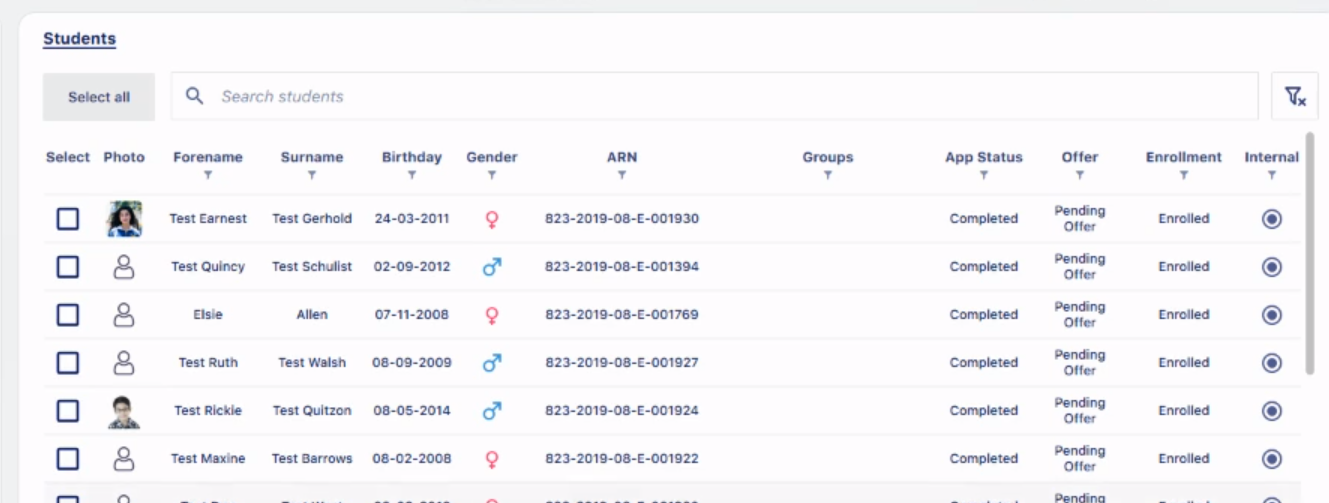
- Choose “existing enrolled students” when prompted, and then filter to select the correct year group from the list of all on-roll students.
- Click “select all” to choose all of the students who appear in your filtered list.
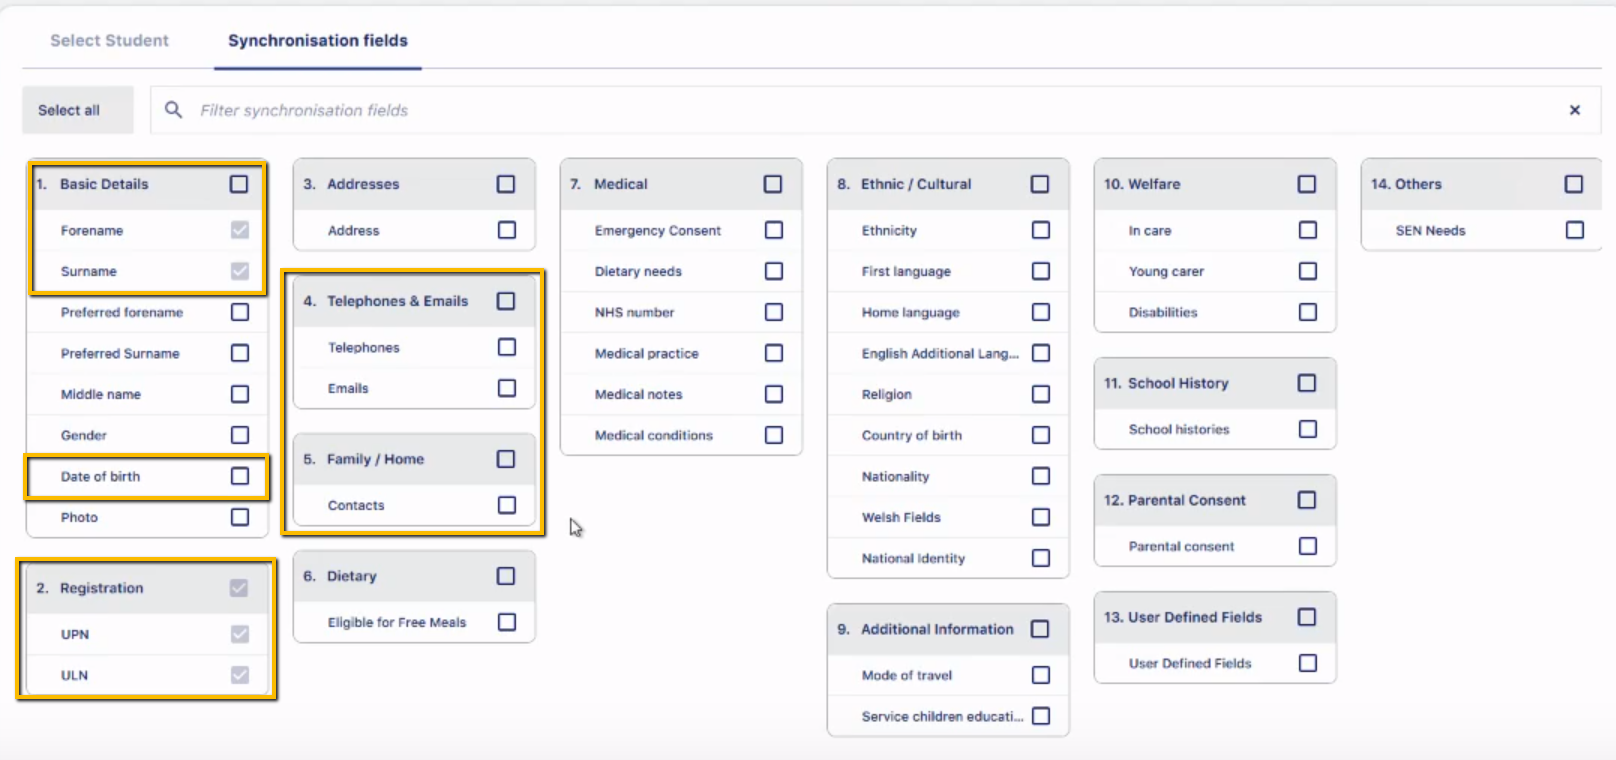
- Choose which fields of data to export from SIMS; we suggest the following:
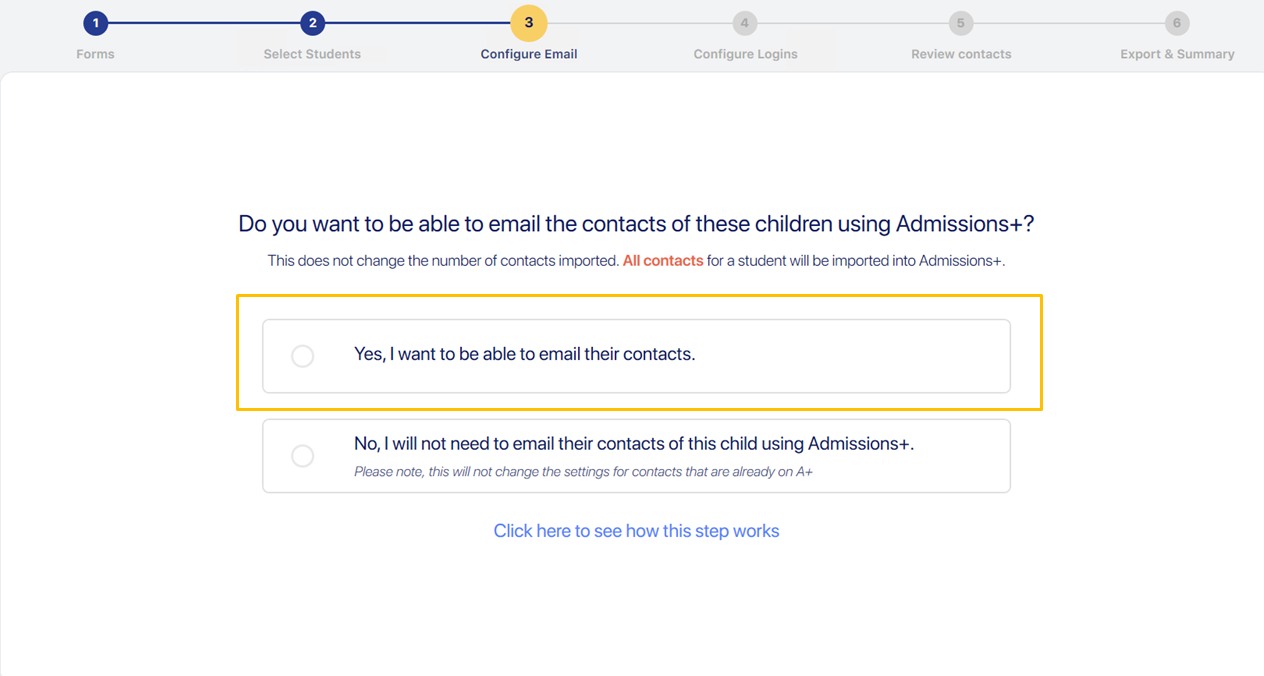
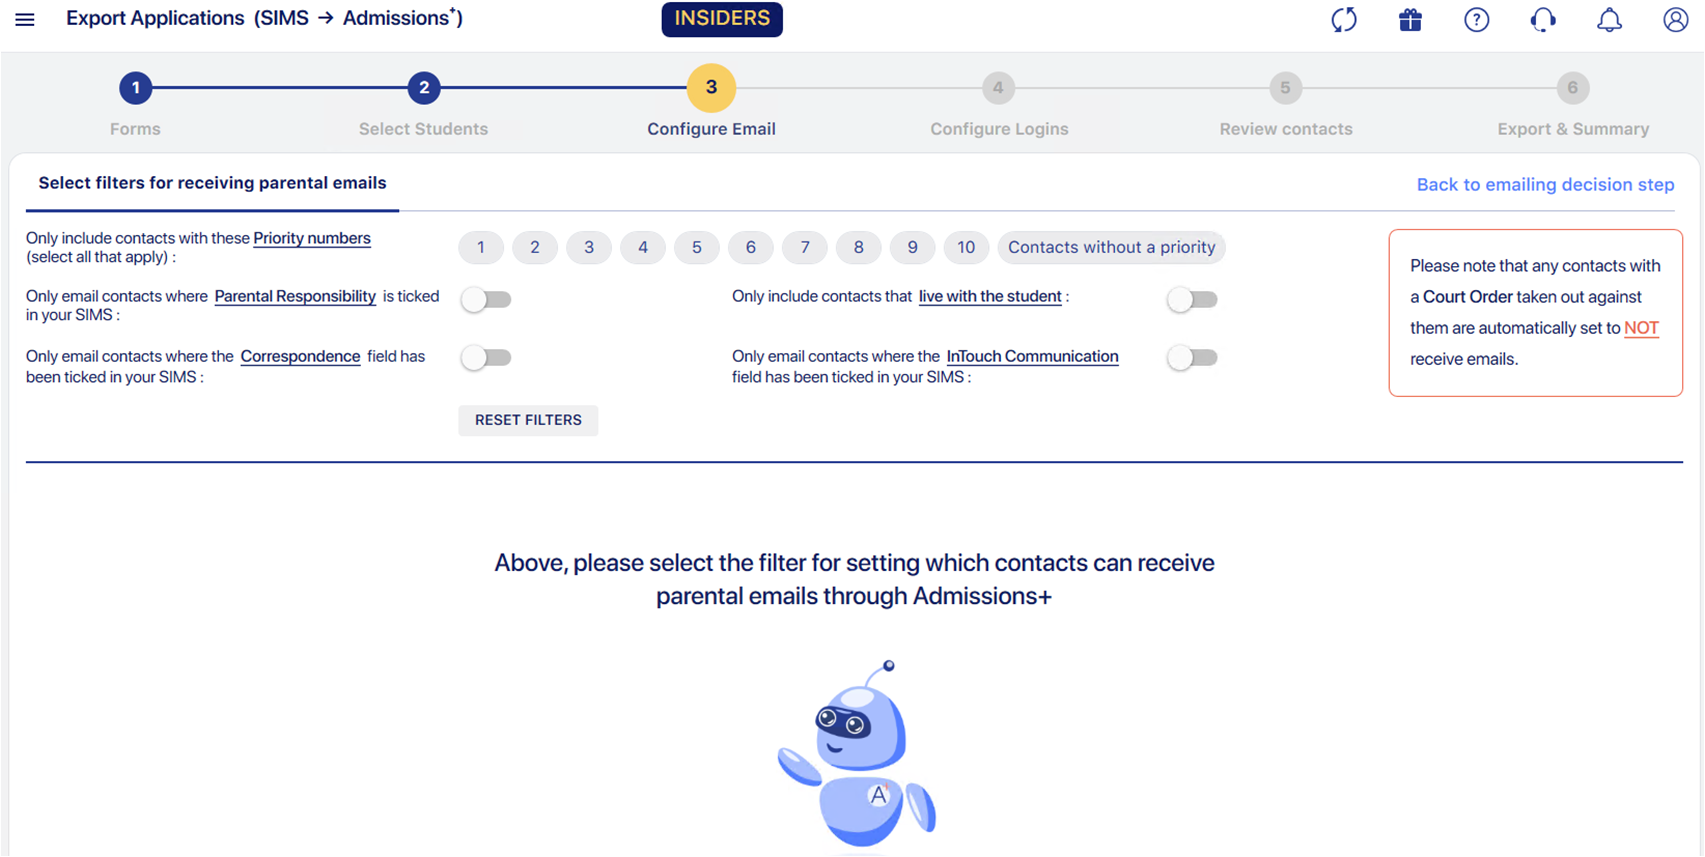
- You will then be asked whether you would like to be able to email the parents/contacts of each student - we suggest choosing “yes” and then selecting to import the data for Priority 1 and/or contacts with Parental Responsibility.
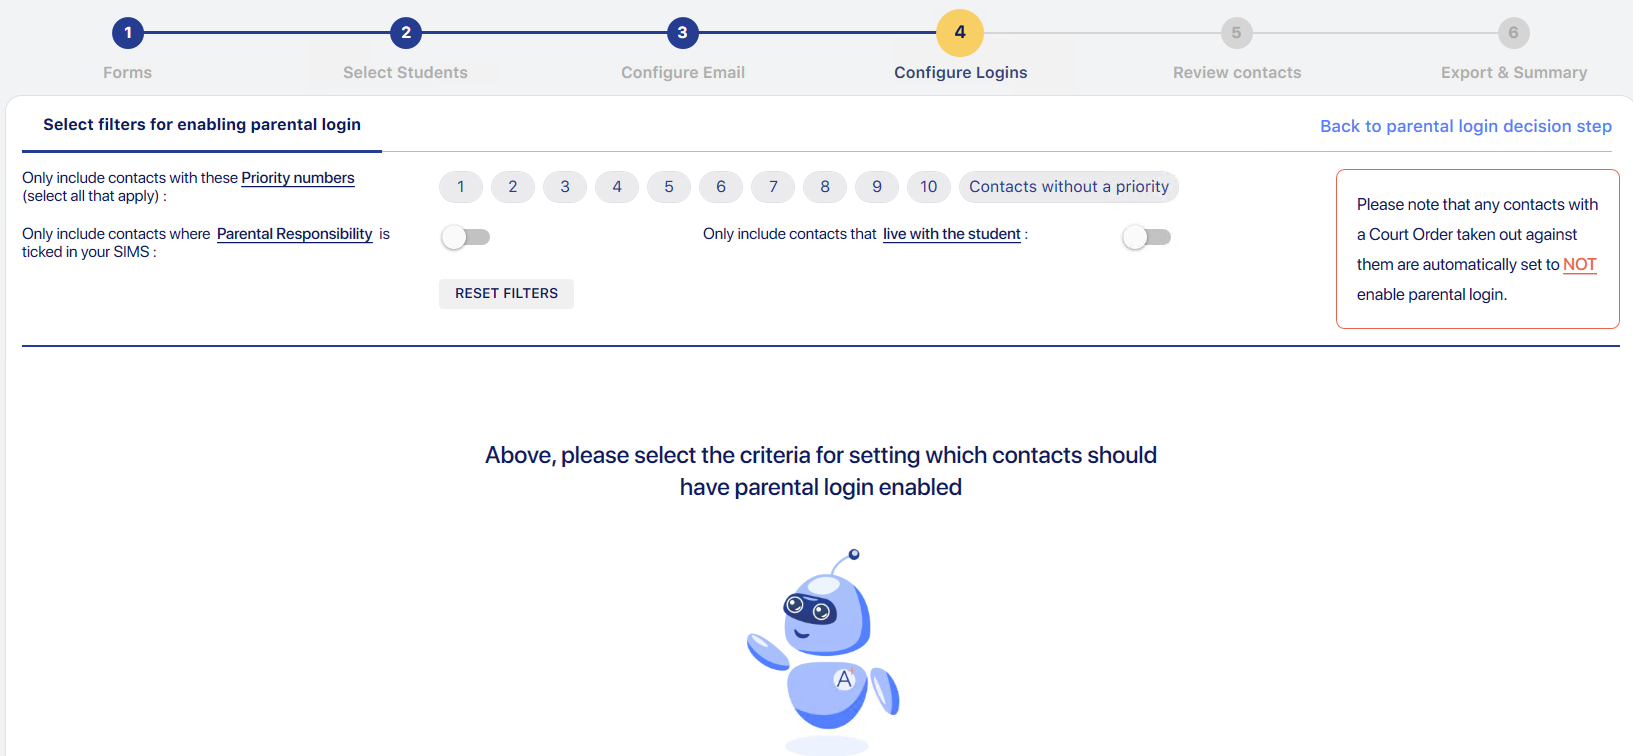
- You will then be asked whether you want the contacts to have login credentials so that they can login to the system, as well as choosing which contacts to enable this for.

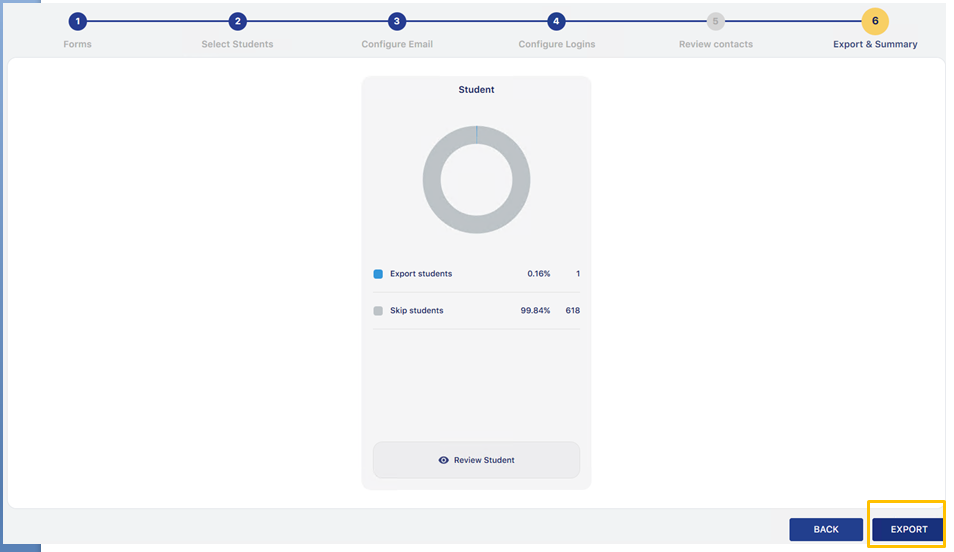
- Finally, you will be prompted to complete the export and the data for your students will show in the Data > Import area of your Options platform.


MOVING YOUR YEAR 9 STUDENTS FROM ALL OTHER MIS INTO YOUR OPTIONS FORM
- Navigate to Data > Import > Start an Import.
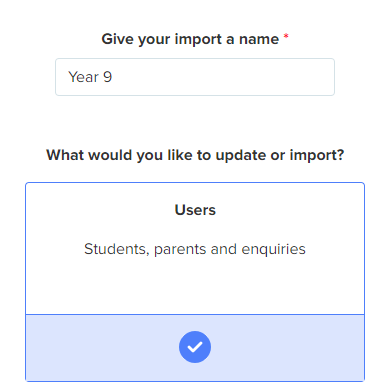
- Give your import a name and select “users”, then “next”.
-
Select “New Users” and “next”, then “Students” and “next”.
-
Select the name of your MIS and then click “next”.

- You will see a Mapping step which shows you which data will be imported; scroll to the bottom and click "next".

-
Filter by Year and select Year 9 from the dropdown menu, then click “select all” to choose all of the students within that year group.

-
Click “next” to complete the import, and the students will then be visible in your Imports area.

Note: if you need to be able to communicate with the parents of these students, the contact details of the parents will need to be imported separately.
1. Click your Registered Students dashboard card and tick to select all students; then click "export > as CSV"


2. On the CSV you have exported, add columns for Parental First Name, Parental Last Name, Parental Title and Parental Email and populate these fields with the data for your students.
3. Save the CSV file and go to Data > Import > Start an Import

4. Name the import, select "users" and "next", followed by "existing users" and "next".
5. Select "students" and "next", then "CSV" and "next".
6. Select your CSV file and progress to the mapping step - map as follows:


7. Click "next", "select all" and "next" to complete the import of the parental data.
TRANSFERRING CLASSES INTO SIMS
Note: First, check your class codes are correct so the mapping will be straightforward! Navigate to the Timetables area of your system and click the pencil icon for each subject to view the classes and their codes. Ensure these match the class codes in your MIS (and amend them as needed).
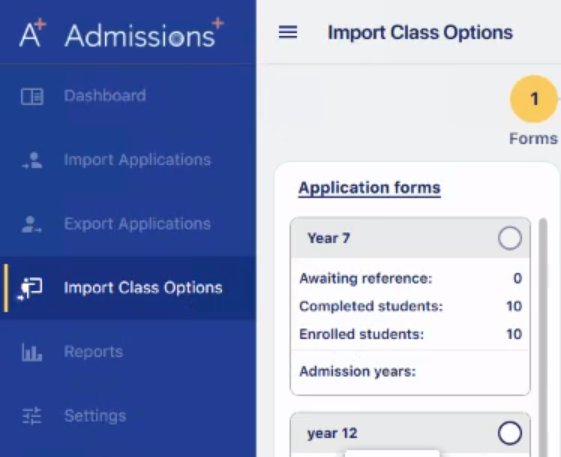
- Load the Admissions+ SIMS App and select "Import Class Options", and then select the Year 9 form from the list of available forms.
- You will then see the list of your Year 9 students and can click "select all", followed by "next".
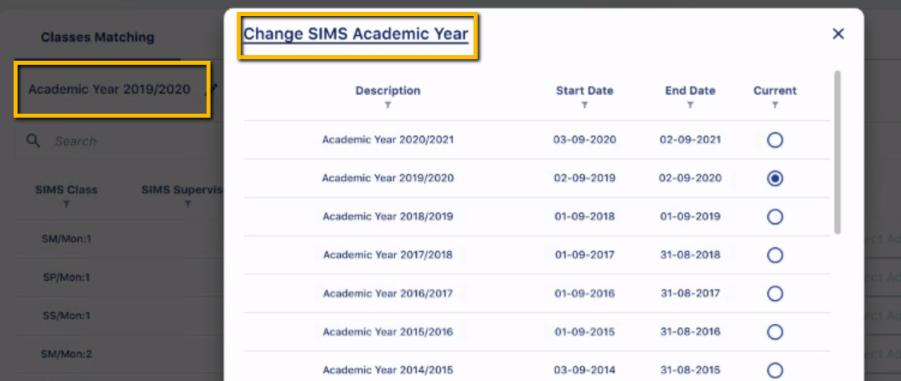
- Set the correct academic year (for example, 2023/2024) and click to update.
- Filter the classes by year group; you will see the SIMS class code, as well as other key information like the name of the subject and the assigned teacher.
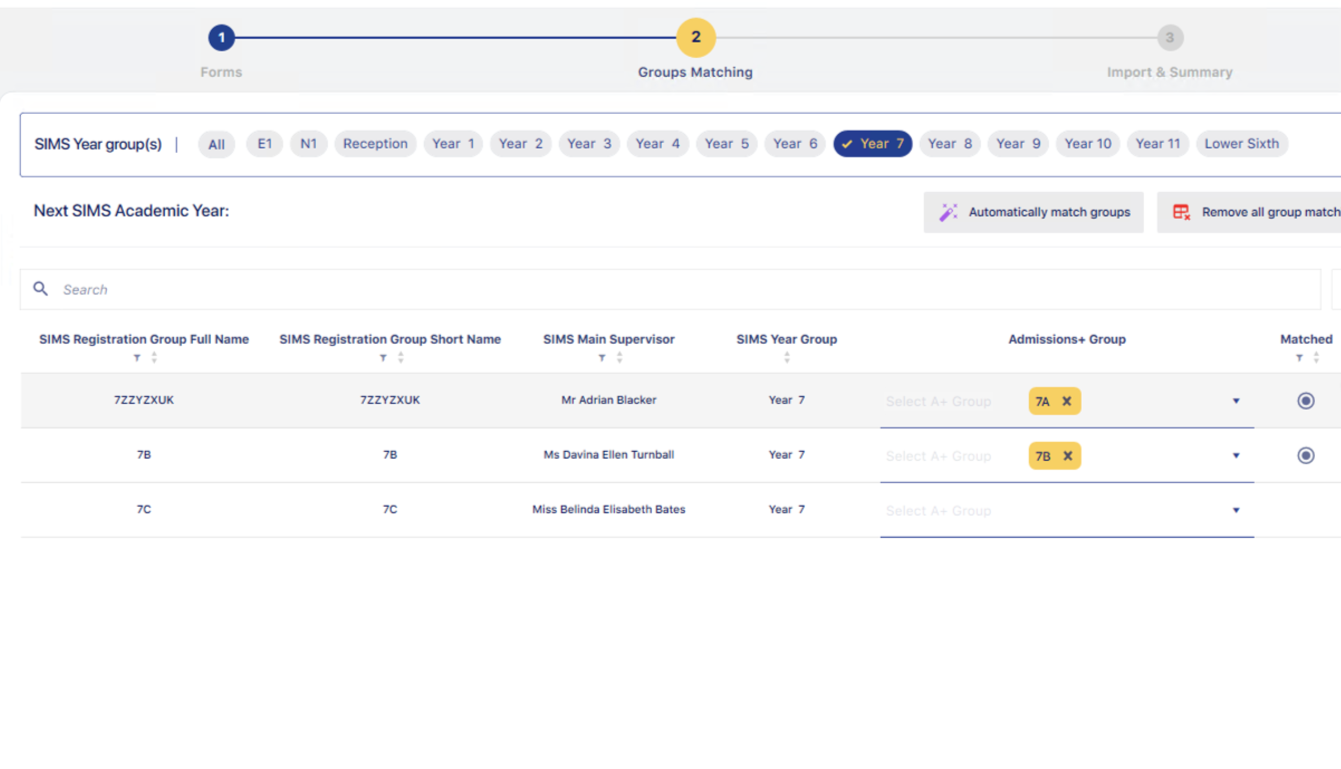
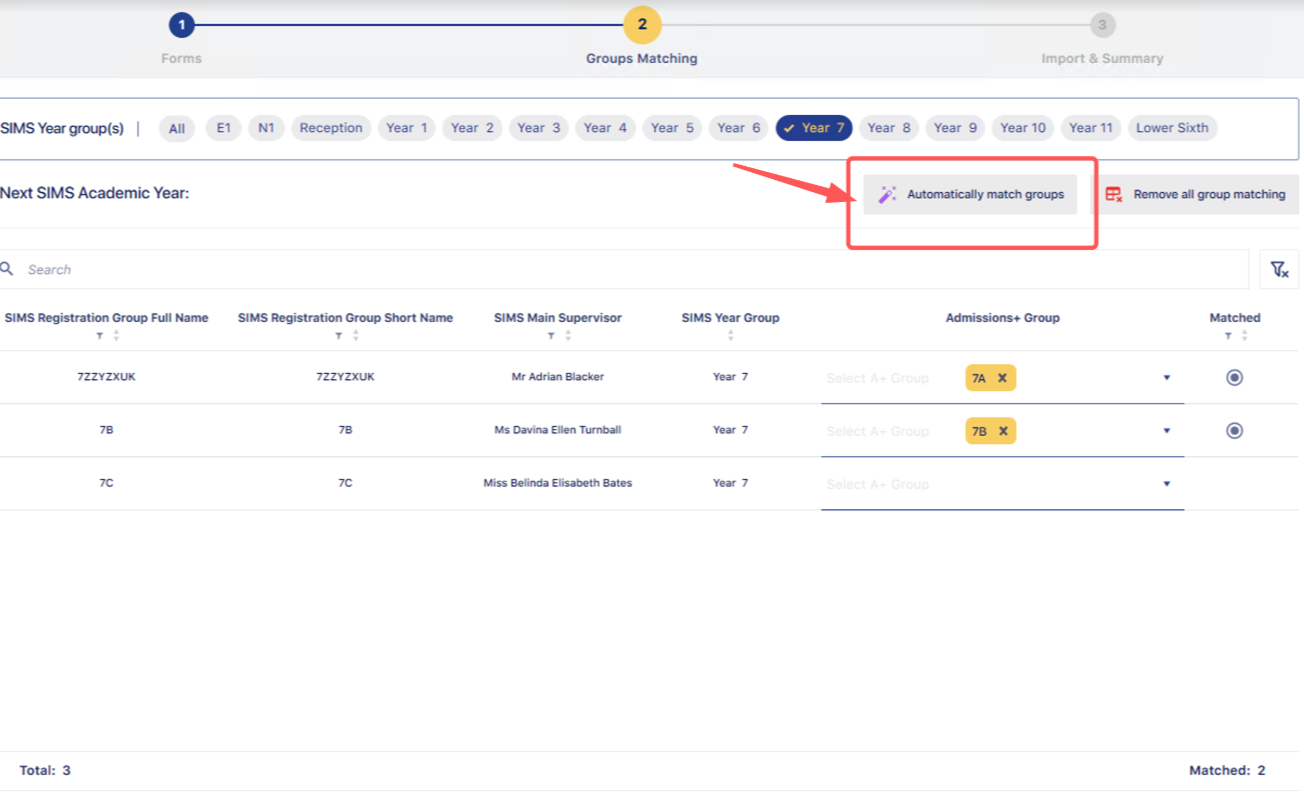
- Click the "automatically match groups" button to map the class codes from SIMS to the equivalent codes from your Options Form.
- Once you have matched them all, check them carefully and click "next"; this will then commence the class import for the students.
- Note: the import will not assign students to their base bands, so you will need to do this in SIMS once the classes import has finished.
TRANSFERRING CLASSES INTO ALL OTHER MIS
Note: First, check your class codes are correct so the mapping will be straightforward! Navigate to the Timetables area of your system and click the pencil icon for each subject to view the classes and their codes. Ensure these match the class codes in your MIS (and amend them as needed).
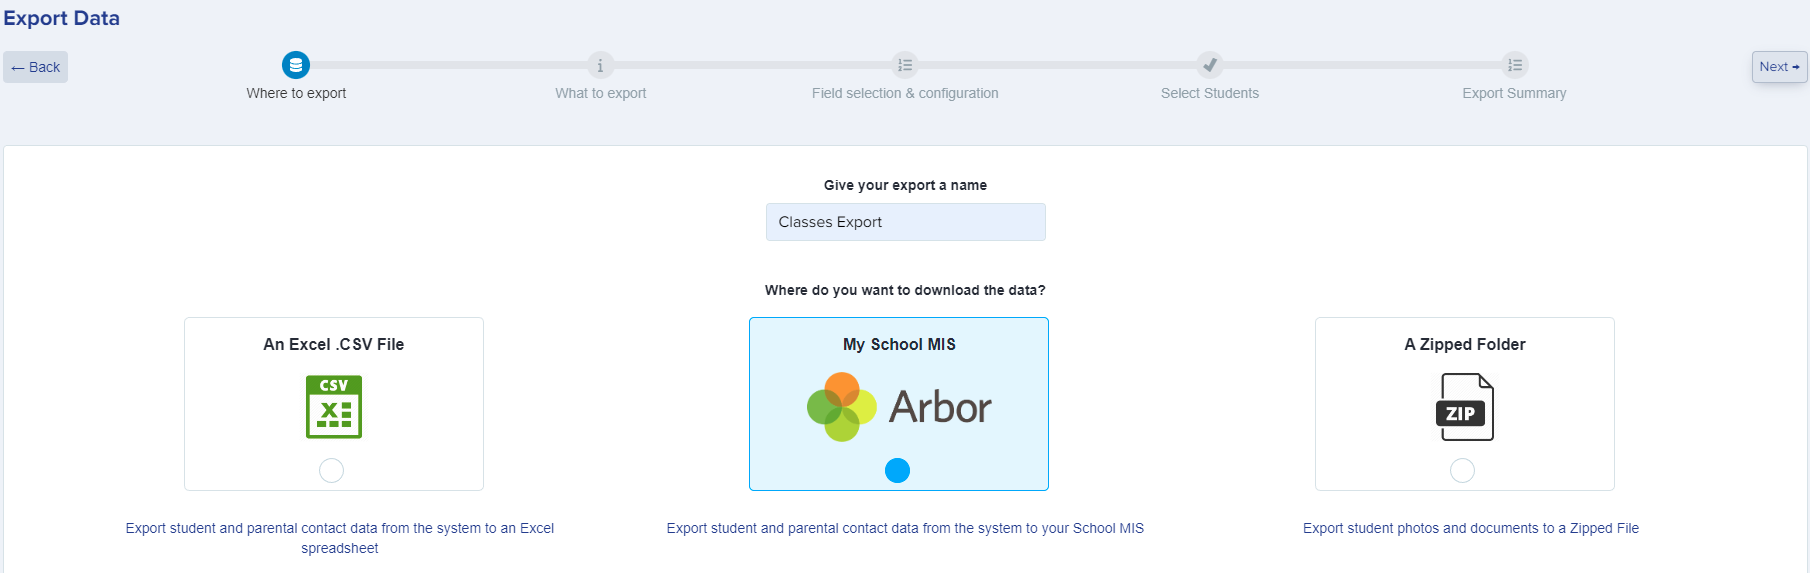
- Within your Options Form, navigate to Data > Export > Start an Export.

- Give your export a name, and select your MIS before pressing "next".
- Select "Student Classes" and then "next".
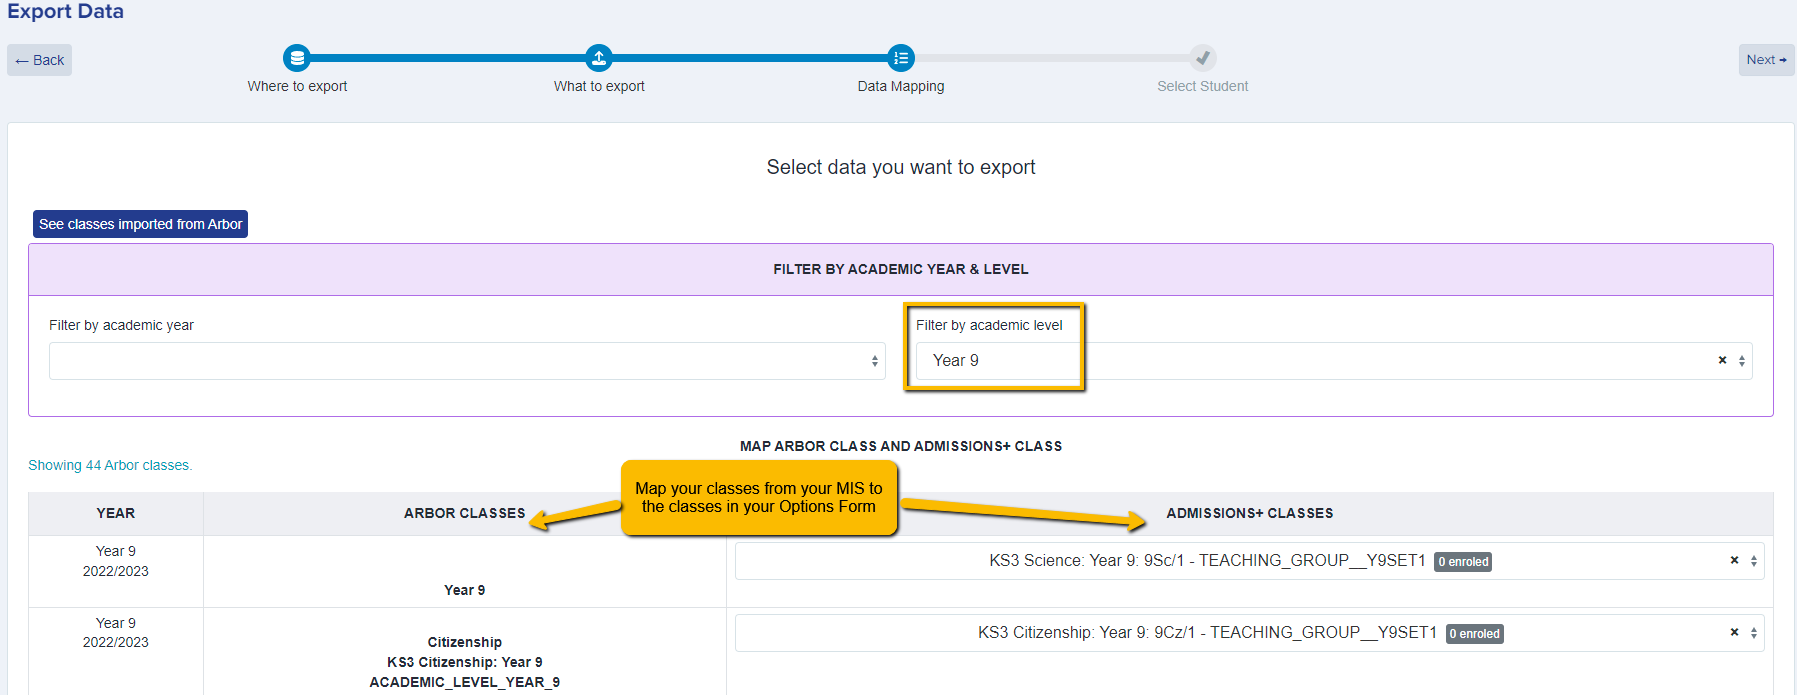
- On the mapping step, filter by Academic Level to show the list of relevant classes; you will see the name and key details of the class as it appears in your MIS and will then match these to the equivalent classes within your Options Form.
- Check you have matched them all correctly, and you will then see a preview before clicking "next" to commence the export.