CONTENTS:
Overview
Staff users have the ability to manage a student’s offer status on their behalf. This feature is useful when:
-
A student has confirmed their decision offline or via another communication channel.
-
The school needs to withdraw or correct an offer.
-
Bulk updates are required after a deadline or batch review.
Available Offer Statuses:
-
Pending – The application is awaiting a decision or review.
-
Offer Made – An offer has been formally made to the student but not yet accepted or declined.
-
Accepted – when the student has agreed to the offer.
-
Declined – when the student has rejected the offer.
-
Withdrawn – when the school needs to withdraw the offer previously made.
Updating Offer Status Individually
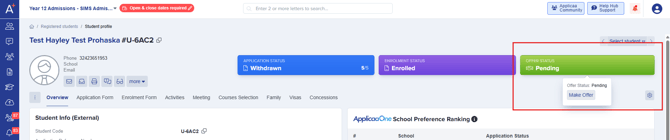
To update an offer status for a single student, you will have to go to the student profile which you can access by searching for their name.

Within the Student profile, you will find the Offer Status tab on the top right of the screen.
If the students Offer Status is Pending, the only option you have is to "Make Offer".
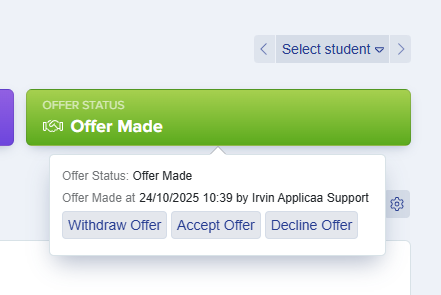
For students who already has an offer which under the "Offer Made" status, you can change or update it to either Accepted, Declined, or Withdrawn.
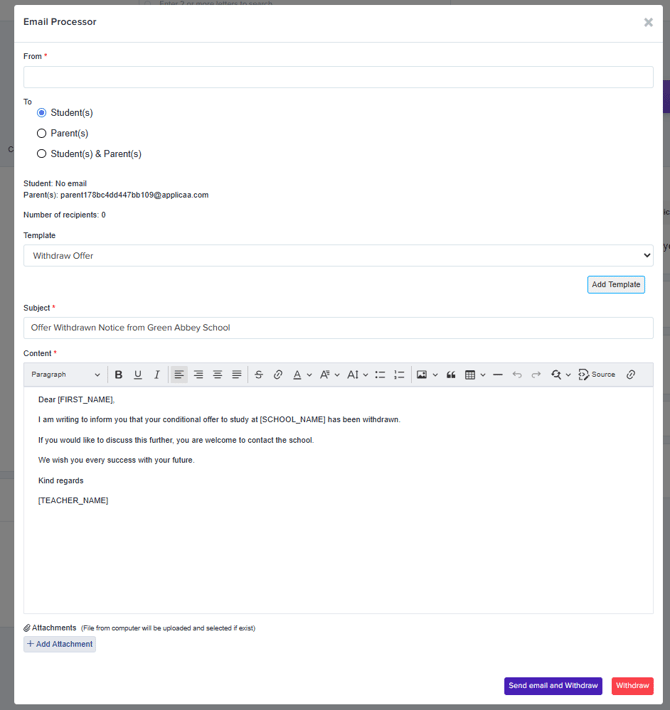
If you change the student's status to "Withdraw Offer" an email processor page will pop up giving you an option to inform the student and/or their parents regarding reason for withdrawal via an email.
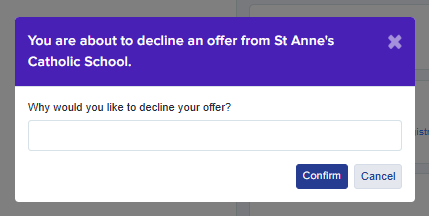
When you change the offer status to "Decline Offer" on behalf of the student, it will then ask you the reason for declining the offer for record tracking.
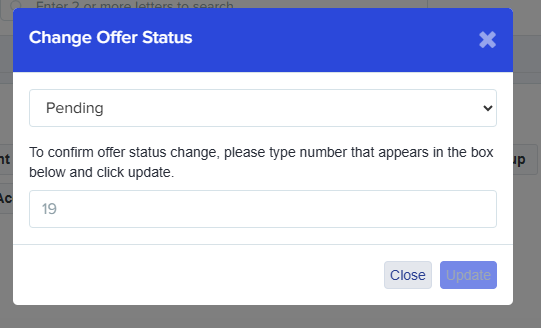
Updating Offer Status in Bulk
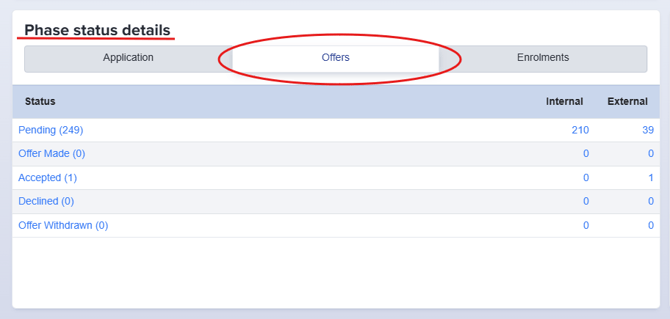
To update offer statuses for several students at once, start by navigating to the "Phase status details" table on your dashboard. Here, you'll see each offer status along with the number of students assigned to each. This view makes it easy to identify and select groups of students whose statuses you wish to update in bulk.
To select students for a bulk update, use the checkboxes on the left side of the table to choose individual students, multiple students, or select all students at once.
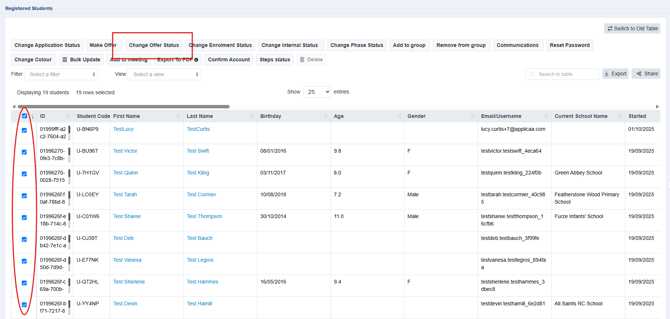
Once a selection has been made the "Change Offer Status" button will appear on the top of the table. After clicking the button, it will show you the different status options that you can select.
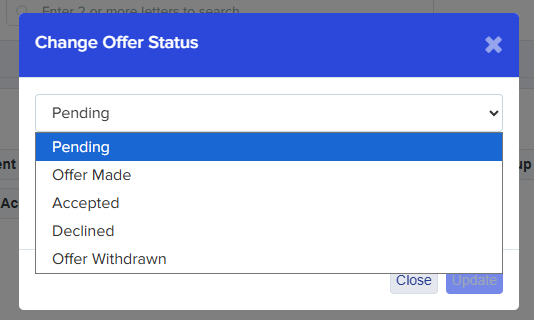
To confirm your changes, simply enter the number of students whose status you are updating, then click the Update button to apply the changes.