You can return to this area anytime to review your choices or make changes.
Important Note: The Enrolment Navigator replaces the previous Enrolment Settings area, which will eventually be removed completely. If you've already configured settings in the old area, they will carry over, but we strongly recommend reviewing all settings in the new navigator as a way of double checking you are happy with everything.
How to Access
- Navigate to Settings
- Click Enrolment Navigator
Settings menu with Enrolment Navigator option highlighted

Step-by-Step Guide
1. Welcome
The first page introduces the benefits of using the enrolment flow for Enrolment Day. This section includes:
- Overview of the enrolment process
- Videos from schools demonstrating how they use the enrolment area
- Getting started instructions
Welcome page with video examples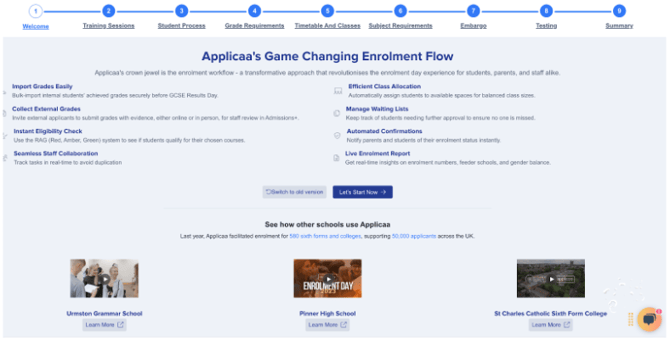
2. Training Sessions
This step displays available training sessions you can book:
- Enrolment Walkthrough
- Classes Management, Reporting and Exporting
- MIS Training (availability depends on time of year)
- Grade Import Walkthrough
Note: Some sessions appear multiple times due to multiple dates - only sign up once per session type.
To book a session, simply click on the booking button.
Training sessions list with booking links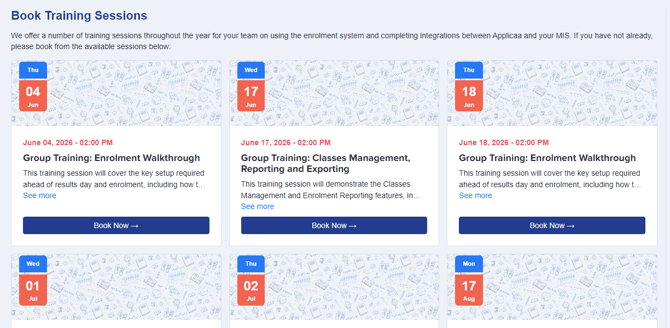
3. Student Process
This section introduces new enrolment form management capabilities:
Key Features:
- Student Access Control: Decide if students can access the enrolment form on enrolment day
- Scheduled Availability: Set a specific date and time when the enrolment form becomes available to students (recommended for enrolment day at the time your first students will log in)
- Process Overview Video: Located in the top right corner, showing how the enrolment process looks for applicants
Additional Settings:
- Update/edit enrolment messages
- Configure pop-ups that appear when students log in
- Customise your enrolment form
Student process settings with date/time scheduler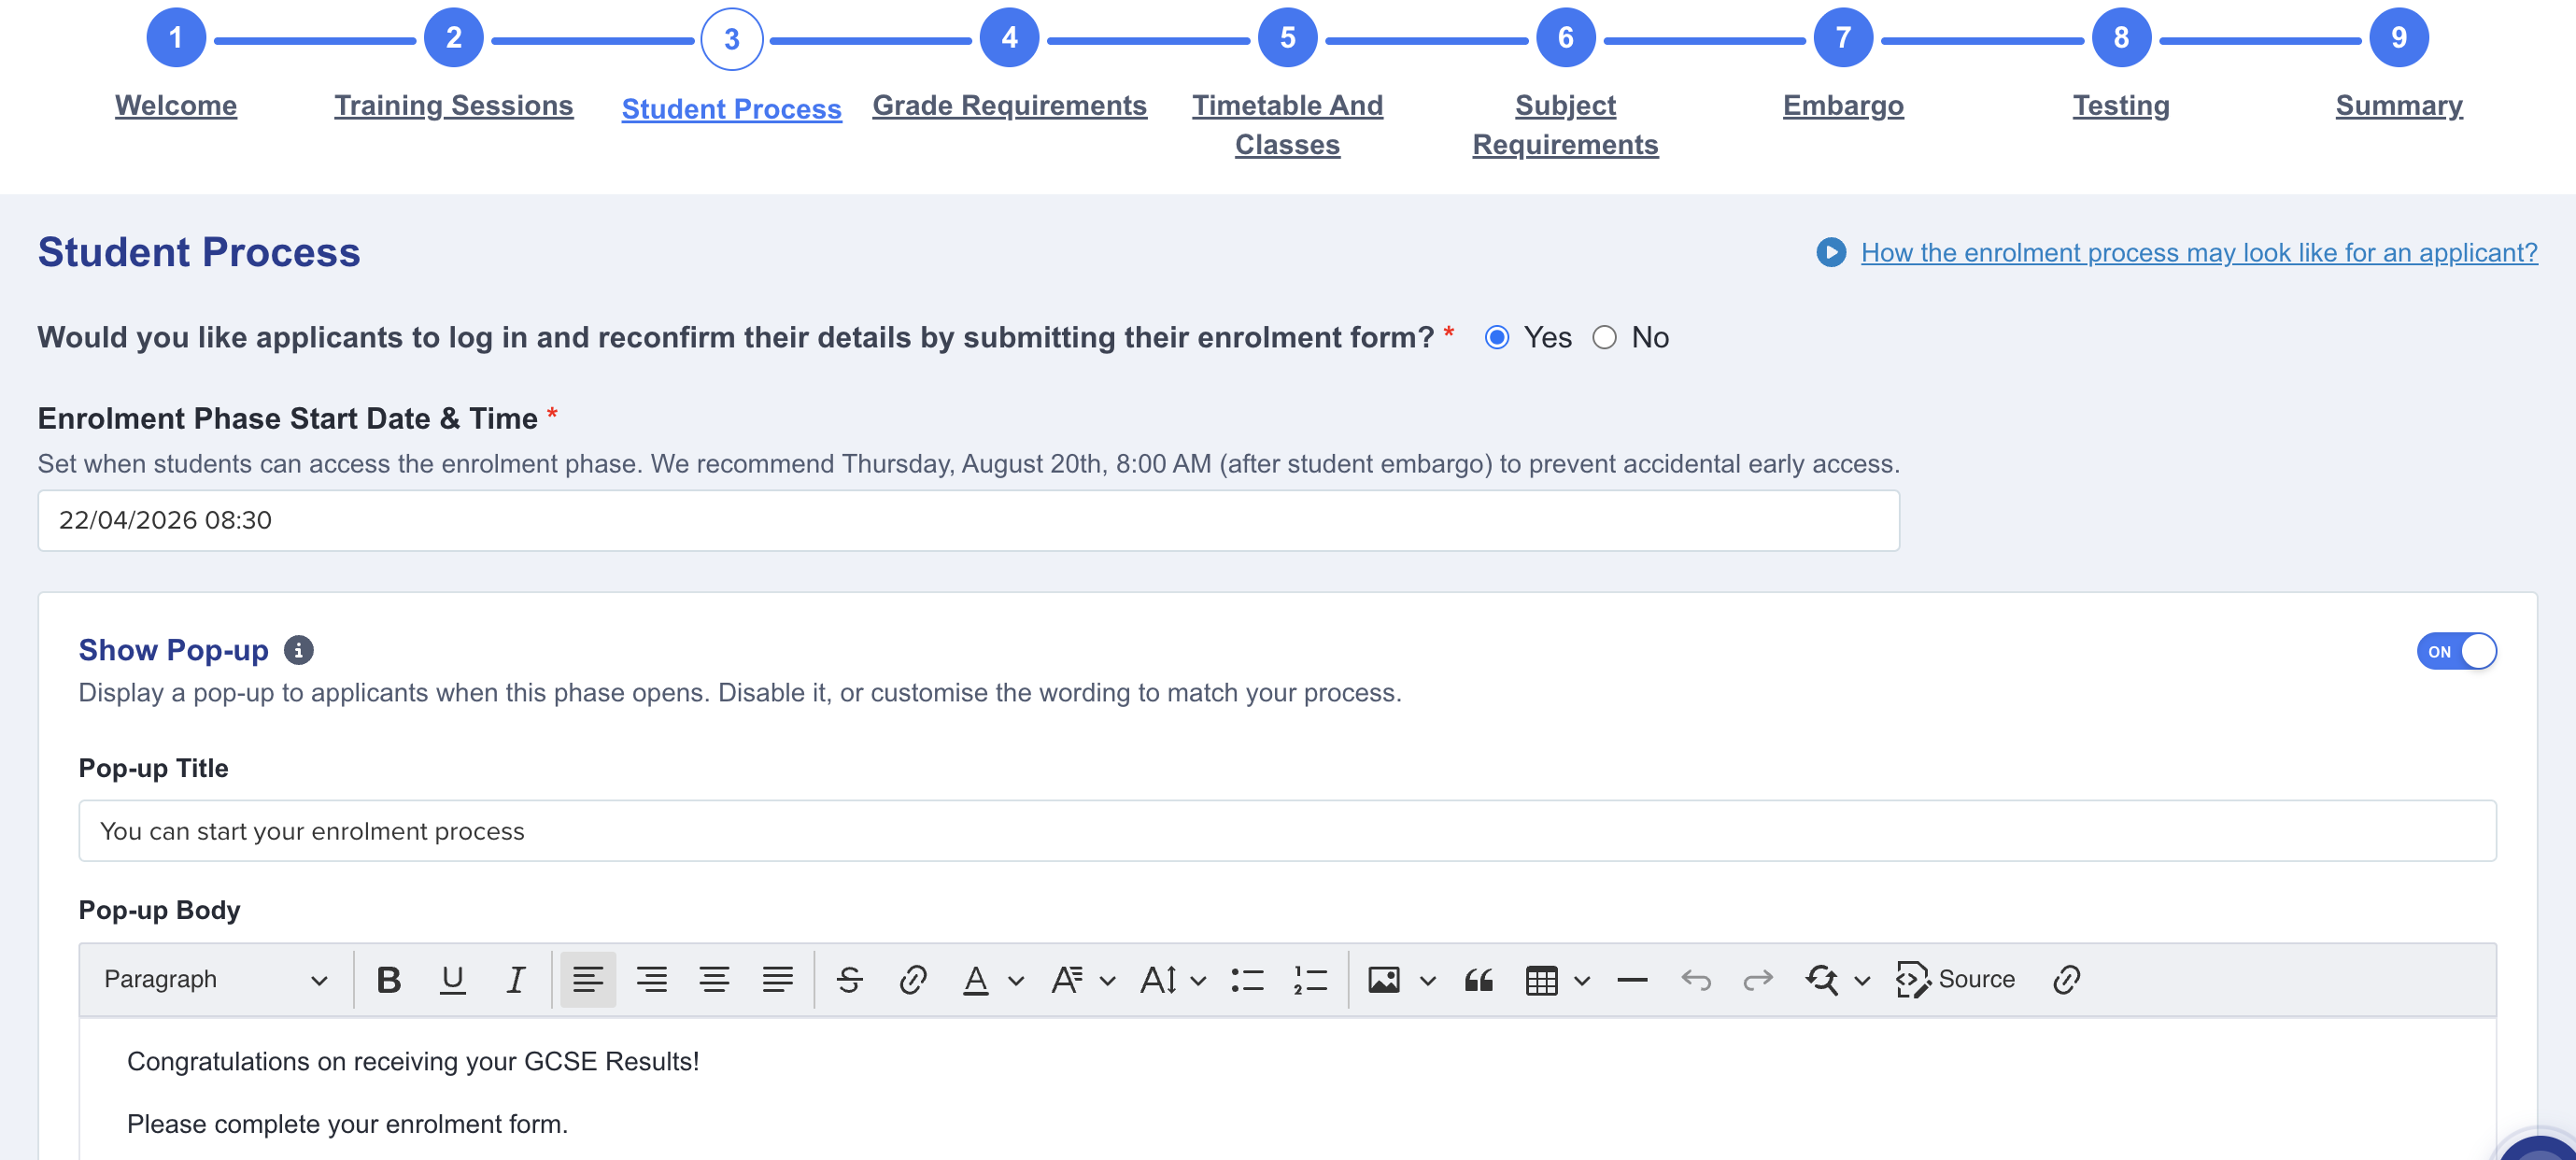
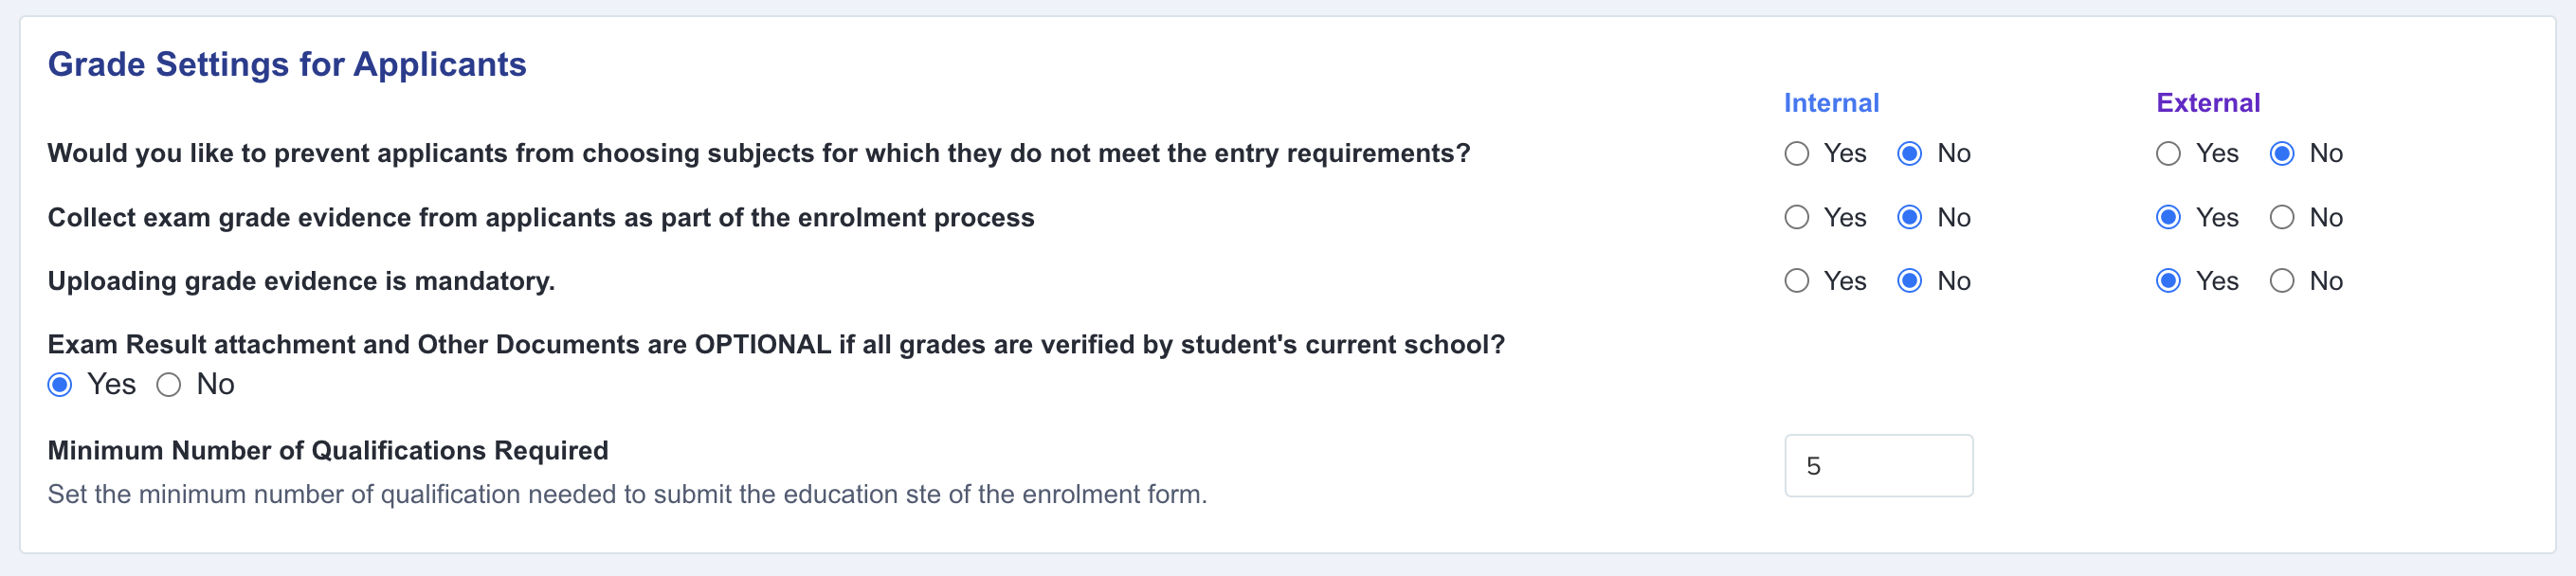
4. Grade Requirements
Configure grade requirement settings for both internal and external students:
- Enforce grade requirements (Yes/No)
- Mandate evidence uploading
- Configure other important grade-related settings
This section also includes:
- Key settings for staff processes
- Class list management
- Class cap settings for staff members
Grade requirements configuration page
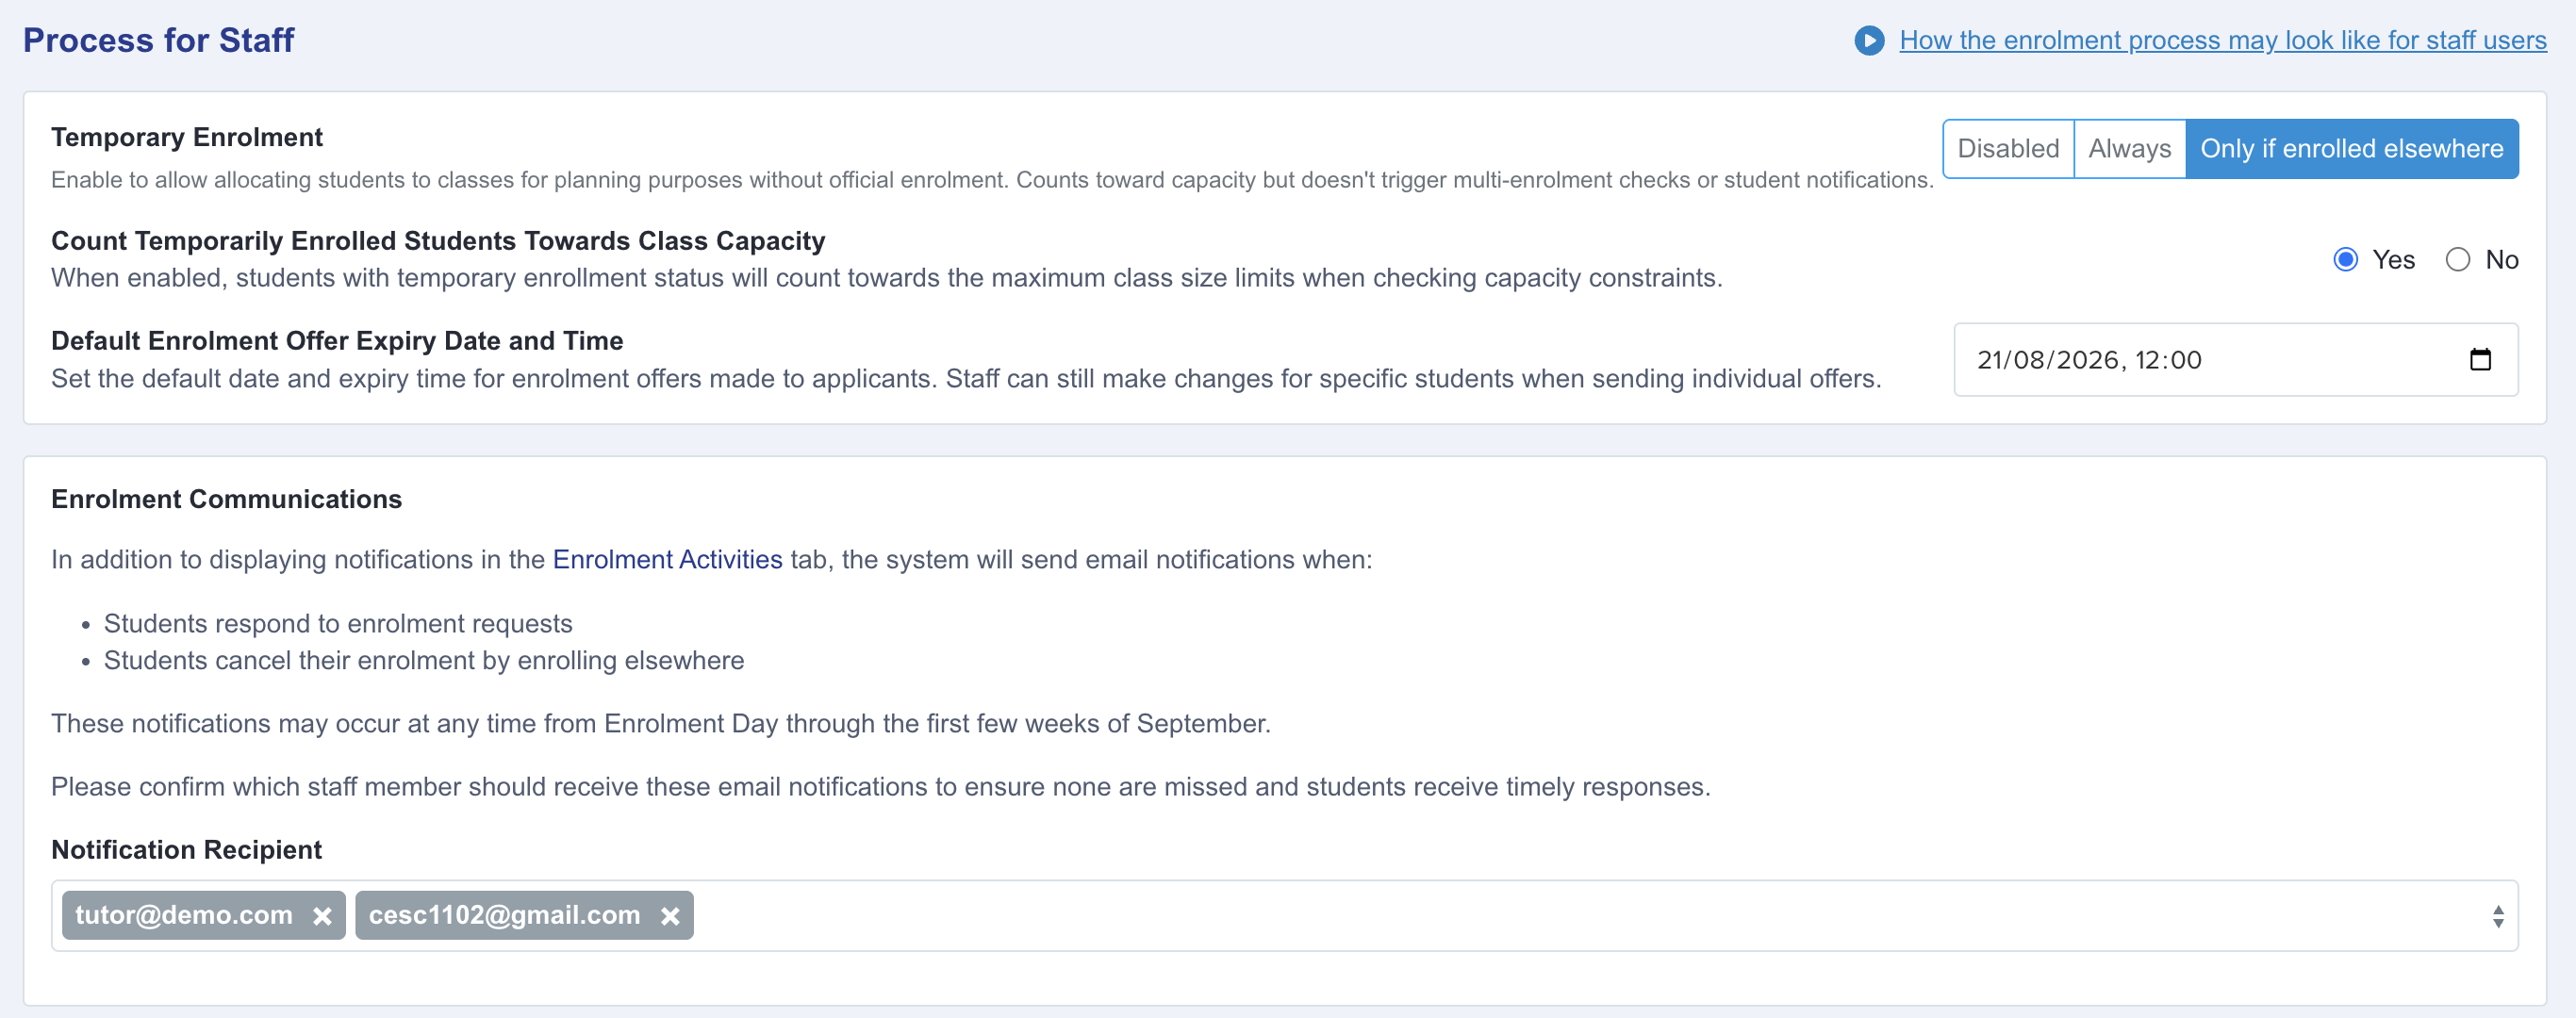
Temporary Enrolment Settings:
If an applicant holds an enrolled place at another institution, the multi-enrolment pop-up will always display if you attempt to enrol them at your institution.
Temporary enrolment allows a school to reserve a place in classes for a student before issuing the formal enrolment.
Disabled: this is the default setting. The option to reserve spaces is not available. If a student is enrolled elsewhere, schools would send an enrolment request to the student and can only enrol the student at their school once the student has relinquished their place elsewhere.
Only if enrolled elsewhere: the option to temporarily enrol a student will be available in the case that the student is already enrolled at another institution. You will be presented with a choice to either reserve spaces in those classes and send the enrolment offer, or send an enrolment offer without reserving the spaces.
Always: when enrolling any student, you will be prompted to temporarily enrol them first, and they would all have to accept the enrolment offer before you are able to enrol them into their classes. Enrolment is not finalised for any student until they accept.

You can read more about setting enrolment red flags and why you may use them in this article.
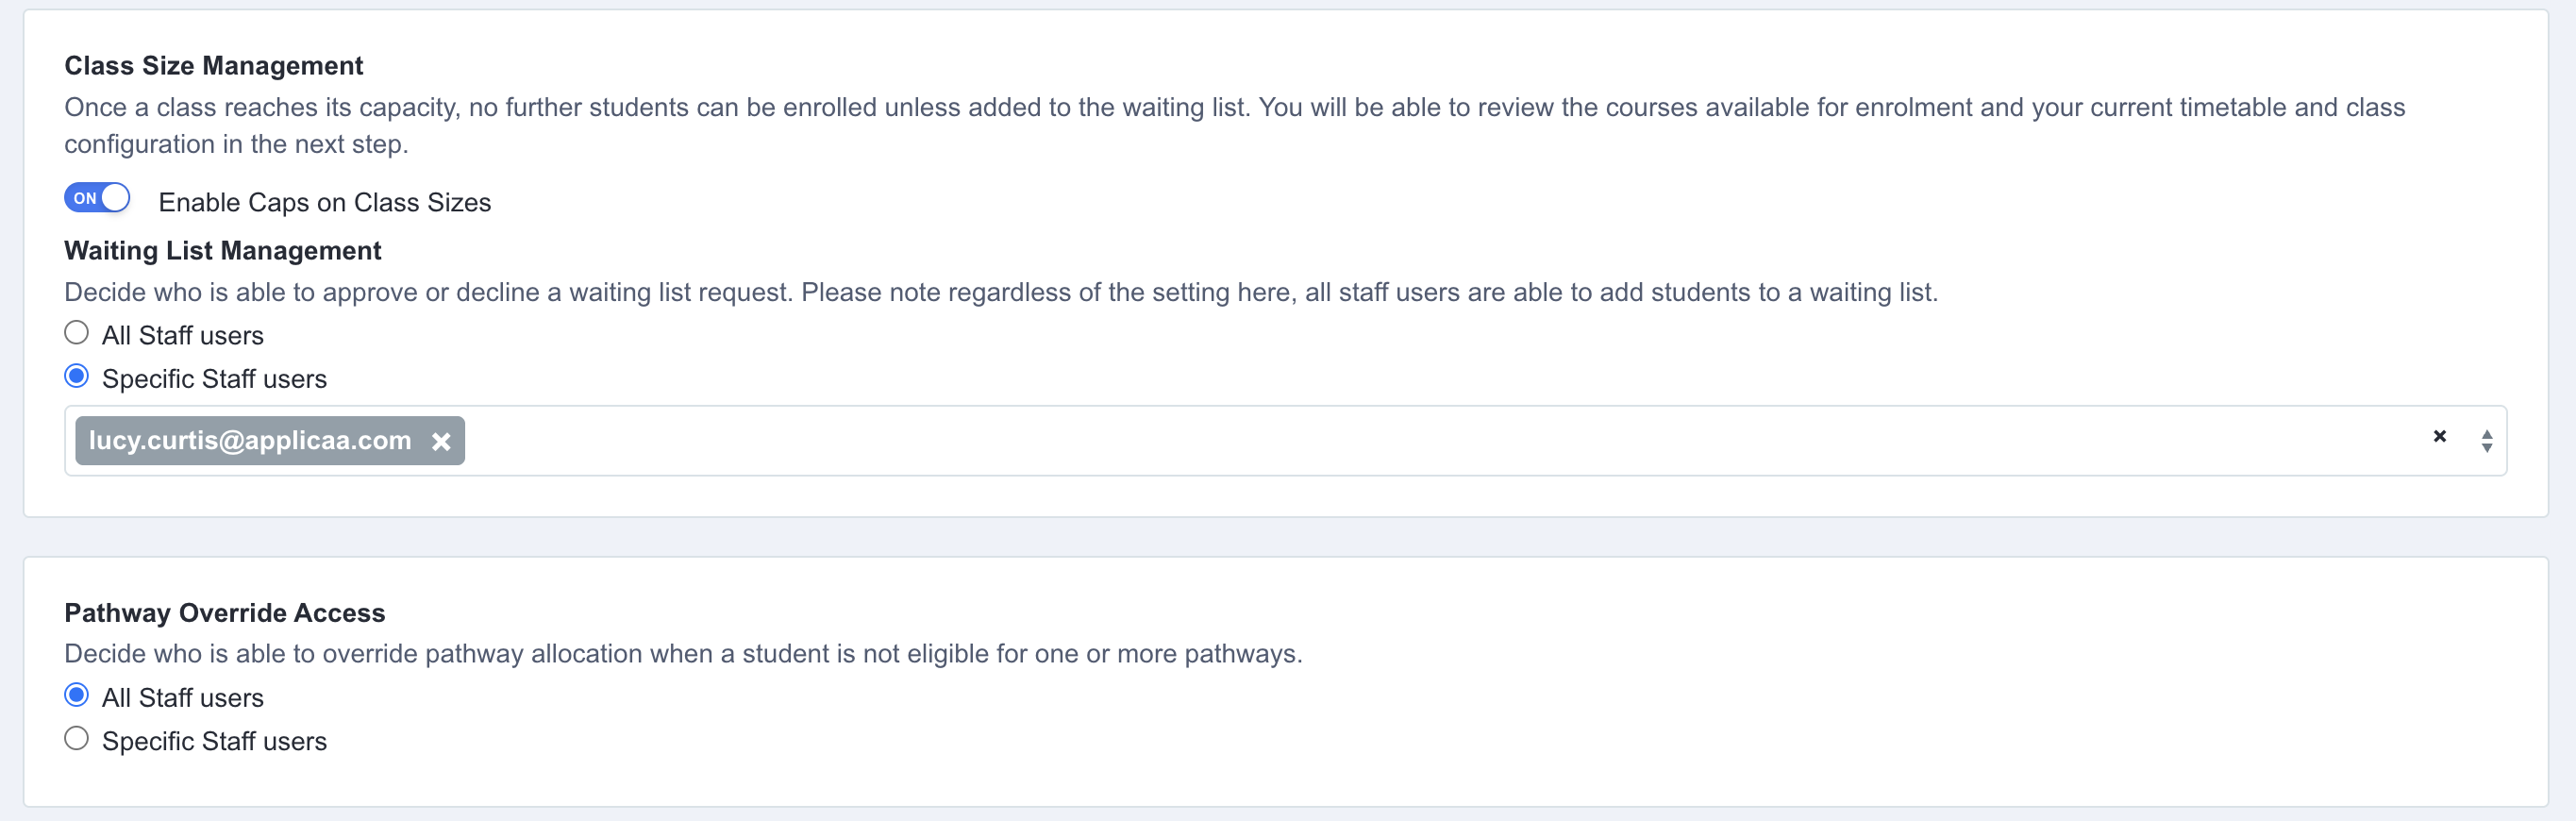
Read more about waiting list usage and the pathway override functions in these articles.
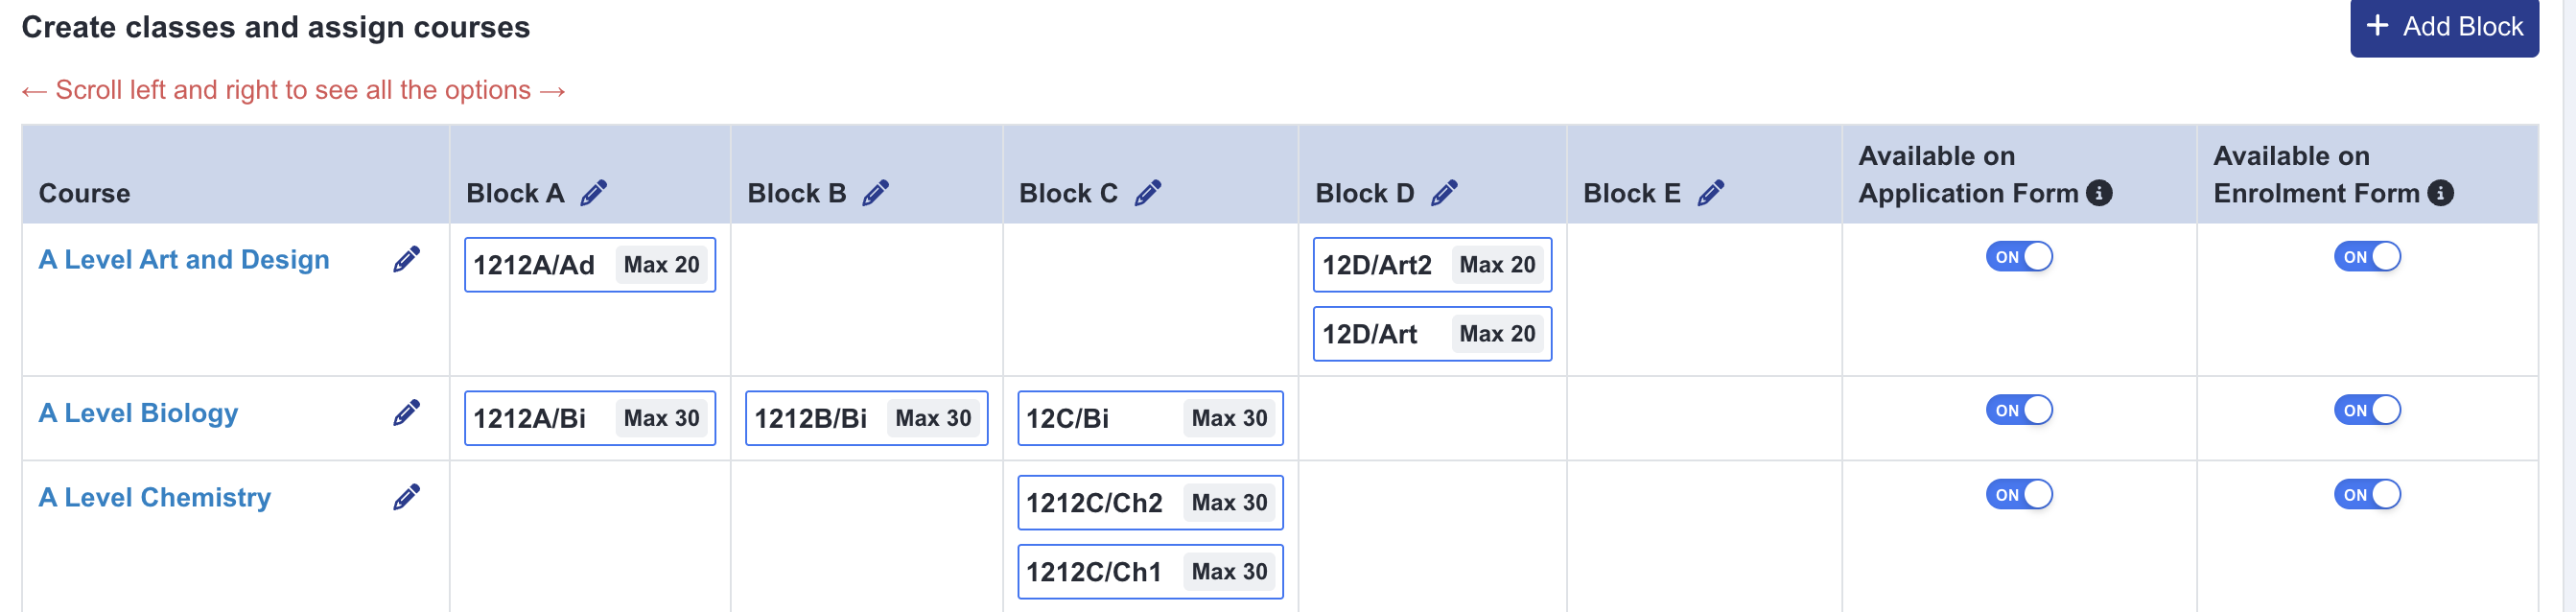
5. Timetable and Classes
Key Settings:
- Course Relationships:
- Pre-selected courses configuration
- Subject Filter Groups (group subjects into filters for use at enrolment)
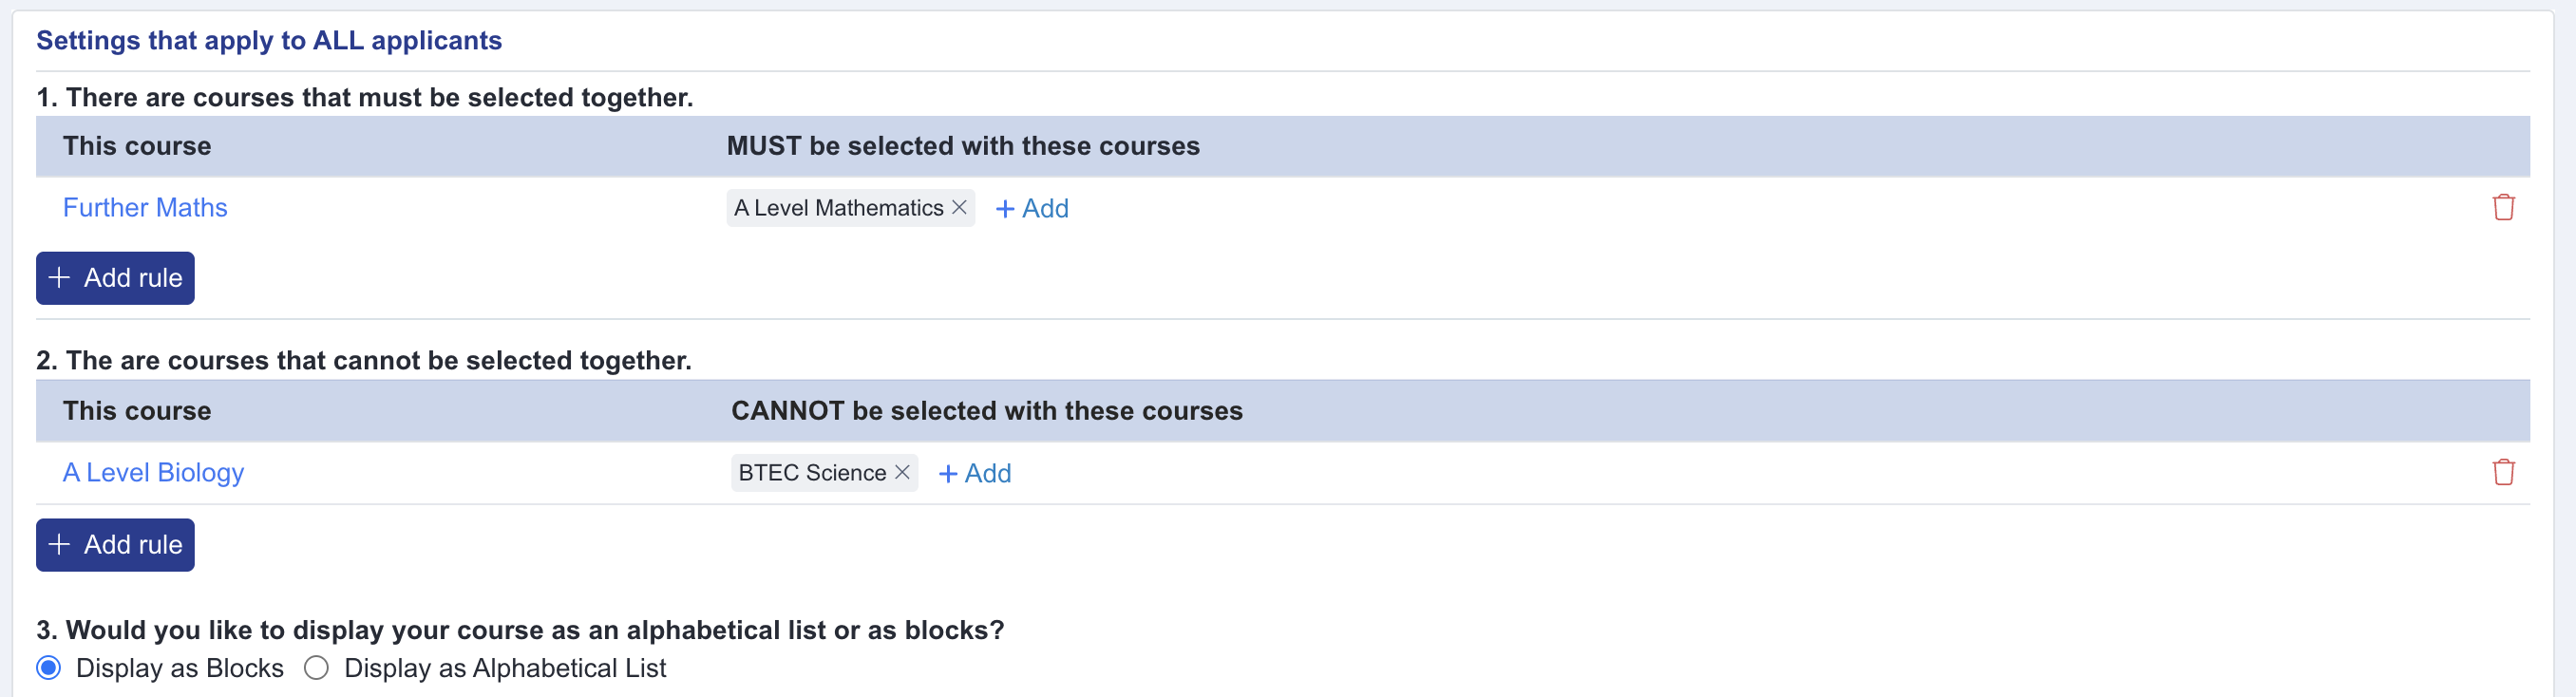
- Courses that must be taken together
- Courses that cannot be taken together
- Display Options: Choose to display courses as blocks or alphabetically (to applicants)
- Class Configuration:
- Set classes for all subjects
- Edit class codes
- Manage learning hours
- Set subject exclusions (subjects which should not count towards a student's min/max totals)
Timetable and classes interface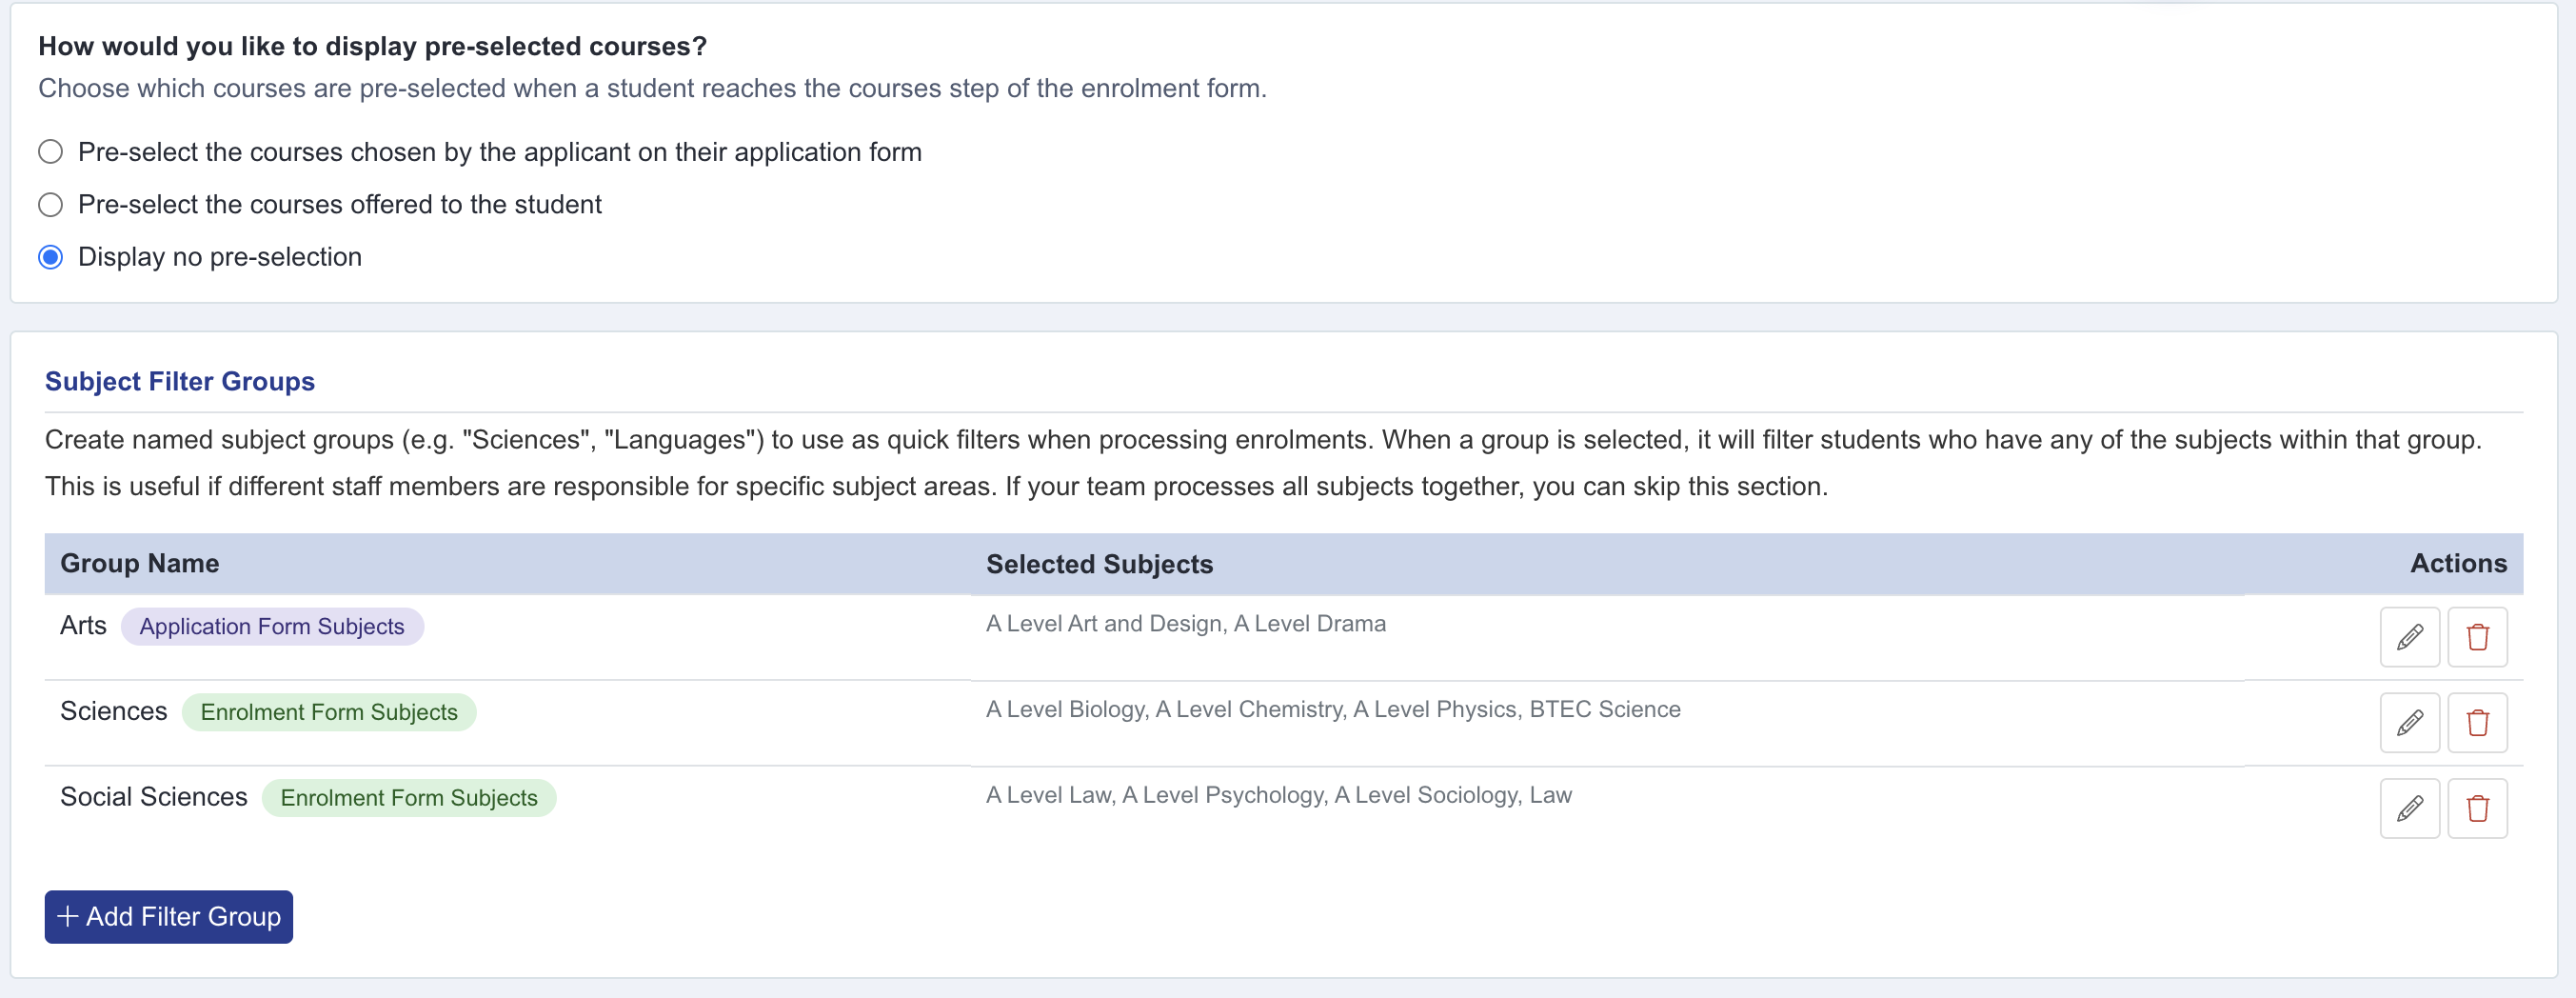
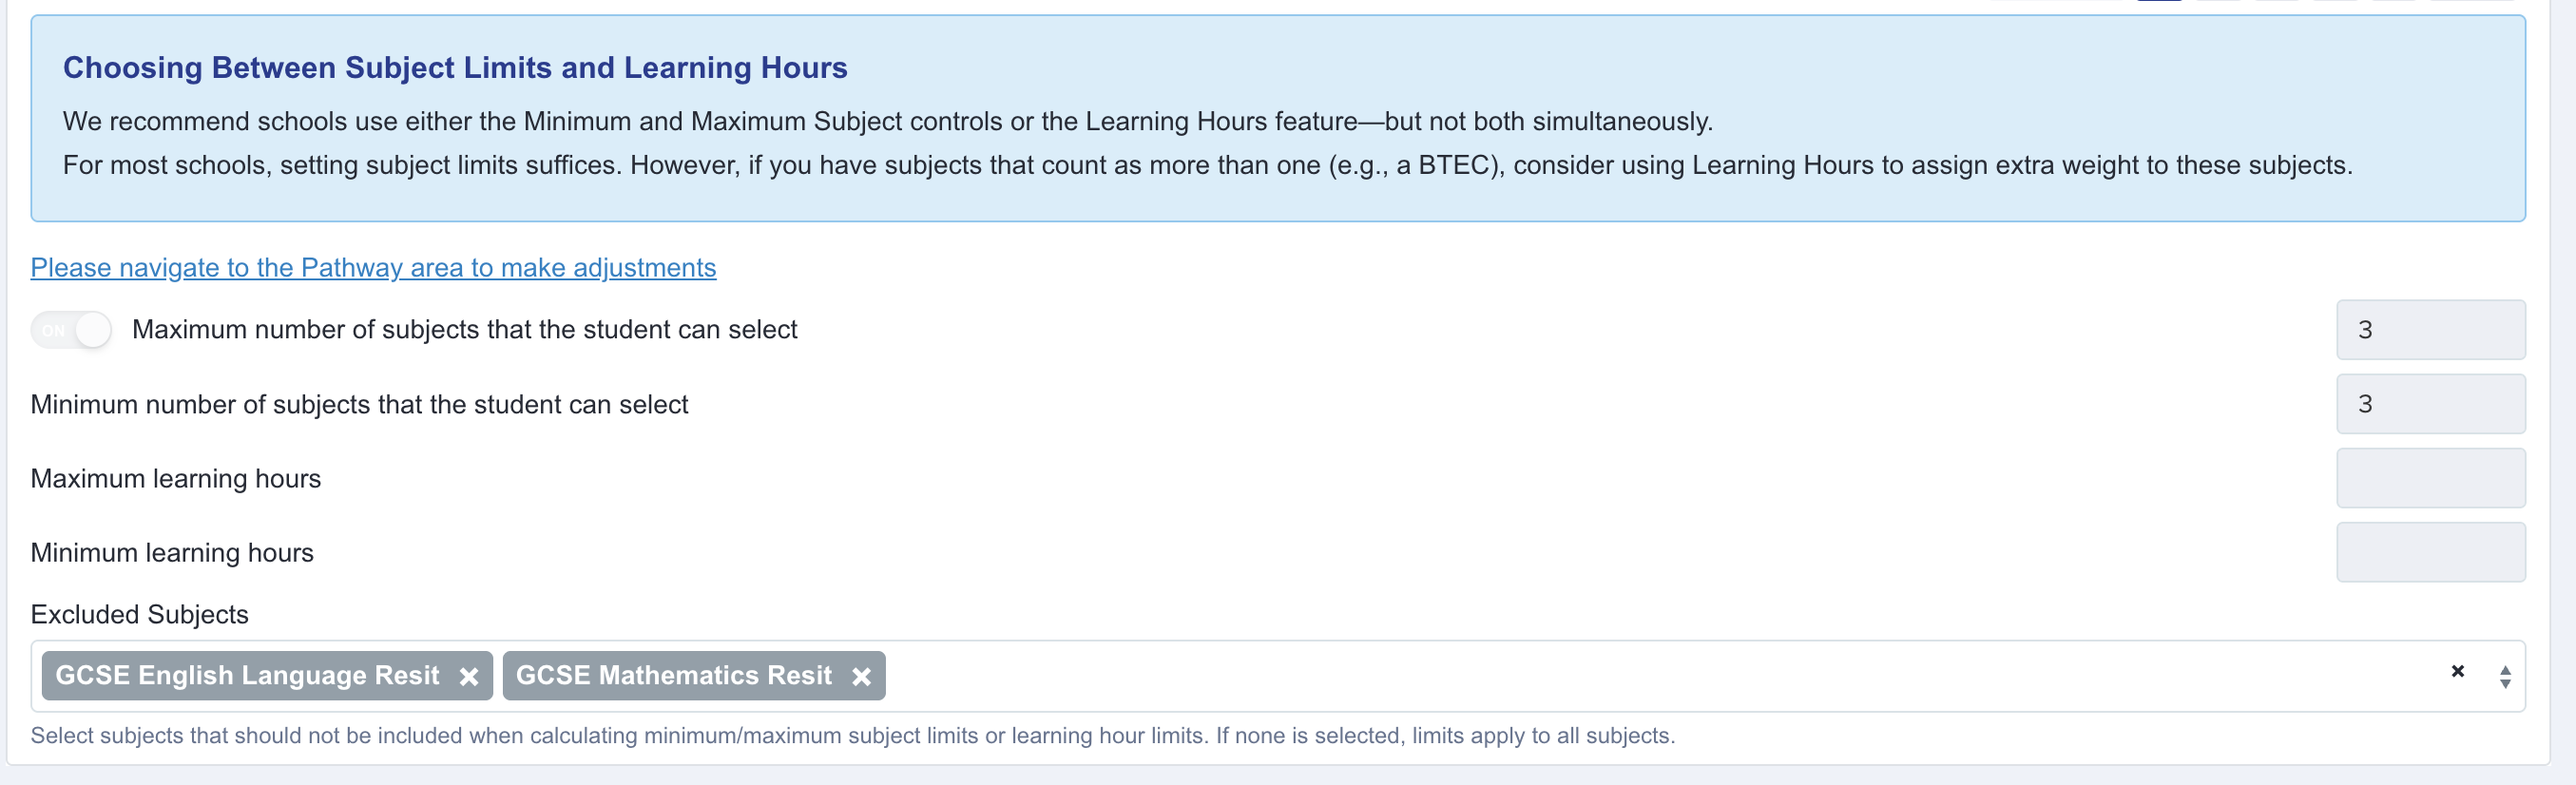
If you are using Pathways, you will need to configure your min/max settings in the pathways area and will be directed to do so. Read more about how to use Pathways in this article.
6. Subject Requirements
Subject Management:
- Alphabetically sortable subject list
- For each subject, review and edit:
- Subjects that must be taken together
- Subjects that cannot be taken together
- Specific requirements
- General requirements
Subject requirements list with editing options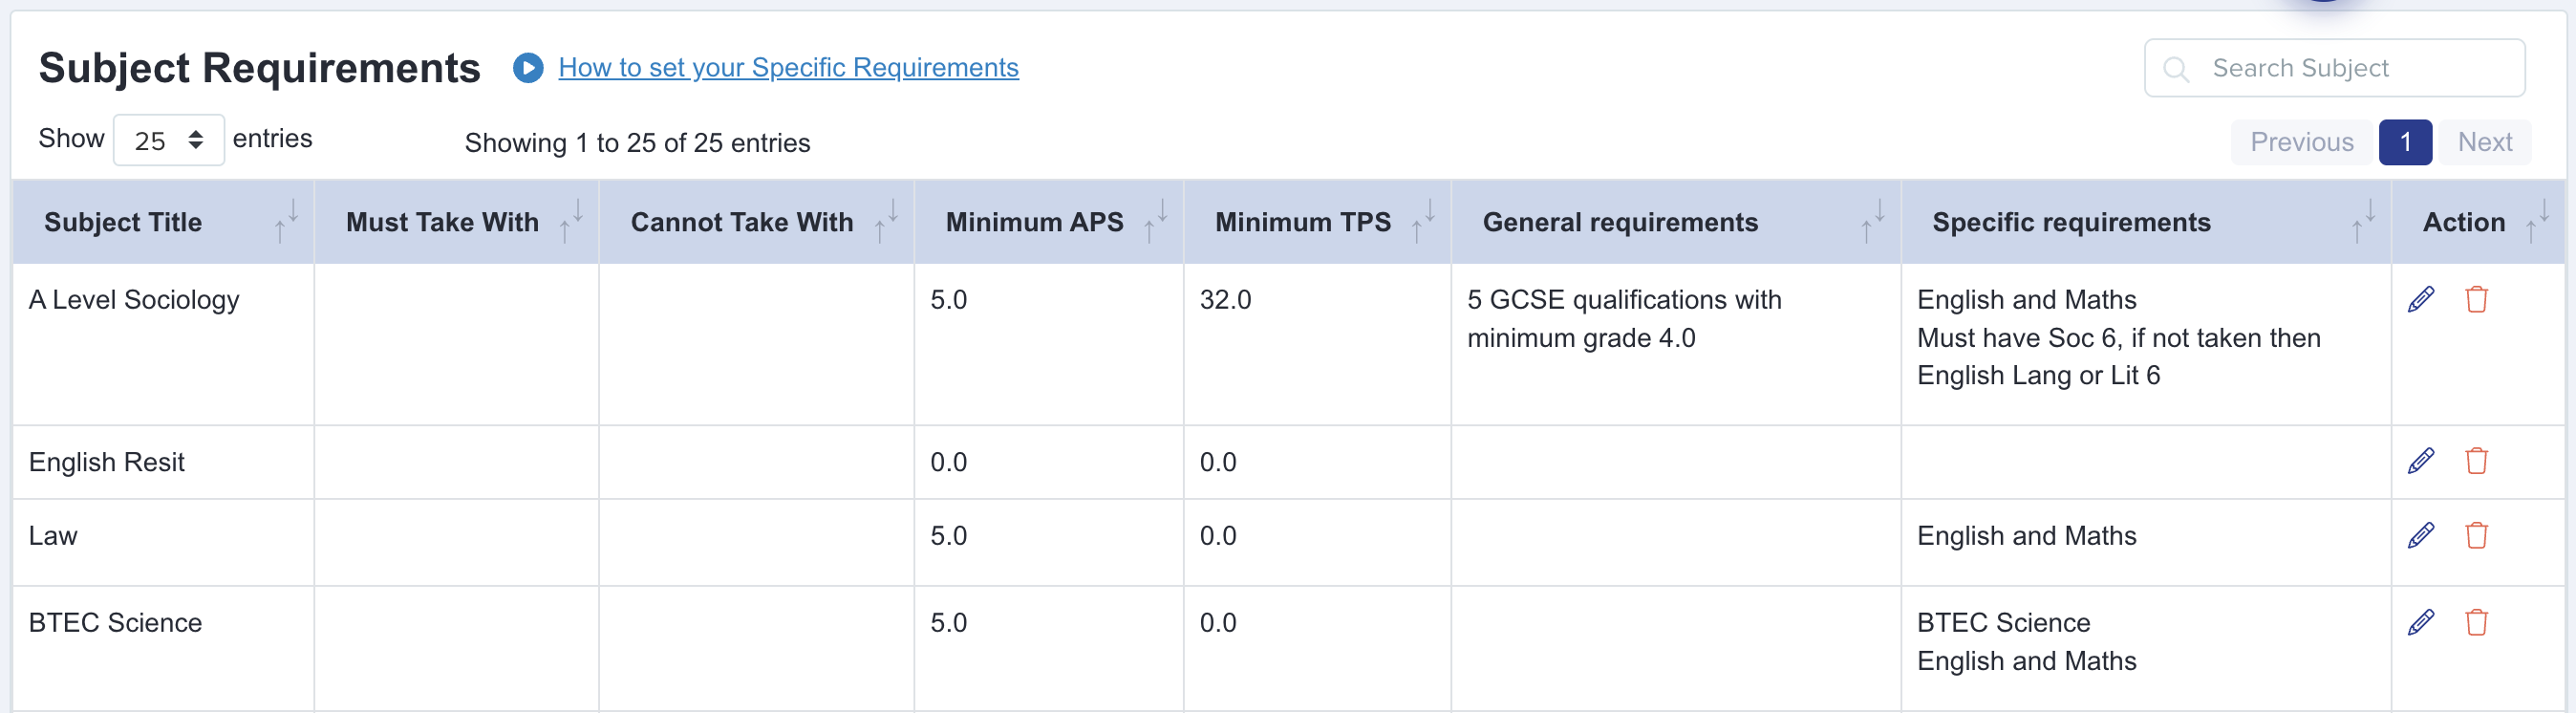
7. Embargo Settings
Review and manage all embargo settings in one place:
- Add embargo periods if needed
- Edit embargo messages
- Summary view of all embargo configurations
Embargo settings summary page
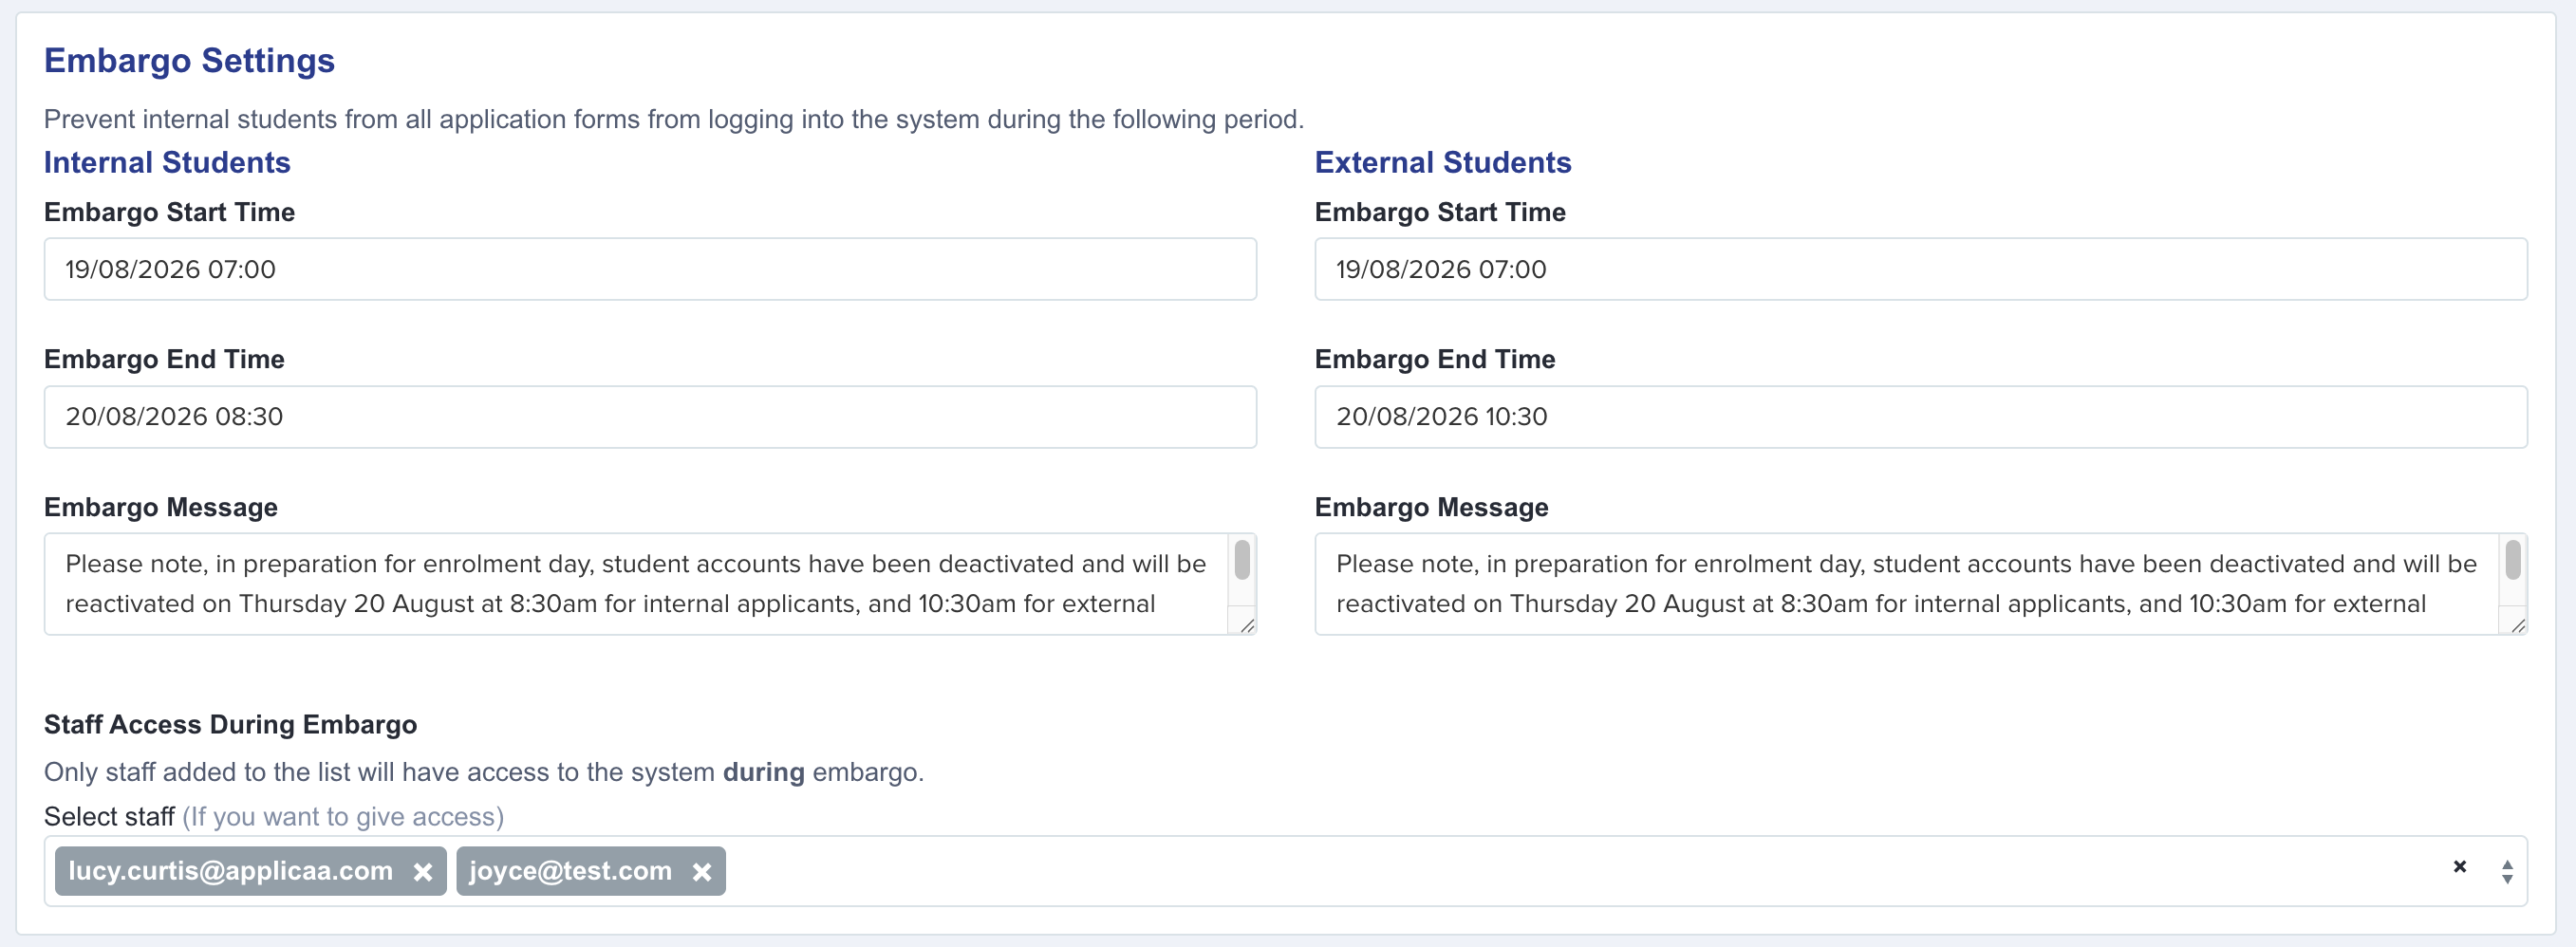
Super Admin users will be granted access by default during your embargo period - you do not need to list them in the Staff Access dropdown. See this article for information on how to check who your Super Admin users are, and to add more staff if required.
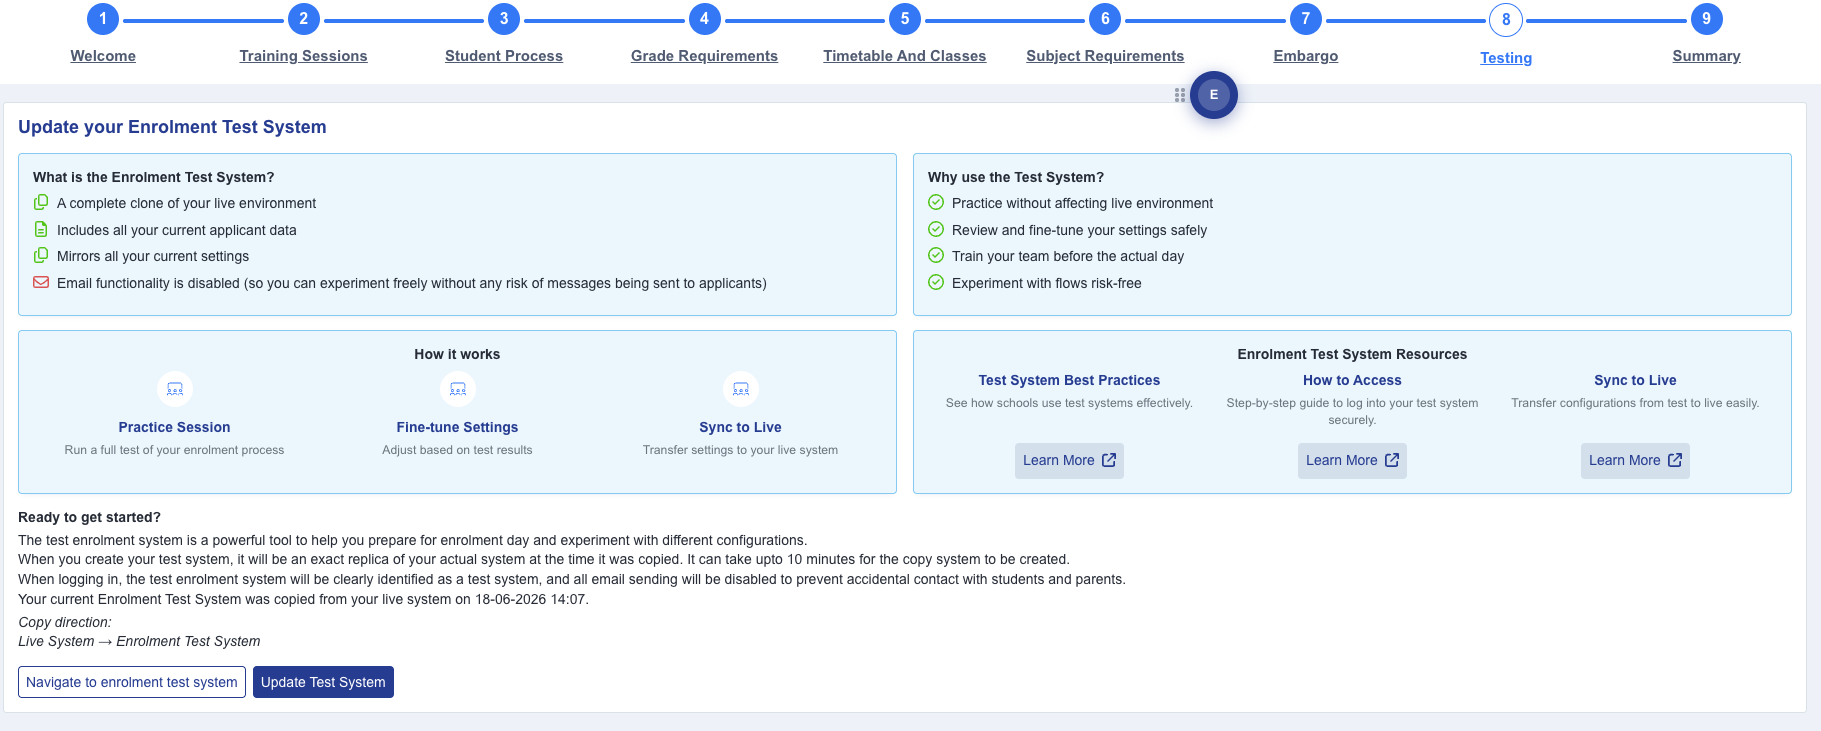
8. Testing
This step explains the benefits of testing your enrolment configuration:
- Why testing is important
- How to access the testing system
- Best practices for enrolment testing
Testing information and access page
9. Summary
The final step provides a comprehensive overview of all your choices:
- Reviews all key decisions made
- Displays current configuration settings
- Allows you to click back to any previous step to make changes
Summary page showing all configuration choices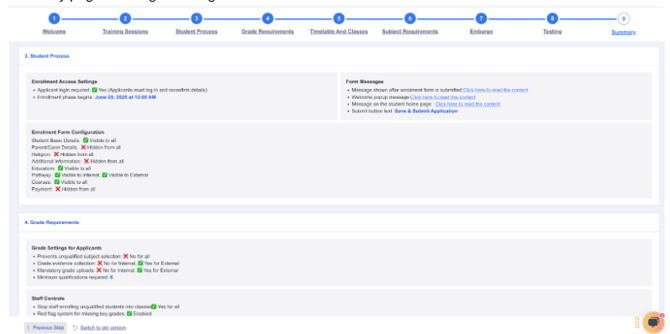
Best Practices
- Review All Settings: Even if your settings carried over from the old system, go through each step to ensure everything is configured correctly
- Use Scheduled Availability: Set the enrolment form to become available automatically on enrolment day
- Test Your Configuration: Use the testing step to ensure everything works as expected before enrolment day
- Check the Summary: Always review the summary page before finalising your setup
Need Help?
- Book a training session through the Training Sessions step
- Watch our Enrolment Walkthrough video tutorials for visual guidance
- Contact support if you encounter any issues