When someone registers to attend an event you have created, Admissions+ can automatically send them a confirmation email. This email is based on an editable default template that includes tokens for event details, QR codes, and “Add to Calendar” links. You can customise both the tokens and the content of the template to ensure registrants receive the right information.
Setting Up an Automated Confirmation Email
- Navigate to Communications and Events > Events > Event Calendar.
- Click the pencil icon to edit the event.
- Go to the Email & Questions section.
- Tick the box for Automated Email.


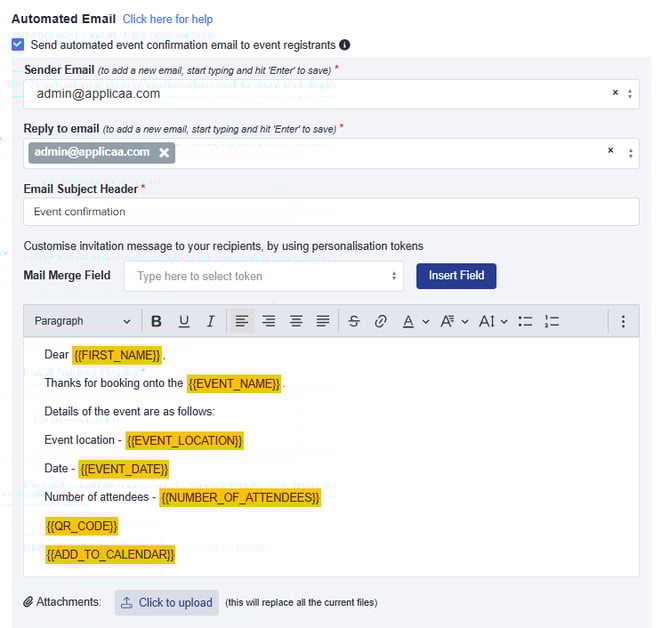
Once enabled, you will need to complete the mandatory fields:
-
Sender Email – the email address the confirmation will be sent from.
-
Reply-to Email – the address registrants can reply to.
-
Email Subject Header – the subject line for the confirmation email.
** You can also attach files or documents if required.**

Email Options
You can choose from two types of automated confirmation emails:
Send automated event confirmation email to all registrants – This option sends the confirmation email to everyone who registers for the event, regardless of whether they have an Applicaa account already or not.
Send automated email only to users with an Applicaa account – This option allows you to send a custom confirmation email to registrants who already have an Applicaa account.
